Index
Introduction
A Reed Sensor is a magnetic switch that changes its state when exposed to a magnetic field. It consists of two ferromagnetic contacts enclosed in a glass tube. When a magnet is brought near the sensor, the contacts close and complete the circuit. Reed sensors are commonly used in door alarms, security systems, position sensing, and automation projects. In this tutorial, we’ll interface a Reed Sensor with the ESP32 and monitor its status through the Serial Monitor.
Required Components
- ESP32 Board
- Reed Sensor Module
- Jumper Wires
- Breadboard
- Magnet
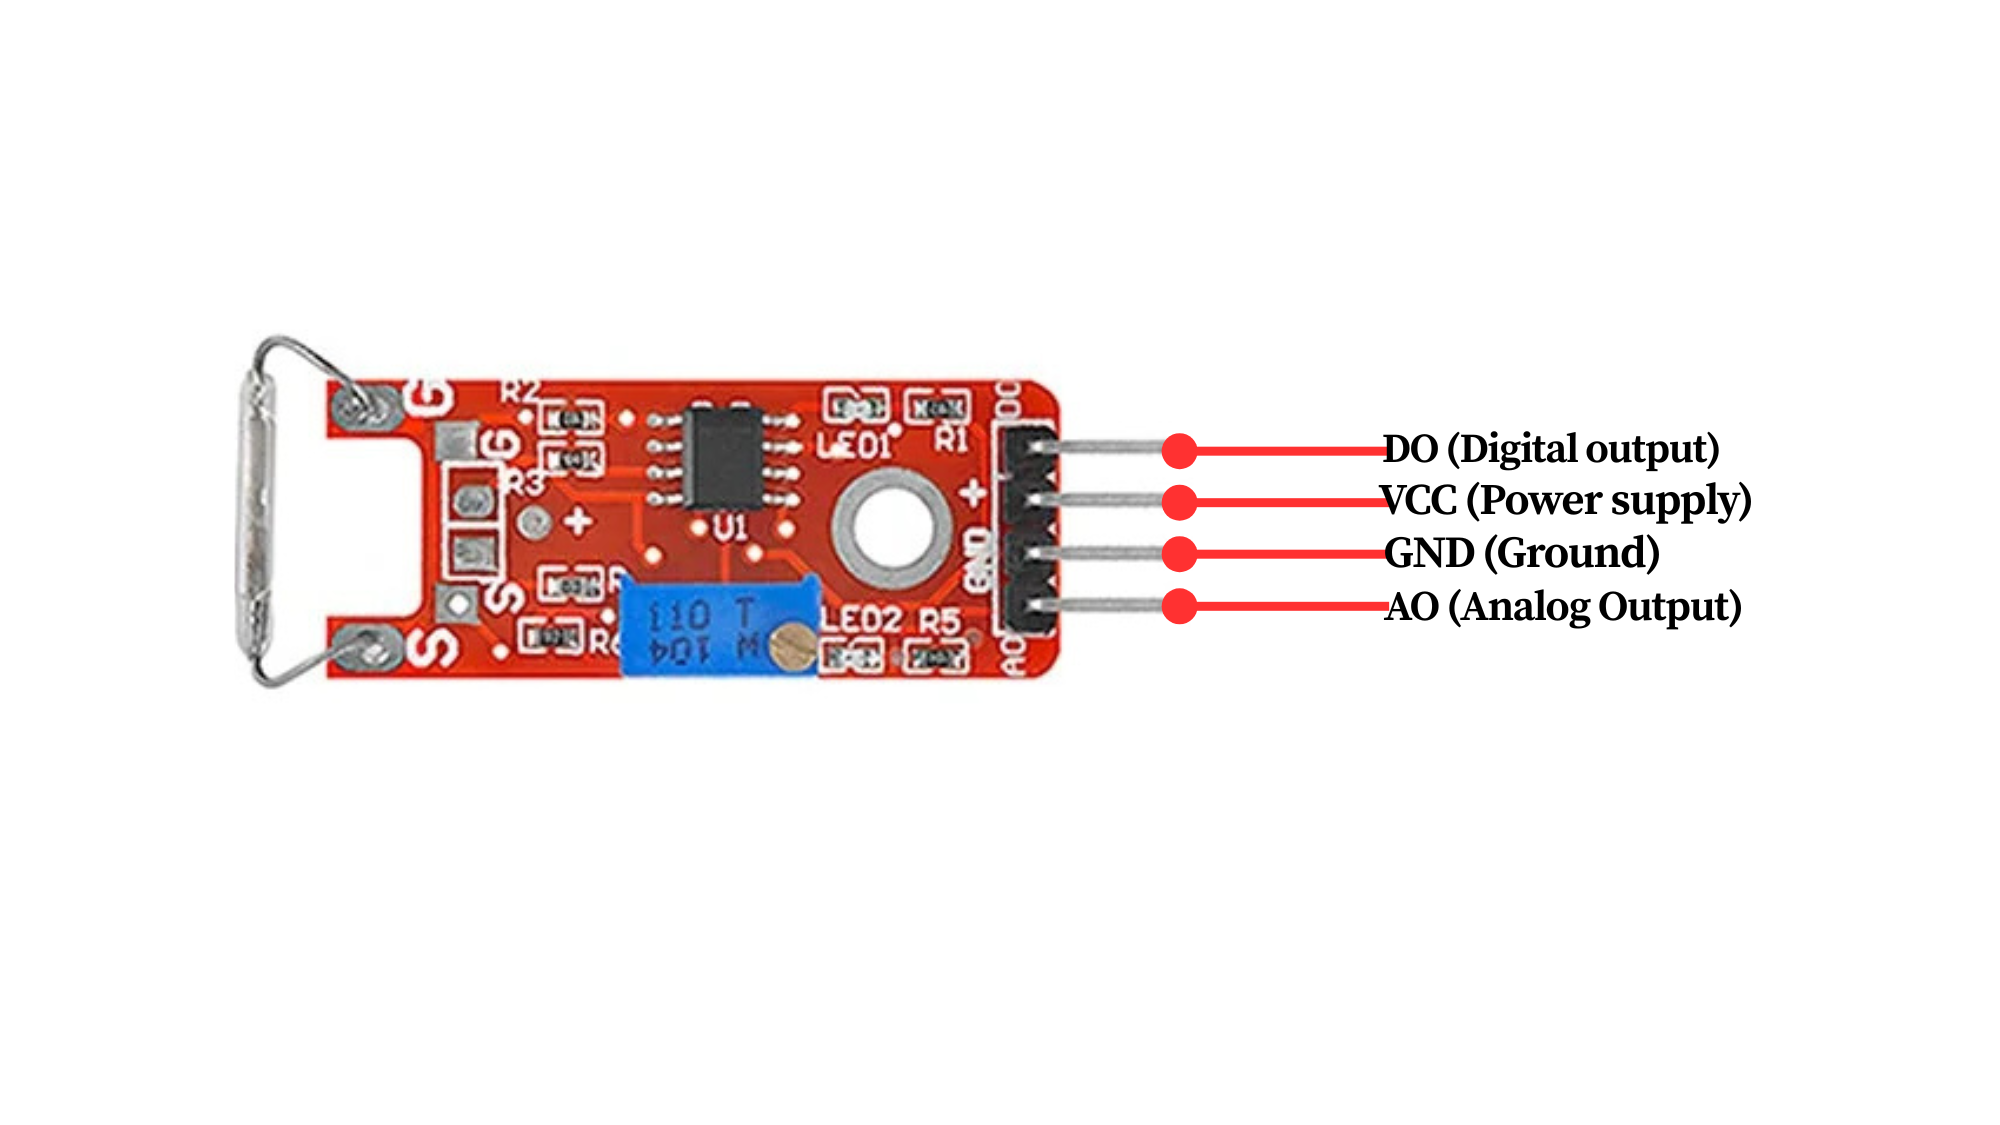
Pinout
Circuit Diagram / Wiring
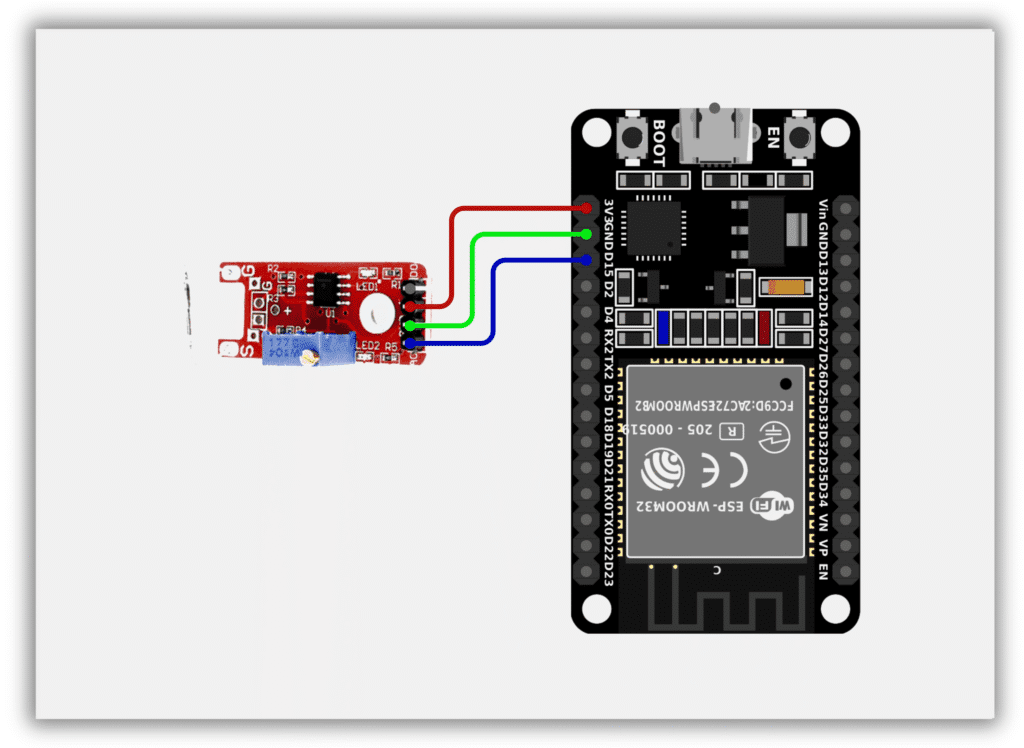
- Reed Sensor VCC → 3.3V (ESP32)
- Reed Sensor GND → GND (ESP32)
- Reed Sensor OUT → GPIO 15 (ESP32)
Code / Programming
/*
  Filename: ol_reed_sensor.ino
  Description: Reads Reed Sensor status and prints detection result via Serial Monitor
  Author: www.oceanlabz.in
  Modification: 1/4/2025
*/

#define REED_SENSOR_PIN 15

void setup() {
  Serial.begin(115200);
  pinMode(REED_SENSOR_PIN, INPUT);
}

void loop() {
  int sensorState = digitalRead(REED_SENSOR_PIN);

  if (sensorState == LOW) {
    Serial.println("Magnet Detected");
  } else {
    Serial.println("No Magnet");
  }

  delay(500);
}
Explanation
- The REED_SENSOR_PIN reads the digital output from the Reed Sensor.
- When a magnet is brought near the sensor, the internal contacts close and the output changes state.
- The ESP32 continuously monitors the sensor output and determines whether a magnetic field is present.
- The detection status is displayed on the Serial Monitor.
Troubleshooting
- Ensure that the sensor is powered correctly (VCC to 3.3V and GND to GND) and that the output pin is connected to GPIO 15.
- If the sensor does not respond, bring the magnet closer to the sensing area.
- If the readings are unstable, check the wiring connections and ensure a stable power supply.
- If no messages appear in the Serial Monitor, verify that the correct COM port and ESP32 board are selected in the Arduino IDE.