Index
Introduction
This project uses a DHT11 sensor to measure temperature and humidity.
The sensor sends digital data to a microcontroller like Arduino or ESP32.
It is easy to use and does not require analog conversion.
This setup is commonly used in weather monitoring and automation projects.
Required Components
- ESP32 Board
- DHT11 Sensor Module
- Jumper Wires
- Breadboard (optional)
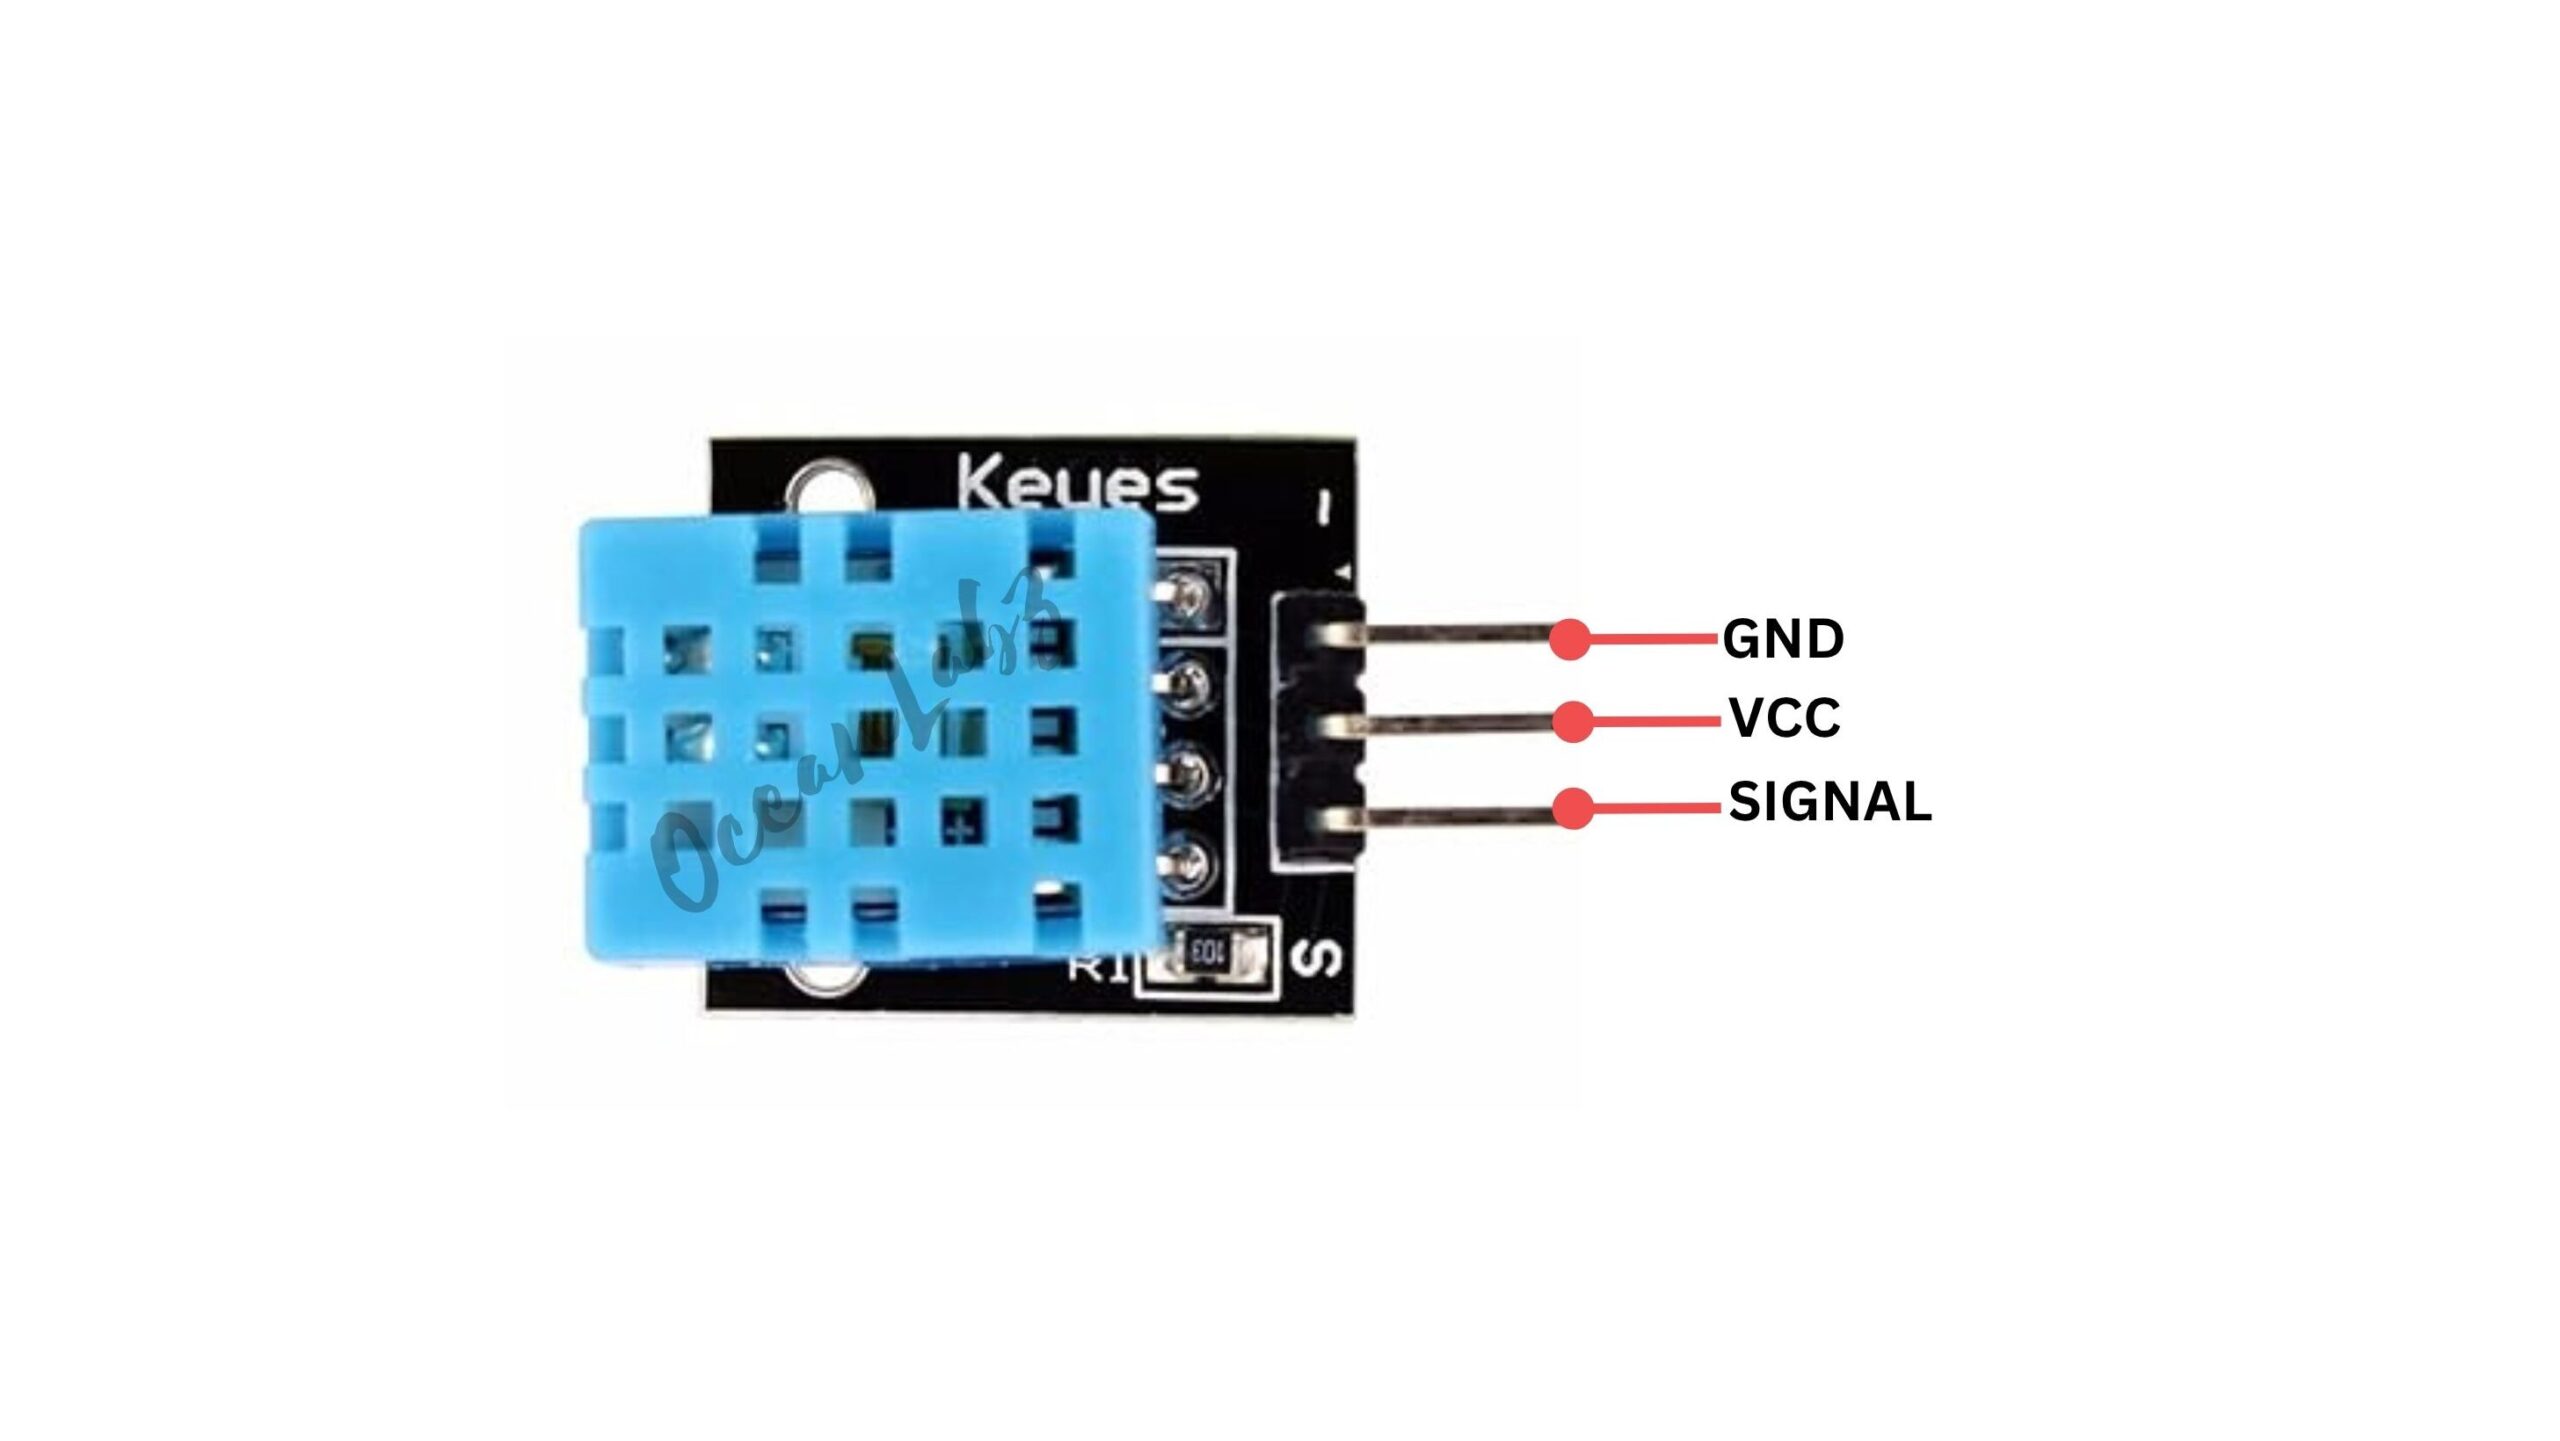
Pinout
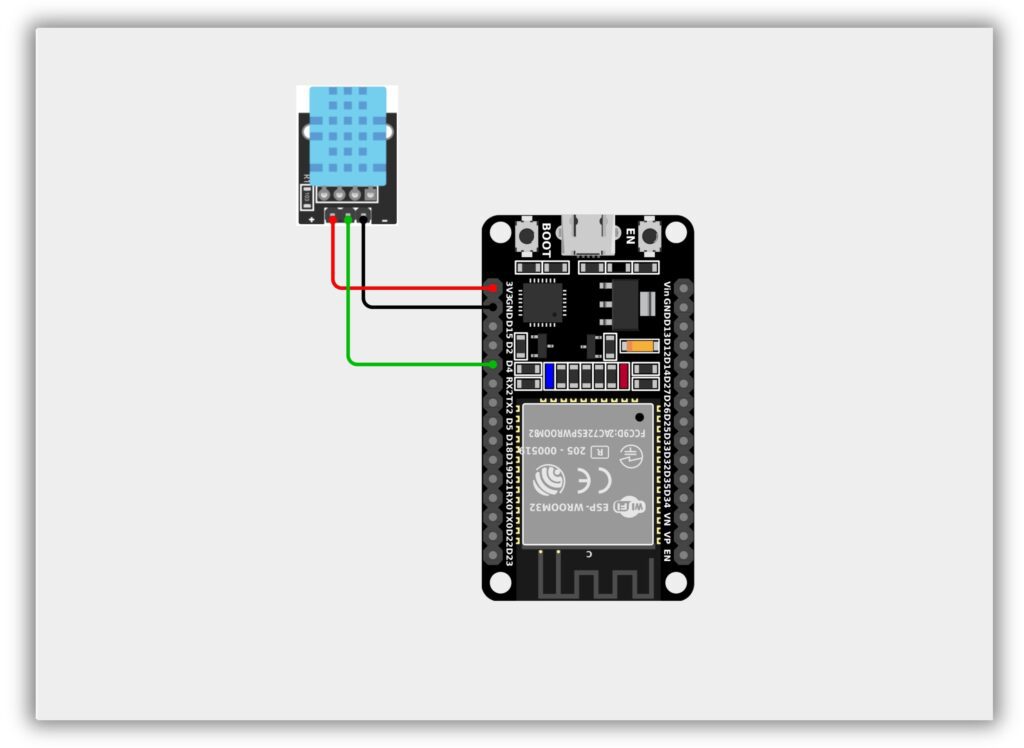
Circuit Diagram / Wiring
- DHT11 → ESP32
- VCC → 3.3V
- GND → GND
- DATA → GPIO 4
Code / Programming
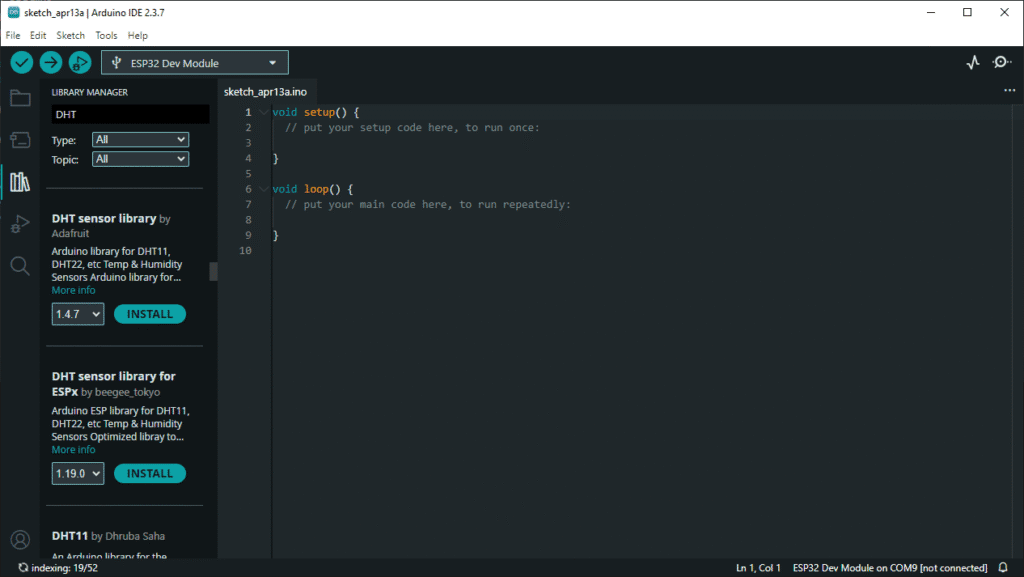
- Install Required Library (via Arduino Library Manager).
- Go to the “Libraries” tab on the left-hand side of the screen.
- Click on the “Library Manager” button (book icon) at the top of the Libraries tab.
- In the Library Manager window, type “DHT” in the search bar.
- Locate the “DHT sensor library” library by Adafruit click on the “Install” button next to it.
- Wait for the library to be installed, and you’re ready to use the DHT library in your projects.
/***********************************************************************
 * Filename    : DHT11_Sensor.ino
 * Author      : www.oceanlabz.in
 * Modification: 1/4/2025
 ***********************************************************************/


#include "DHT.h"

#define DHTPIN 4        // Data pin connected to GPIO 4
#define DHTTYPE DHT11   // DHT11 sensor

DHT dht(DHTPIN, DHTTYPE);

void setup() {
  Serial.begin(115200);
  Serial.println("DHT11 Sensor with ESP32");

  dht.begin();
}

void loop() {
  float humidity = dht.readHumidity();
  float temperature = dht.readTemperature(); // Celsius

  // Check if any reads failed
  if (isnan(humidity) || isnan(temperature)) {
    Serial.println("Failed to read from DHT sensor!");
    return;
  }

  Serial.print("Temperature: ");
  Serial.print(temperature);
  Serial.print(" °C  |  ");

  Serial.print("Humidity: ");
  Serial.print(humidity);
  Serial.println(" %");

  delay(2000); // DHT11 needs ~2 seconds delay
}
Explanation
- Reads temperature and humidity data from the DHT11 sensor using GPIO pin on the ESP32.
- Processes the sensor data and checks for any reading errors.
- Displays the temperature (°C) and humidity (%) values on the Serial Monitor every 2 seconds.
Troubleshooting
- If no data is shown, check wiring (VCC → 3.3V, GND → GND, DATA → correct GPIO) and ensure the correct pin is defined in code.
- If showing “Failed to read,” verify library installation and add a 10k pull-up resistor (for non-module DHT11).
- If readings are unstable, ensure proper power supply and add a delay of at least 2 seconds between readings.