Index

Introduction
The PIR (Passive Infrared) sensor detects motion by sensing changes in infrared radiation.
It outputs a digital HIGH signal when motion is detected and LOW when idle.
Commonly used in security systems, motion-activated lights, and automation projects.
In this tutorial, we’ll connect a PIR sensor to an Arduino and detect motion events.
Required Components
- Arduino UNO
- PIR Motion Sensor
- Jumper wires
- Breadboard (optional)
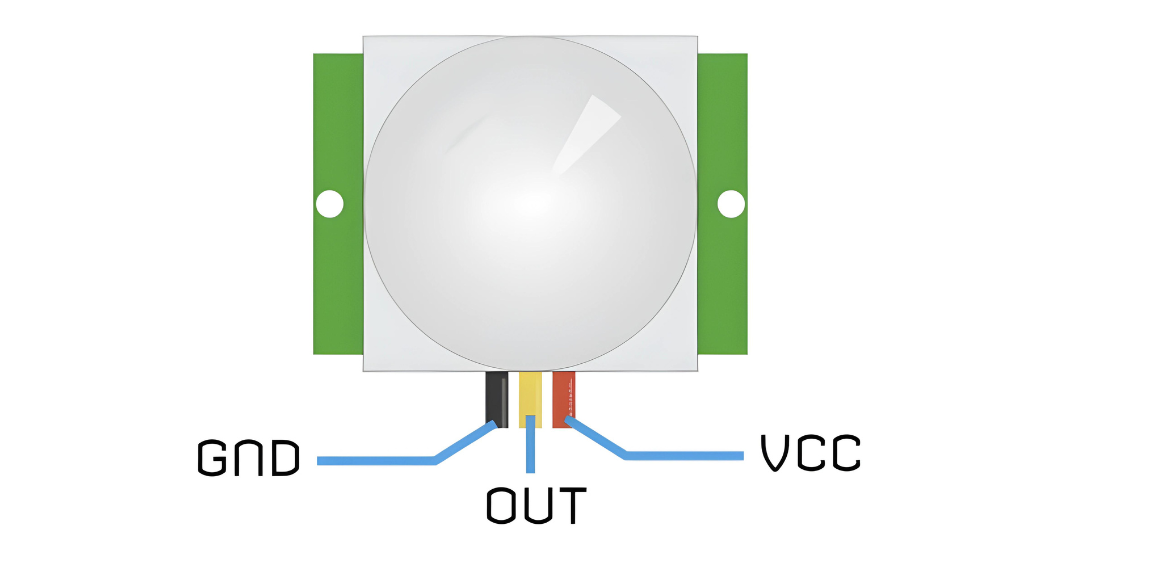
Pinout
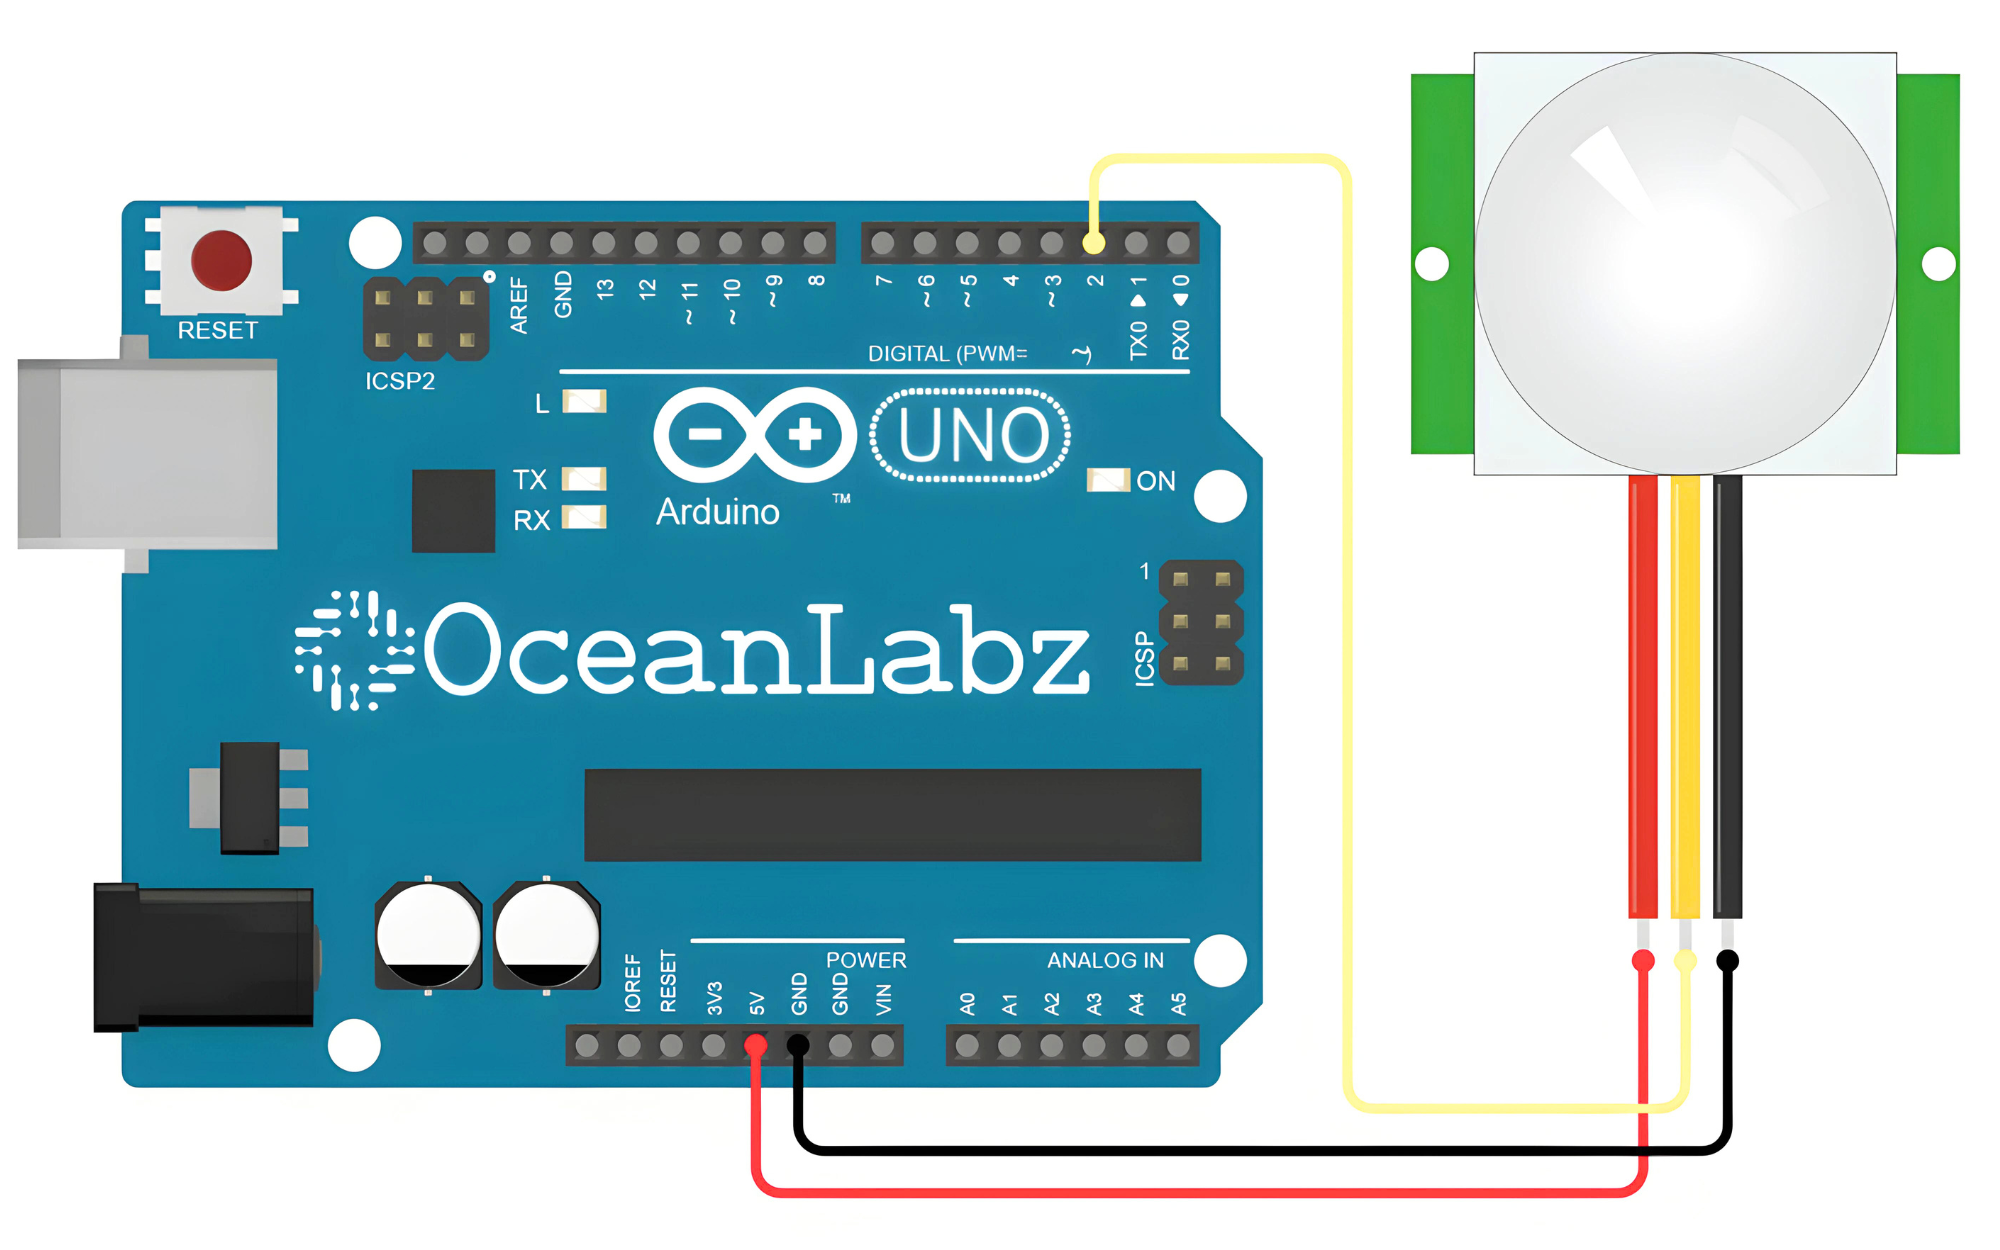
Circuit Diagram / Wiring
- PIR VCC → 5V (Arduino)
- PIR GND → GND (Arduino)
- PIR OUT → D2 (Arduino)
Arduino Code / Programming
#define PIR_Pin 2

void setup() {
  Serial.begin(9600);
  pinMode(2, INPUT);
}
void loop() {
  int val = digitalRead(2);
  if (val == HIGH) {
    Serial.println("Motion Detected");
  } else {
    Serial.println("No motion detected.");
  }
  delay(1000);
}
Explanation
- The PIR sensor is connected to pin 2 and read using
digitalRead(). - When motion is detected (
HIGH), “Motion Detected” is printed to the Serial Monitor. - When idle (
LOW), it prints “No motion detected” every second.
Troubleshooting
- Move your hand in front of the PIR sensor and check for “Motion Detected” on the Serial Monitor.
- If it always shows “No motion,” check power (VCC = 5V) and ensure sensor’s output is connected to pin 2.
- Adjust the sensor’s sensitivity and delay potentiometers if detection is inconsistent.