Index
Introduction
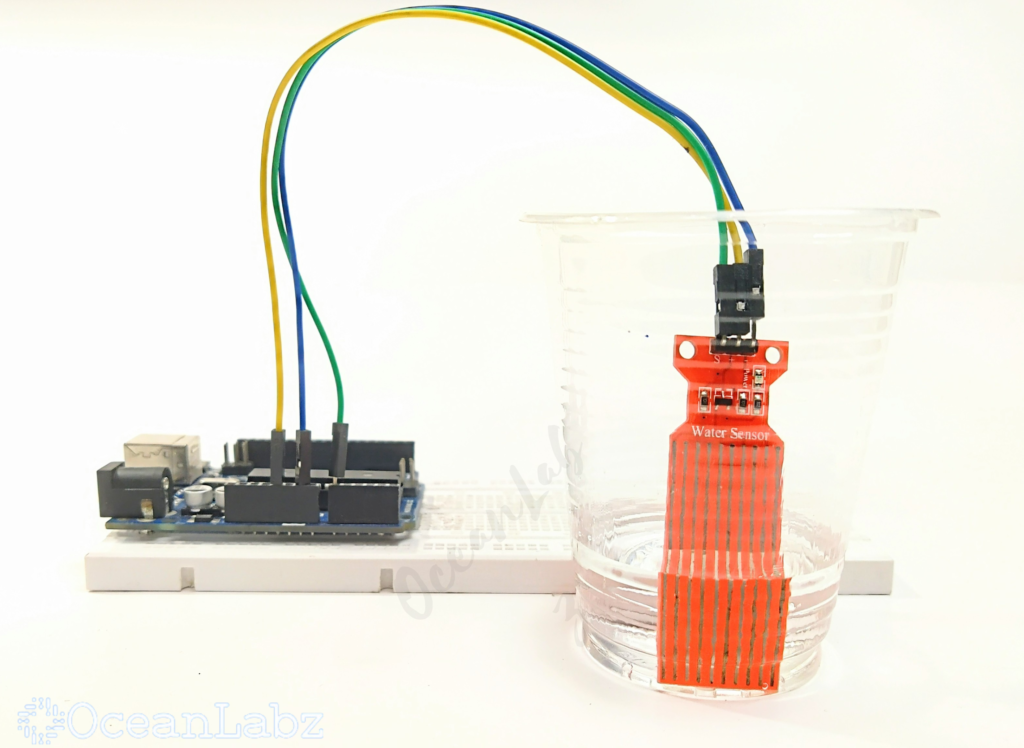
Water Level Sensor detects water presence and depth using exposed conductive traces.
It provides an analog signal that increases with the water level, allowing for precise monitoring.
This sensor is simple to use and ideal for water tanks, aquariums, and irrigation systems.
In this tutorial, we will learn how to connect and read values from the sensor using Arduino.
Required Components
- Arduino UNO
- Water Level Sensor
- Jumper wires
- Breadboard (optional)
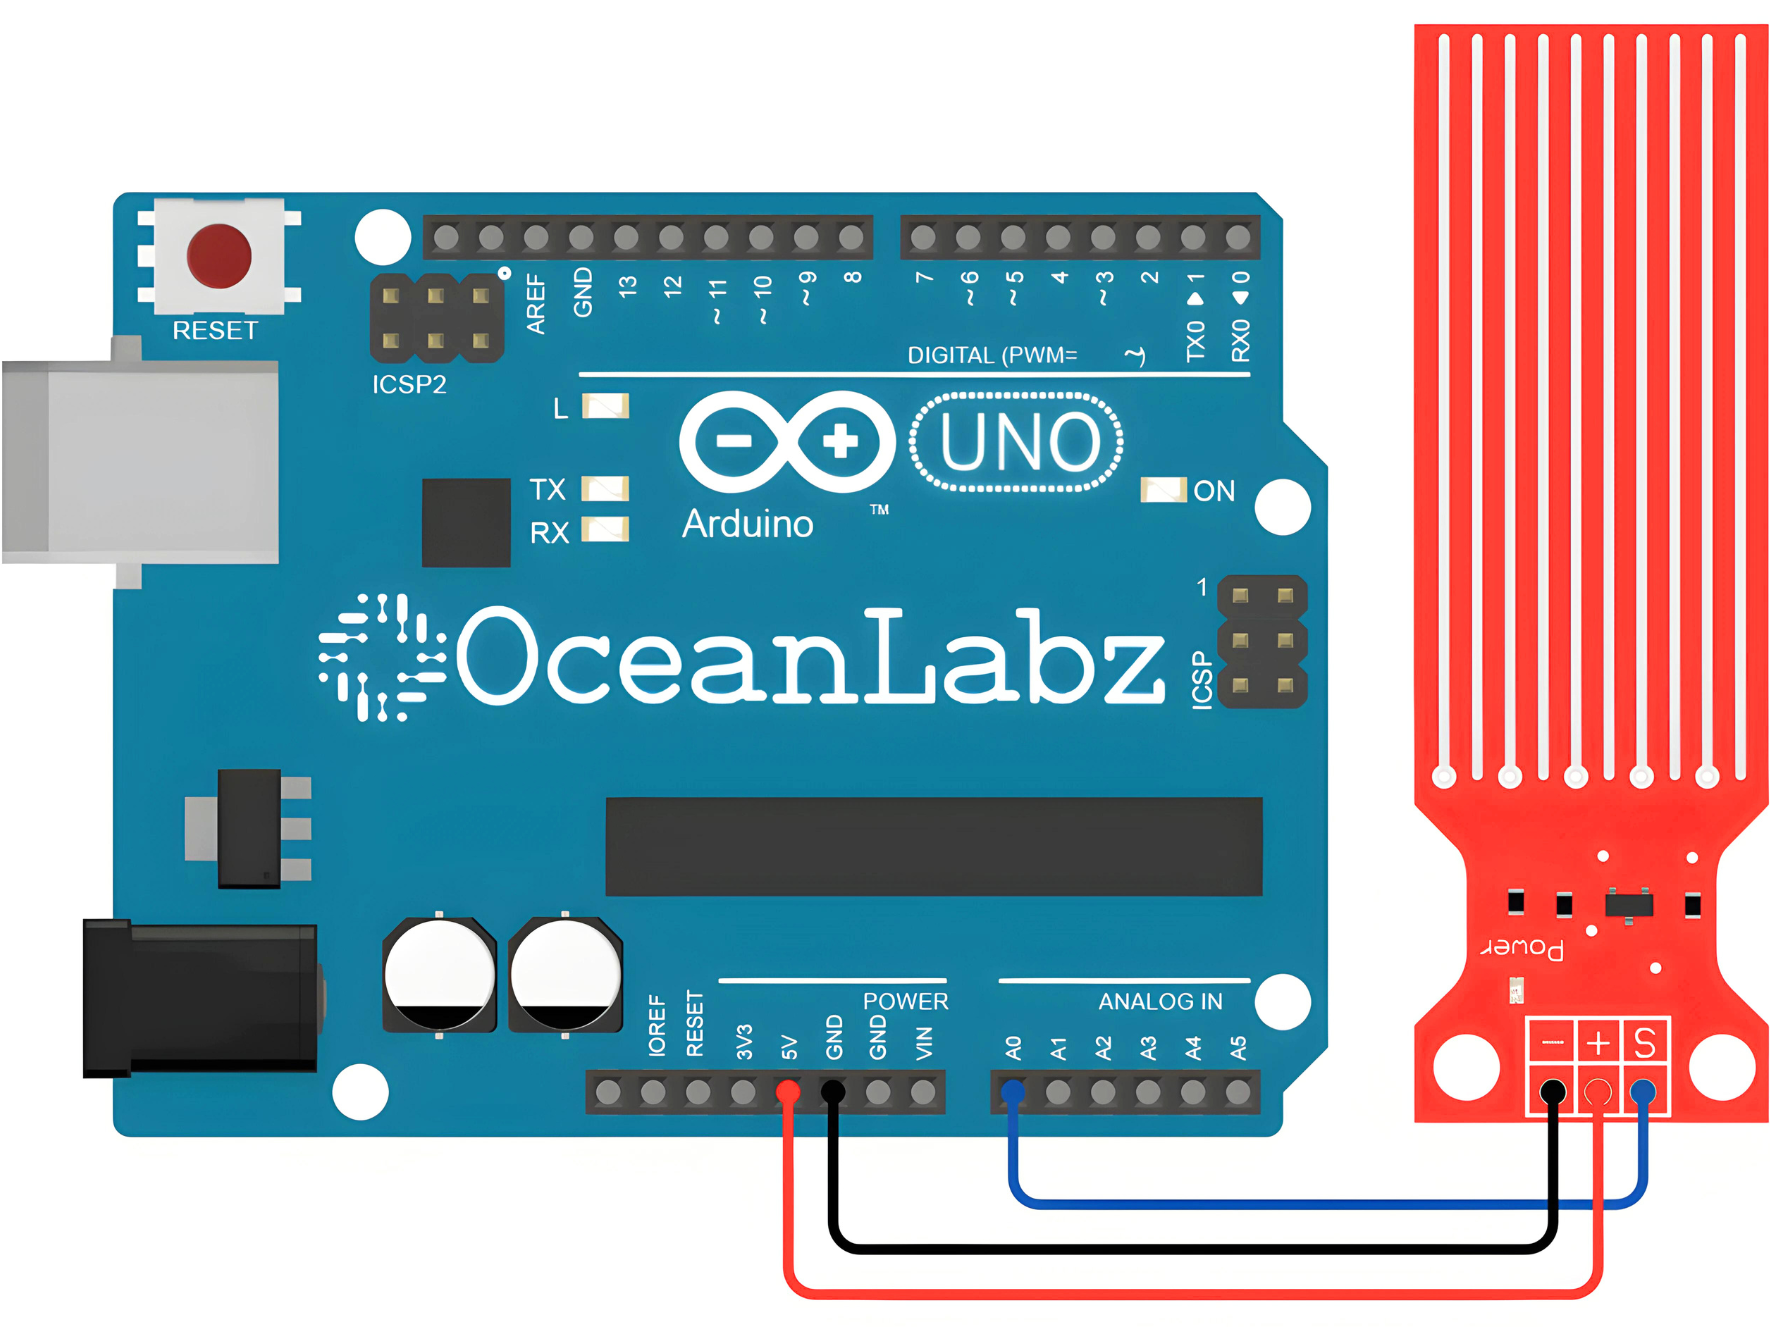
Pinout

Circuit Diagram / Wiring
- Water Sensor VCC → 5V (Arduino)
- Water Sensor GND → GND (Arduino)
- Water Sensor Signal → Pin A0 (Arduino)
Arduino Code / Programming
const int sensorPin = A0;
int sensorValue = 0;
int waterLevel = 0;

void setup() {
  Serial.begin(9600);
}

void loop() {
  sensorValue = analogRead(sensorPin);
  waterLevel = map(sensorValue, 0, 1023, 0, 100); // Adjust the mapping range as needed
  Serial.print("Water Level: ");
  Serial.print(waterLevel);
  Serial.println("%");
  delay(1000);
}
Open the Serial Monitor
- Connect your Arduino to the computer and upload the code.
- Open the Serial Monitor in the Arduino IDE by going to Tools > Serial Monitor or pressing
Ctrl+Shift+M. - Set the baud rate to 9600 in the Serial Monitor.

Explanation
- The sensor reads analog values from A0 to measure water contact with the sensor surface.
map()converts the raw analog value (0–1023) into a percentage (0–100%) for easy interpretation.- The water level percentage is printed to the Serial Monitor every second.
Troubleshooting
- Dip the sensor gradually in water and observe the percentage change on the Serial Monitor.
- If the values don’t change, check wiring and ensure the sensor is properly powered (5V and GND).
- Clean the sensor pads if readings are unstable due to residue or corrosion.