Index
Introduction
The OLED (Organic Light Emitting Diode) display module is an efficient and vibrant screen choice for ESP32 projects.
It offers superior contrast, wide viewing angles, and fast response times compared to traditional displays.
This tutorial will guide you through connecting the OLED display to an ESP32 and writing code to display text and graphics.
Get ready to enhance your projects with this powerful visual output tool!
Required Components
- ESP32 Board
- OLED Display
- Jumper Wires
- Breadboard (optional)
Pinout
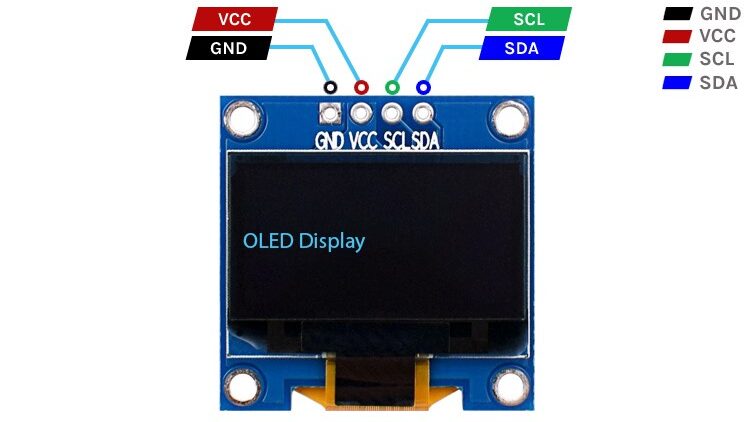
- OLED Display
- GND: Ground pin
- VCC: Power supply pin (3.3V to 5V)
- SCL: Serial Clock pin for I2C communication
- SDA: Serial Data pin for I2C communication
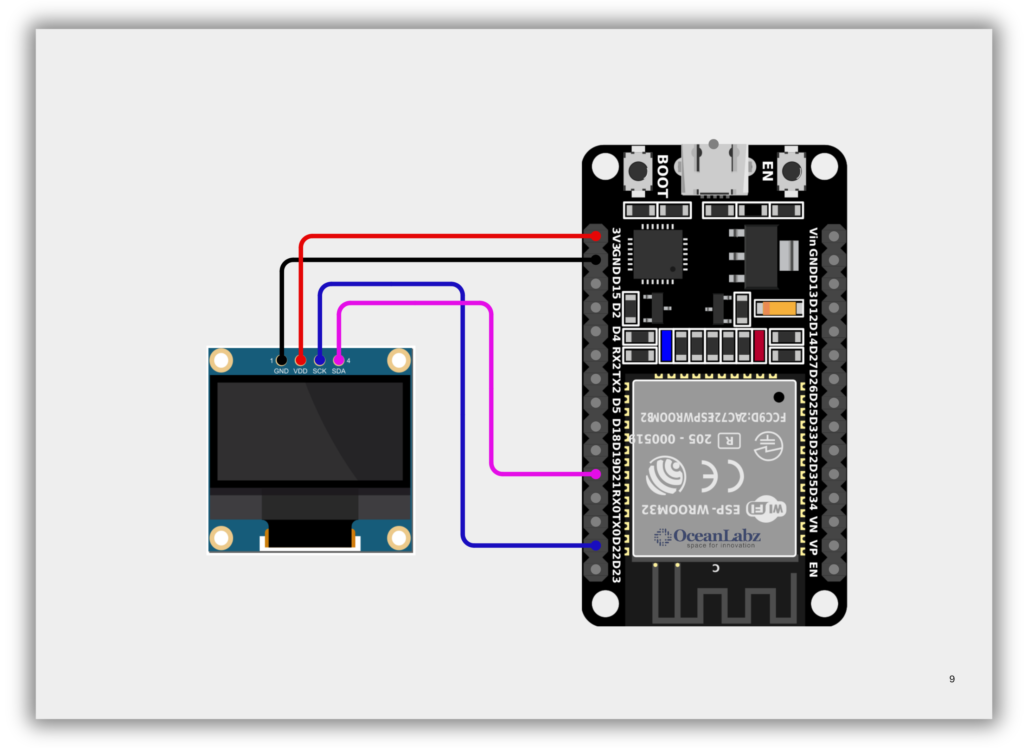
Circuit Diagram / Wiring
- OLED VCC → 3.3V, 5V (ESP32)
- OLED GND → GND (ESP32)
- OLED SDA → Pin 21 (ESP32)
- OLED SCK → Pin 22 (ESP32)
Code / Programming
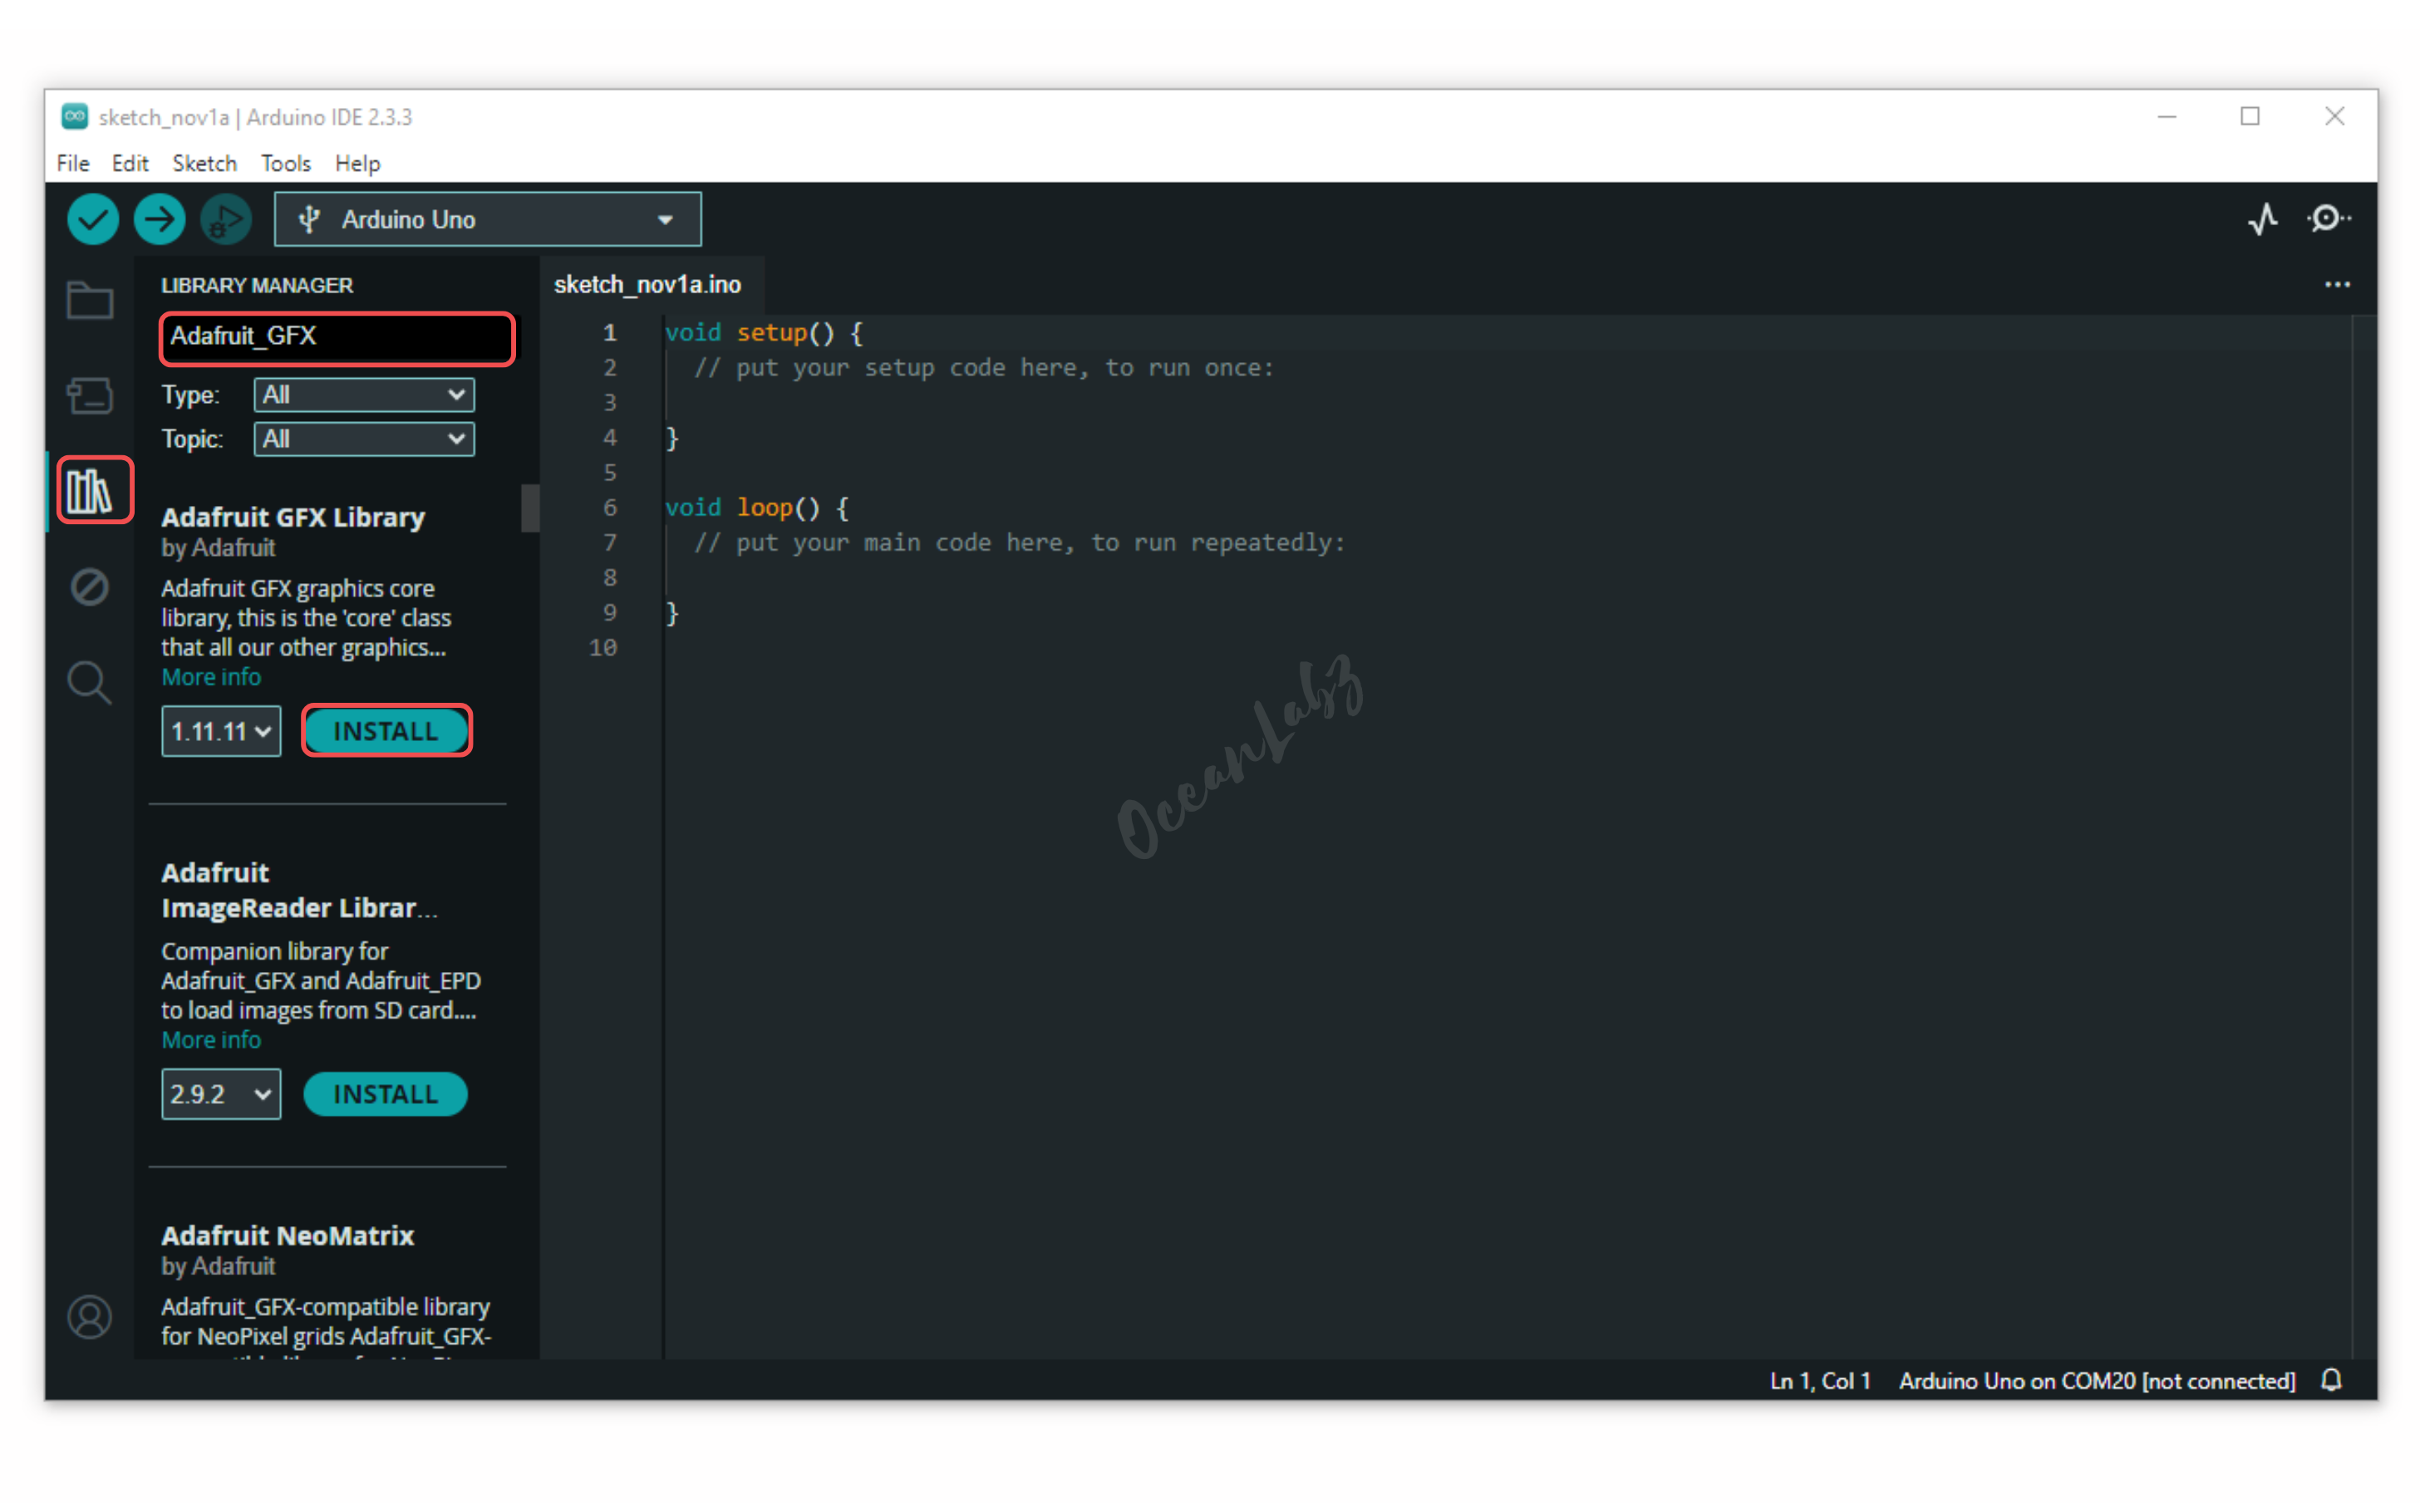
- Install Required Libraries (via Arduino Library Manager).
- Go to the “Libraries” tab on the left-hand side of the screen.
- Click on the “Library Manager” button (book icon) at the top of the Libraries tab.
- In the Library Manager window, type “Adafruit GFX” in the search bar, locate the library, and click on the “Install” button next to it.
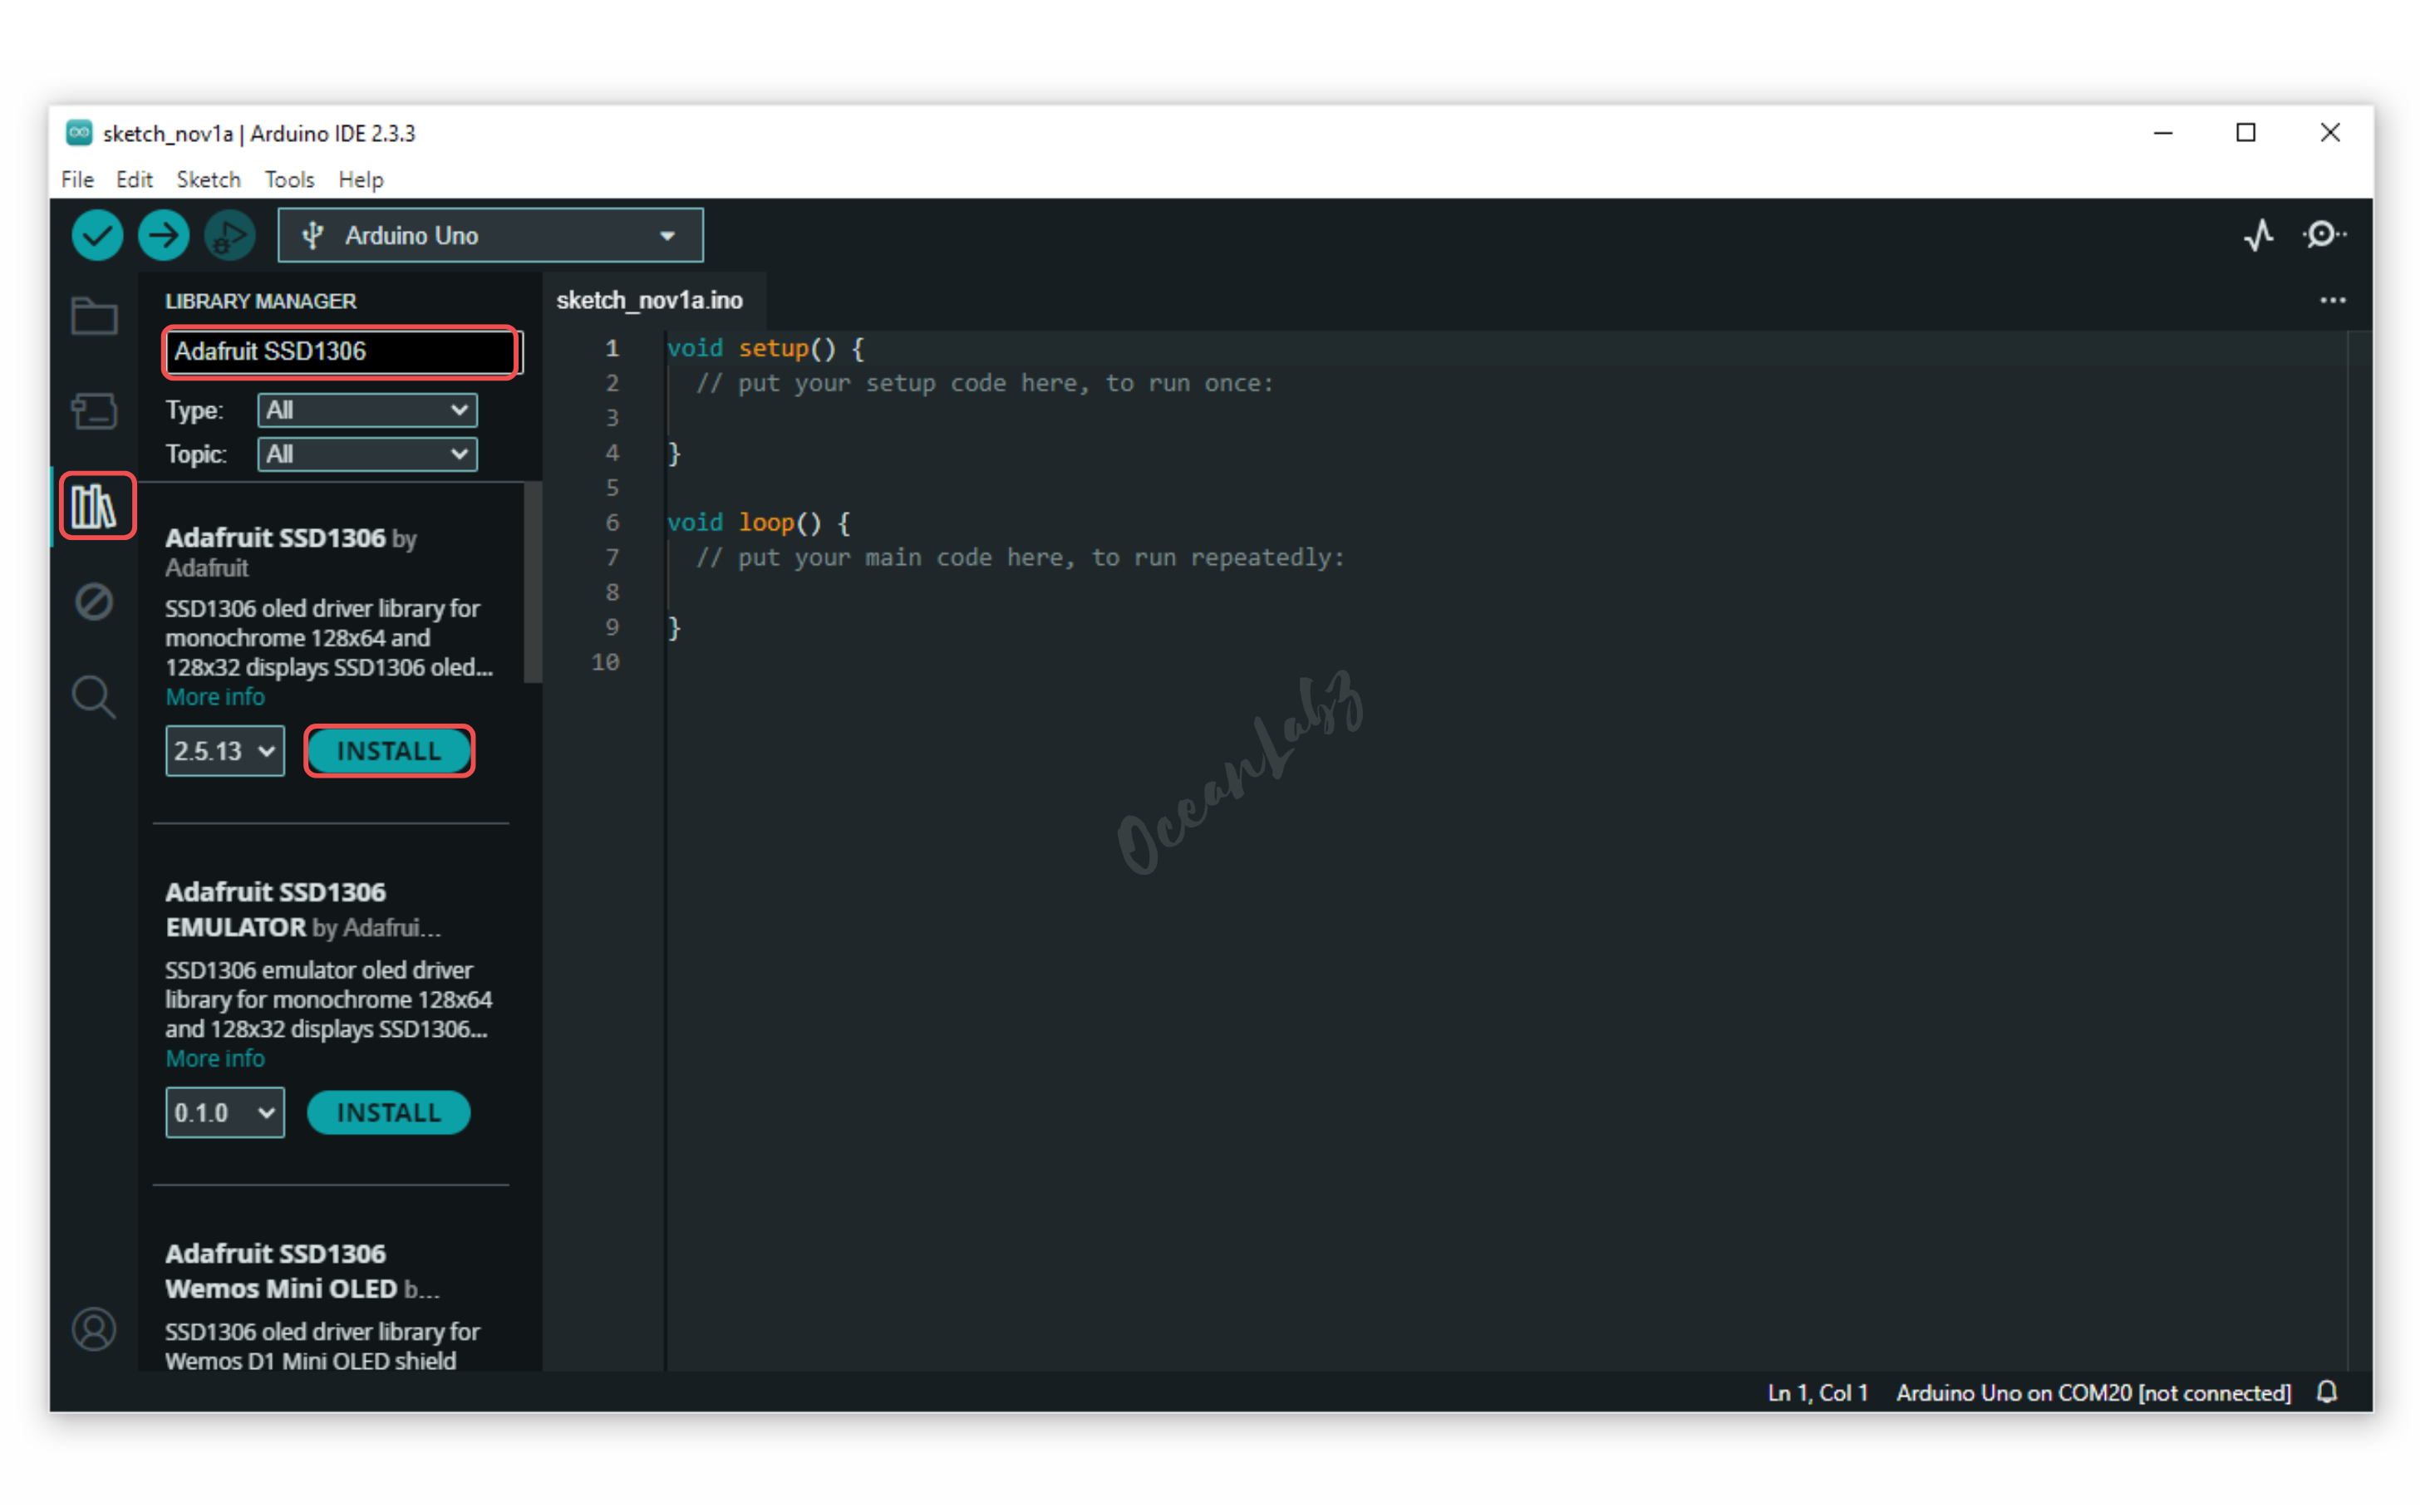
- Repeat the process for “Adafruit SSD1306” to install the SSD1306 library.
The Wire library is included by default, so no installation is needed.
- Copy the provided code into your Arduino IDE.
/*
  Filename: esp32_oled_typewriter.ino
  Description: Displays "OceanLabz" on OLED with typewriter animation using ESP32
  Author: www.oceanlabz.in
  Modification: 1/4/2025
*/


#include <Wire.h>
#include <Adafruit_GFX.h>
#include <Adafruit_SSD1306.h>

// Define screen dimensions
#define SCREEN_WIDTH 128
#define SCREEN_HEIGHT 64

// Define I2C pins for ESP32 (modify if needed)
#define OLED_SDA 21
#define OLED_SCL 22

// Create display object with custom I2C
Adafruit_SSD1306 display(SCREEN_WIDTH, SCREEN_HEIGHT, &Wire, -1);

void setup() {
  Serial.begin(115200);

  // Start I2C on custom pins (for ESP32)
  Wire.begin(OLED_SDA, OLED_SCL);

  // Initialize the OLED display
  if (!display.begin(SSD1306_SWITCHCAPVCC, 0x3C)) {
    Serial.println(F("SSD1306 initialization failed"));
    while (true);  // Stop execution if display fails to initialize
  }

  display.clearDisplay();
  display.display();

  display.setTextSize(2);
  display.setTextColor(SSD1306_WHITE);
}

void loop() {
  display.clearDisplay();
  display.setCursor(0, 20);

  const char* text = "OceanLabz";

  // Typewriter animation
  for (int i = 0; i < strlen(text); i++) {
    display.print(text[i]);
    display.display();
    delay(200);
  }

  delay(2000);

  display.clearDisplay();
  display.display();
  delay(500);
}
Explanation
- The OLED display uses the I2C protocol and connects to the ESP32 via SDA (GPIO21) and SCL (GPIO22).
- The
Adafruit_SSD1306andAdafruit_GFXlibraries allow you to easily display text, graphics, and animations. - This project shows a typewriter-style animation to print text character by character on the OLED screen.
Troubleshooting
- If the screen stays blank, check if the I2C address is 0x3C, and confirm wiring to SDA/SCL pins.
- Make sure you install both libraries:
Adafruit SSD1306andAdafruit GFXfrom Library Manager. - Use a logic level-compatible OLED (3.3V or 5V), and verify I2C is working by scanning with an I2C scanner sketch.
Project 1: DHT11 Temperature & Humidity Display on OLED using ESP32
Introduction
In this project, we will interface an OLED display with an ESP32 and use it to show real-time data from a DHT11 temperature and humidity sensor. This project is useful for IoT applications like weather monitoring.
Required Components
- ESP32 Board
- OLED Display
- DHT11 Temperature & Humidity Sensor
- Breadboard
- Jumper Wires
Pinout
- DHT11 Sensor
- GND: Ground pin
- VCC: Power supply pin (3.3V to 5V)
- SIGNAL: Digital data output pin

Circuit Diagram / Wiring
- OLED Display
- VCC → ESP32 3.3V
- GND → ESP32 GND
- SDA → ESP32 GPIO 21
- SCL → ESP32 GPIO 22
- DHT11 Sensor
- VCC → ESP32 3.3V
- GND → ESP32 GND
- Data Pin → ESP32 GPIO 4

Code / Programming
Required Libraries:
Your code uses the following libraries:
- Adafruit SSD1306
- Adafruit GFX Library
- Adafruit Unified Sensor
- DHT sensor library
Installation Steps in Arduino IDE:
Open Arduino IDE on your computer.
- Go to the “Libraries” tab on the left side (or click
Tools > Manage Libraries). - Click the “Library Manager” button (book icon).
- In the Library Manager window, type the name of the library in the search bar.
- Find the correct library (
Adafruit SSD1306,Adafruit GFX Library,Adafruit Unified Sensor, DHT sensor library.). - Click on the “Install” button next to it.
- Wait for the installation to complete — and you’re ready to use the library in your code!
/*
  Filename: esp32_dht11_oled_display.ino
  Description: Display temperature and humidity data from a DHT11 sensor on a 128x64 OLED using ESP32
  Author: www.oceanlabz.in
  Modification Date: 1/4/2025
*/

#include <Wire.h>
#include <Adafruit_GFX.h>
#include <Adafruit_SSD1306.h>
#include <Adafruit_Sensor.h>
#include <DHT.h>

#define SCREEN_WIDTH 128 // OLED display width, in pixels
#define SCREEN_HEIGHT 64 // OLED display height, in pixels

// Declaration for an SSD1306 display connected to I2C (SDA, SCL pins)
Adafruit_SSD1306 display(SCREEN_WIDTH, SCREEN_HEIGHT, &Wire, -1);

#define DHTPIN 4     // Digital pin connected to the DHT sensor

// Uncomment the type of sensor in use:
#define DHTTYPE    DHT11     // DHT 11
//#define DHTTYPE    DHT22     // DHT 22 (AM2302)
//#define DHTTYPE    DHT21     // DHT 21 (AM2301)

DHT dht(DHTPIN, DHTTYPE);

void setup() {
  Serial.begin(115200);

  dht.begin();

  if(!display.begin(SSD1306_SWITCHCAPVCC, 0x3C)) {
    Serial.println(F("SSD1306 allocation failed"));
    for(;;);
  }
  delay(2000);
  display.clearDisplay();
  display.setTextColor(WHITE);
}

void loop() {
  delay(5000);

  //read temperature and humidity
  float t = dht.readTemperature();
  float h = dht.readHumidity();
  if (isnan(h) || isnan(t)) {
    Serial.println("Failed to read from DHT sensor!");
  }
  // clear display
  display.clearDisplay();

  // display temperature
  display.setTextSize(1);
  display.setCursor(0,0);
  display.print("Temperature: ");
  display.setTextSize(2);
  display.setCursor(0,10);
  display.print(t);
  display.print(" ");
  display.setTextSize(1);
  display.cp437(true);
  display.write(167);
  display.setTextSize(2);
  display.print("C");

  // display humidity
  display.setTextSize(1);
  display.setCursor(0, 35);
  display.print("Humidity: ");
  display.setTextSize(2);
  display.setCursor(0, 45);
  display.print(h);
  display.print(" %");

  display.display();
}
Explanation
- Reads temperature and humidity from a DHT11 sensor connected to pin 4.
- Displays the values on a 128×64 I2C OLED screen using Adafruit SSD1306 library.
- Prints error to Serial Monitor if sensor fails to respond, and updates display every 5 seconds.
Troubleshooting
- Check wiring of DHT11 and OLED display (VCC, GND, Data/SCL/SDA).
- Ensure all required libraries are installed: Adafruit SSD1306, GFX, DHT, Unified Sensor.
- Use correct I2C address (usually
0x3C) and DHT data pin in code.
Project 2: ESP32 OLED Web Message Display
Introduction
This project demonstrates how to use the ESP32 with an OLED display and a Wi-Fi web interface.
You can connect to the ESP32 via browser and send custom text messages, which appear on the OLED screen in real time.
It combines Wi-Fi networking, HTML form handling, and Adafruit SSD1306 OLED control, making it a great starting point for IoT display projects.
Required Components
- ESP32 Board
- OLED Display
- Jumper Wires
- Breadboard (optional)
- Wi-Fi Network (2.4 GHz)
Code / Programming
/*
Filename: esp32_oled_web_message.ino
Description: ESP32 web server to send and display text messages on an OLED screen via browser
Author: www.oceanlabz.in
Modification Date: 1/4/2025
*/
#include <WiFi.h>
#include <WebServer.h>
#include <Wire.h>
#include <Adafruit_GFX.h>
#include <Adafruit_SSD1306.h>
// Wi-Fi credentials
const char* ssid = "YOUR_SSID";
const char* password = "YOUR_PASSWORD";
// OLED setup
#define SCREEN_WIDTH 128
#define SCREEN_HEIGHT 64
#define OLED_RESET -1
Adafruit_SSD1306 display(SCREEN_WIDTH, SCREEN_HEIGHT, &Wire, OLED_RESET);
// Web server on port 80
WebServer server(80);
// Message to show
String message = "Hello from ESP32";
// Display message on OLED
void displayMessage(String msg) {
display.clearDisplay();
display.setCursor(0, 20);
display.setTextSize(1);
display.setTextColor(SSD1306_WHITE);
display.println(msg);
display.display();
}
// Root HTML page
void handleRoot() {
String html = "<!DOCTYPE html><html><head><meta charset='UTF-8'>";
html += "<title>ESP32 OLED</title></head><body>";
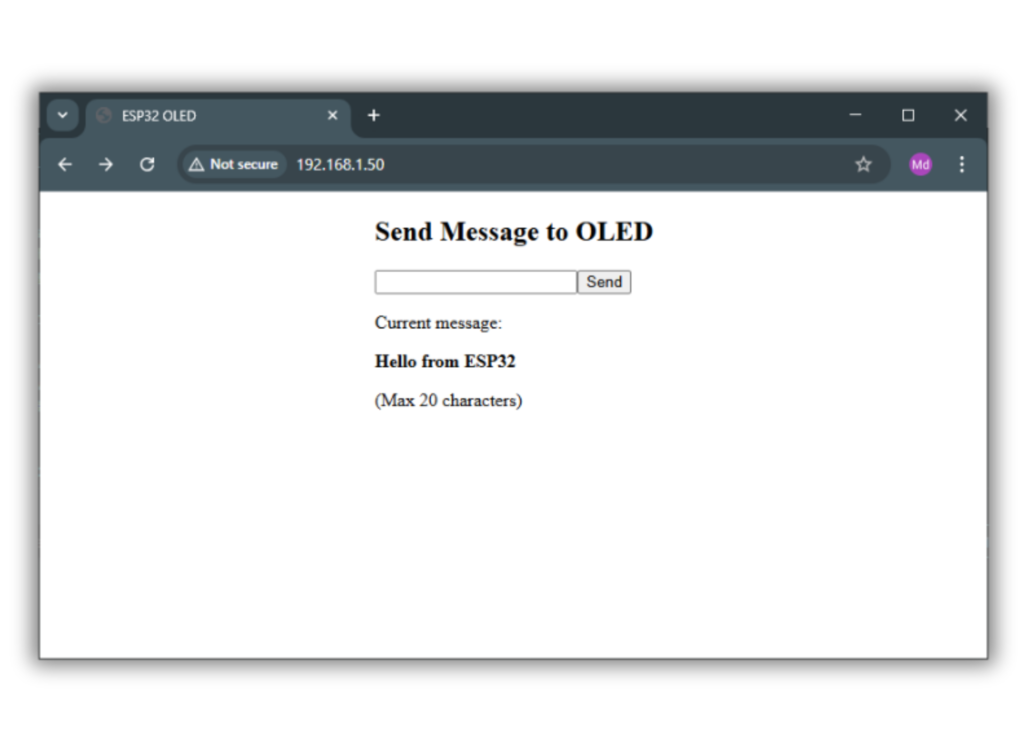
html += "<h2>Send Message to OLED</h2>";
html += "<form action='/send'><input type='text' name='text' maxlength='20' required>";
html += "<input type='submit' value='Send'></form>";
html += "<p>Current message:</p><b>" + message + "</b>";
html += "<p>(Max 20 characters)</p></body></html>";
server.send(200, "text/html", html);
}
// Handle /send?text=... request
void handleSend() {
if (server.hasArg("text")) {
message = server.arg("text");
if (message.length() > 20) message = message.substring(0, 20);
displayMessage(message);
server.sendHeader("Location", "/", true);
server.send(302, "text/plain", "Updated");
} else {
server.send(400, "text/plain", "Missing 'text' parameter");
}
}
void setup() {
Serial.begin(115200);
// OLED init
if (!display.begin(SSD1306_SWITCHCAPVCC, 0x3C)) {
Serial.println("SSD1306 initialization failed");
while (true);
}
display.clearDisplay();
display.display();
displayMessage(message);
// Wi-Fi init
WiFi.begin(ssid, password);
Serial.print("Connecting to WiFi");
while (WiFi.status() != WL_CONNECTED) {
delay(500);
Serial.print(".");
}
Serial.println("\nConnected! IP: " + WiFi.localIP().toString());
// Web routes
server.on("/", handleRoot);
server.on("/send", handleSend);
server.begin();
Serial.println("Server started");
}
void loop() {
server.handleClient();
}
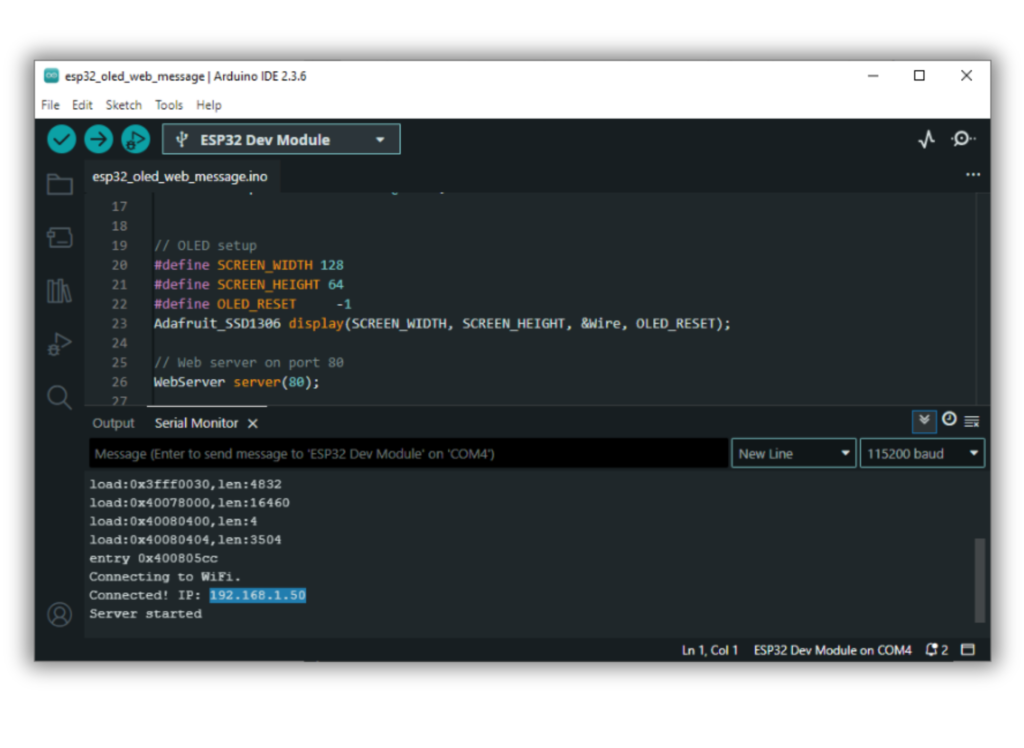
Accessing the Web Server
After uploading the sketch, open the Serial Monitor at 115200 baud and press the RESET button on the ESP32. If everything is fine, it will display the dynamic IP address obtained from your router as well as the “Server started” message.
Next, launch a browser and navigate to the IP address displayed on the serial monitor. You’ll see a web form where you can enter a message. After submitting, the message will instantly appear on the OLED display connected to your ESP32.
Explanation
- The ESP32 hosts a Wi-Fi web server where users can enter text via a browser.
- Submitted text is received and displayed on a 128×64 OLED screen using the Adafruit SSD1306 library.
- The OLED is refreshed each time a new message is received through the
/send?text=route.
Troubleshooting
- OLED not displaying text: Check I2C connections and ensure the address is
0x3C; also verify the display is initialized successfully. - Wi-Fi not connecting: Double-check the SSID/password and ensure the ESP32 is in range of the router.
- Text not updating: Ensure you’re accessing the correct local IP and submitting the form using the provided input field.