Index
Introduction
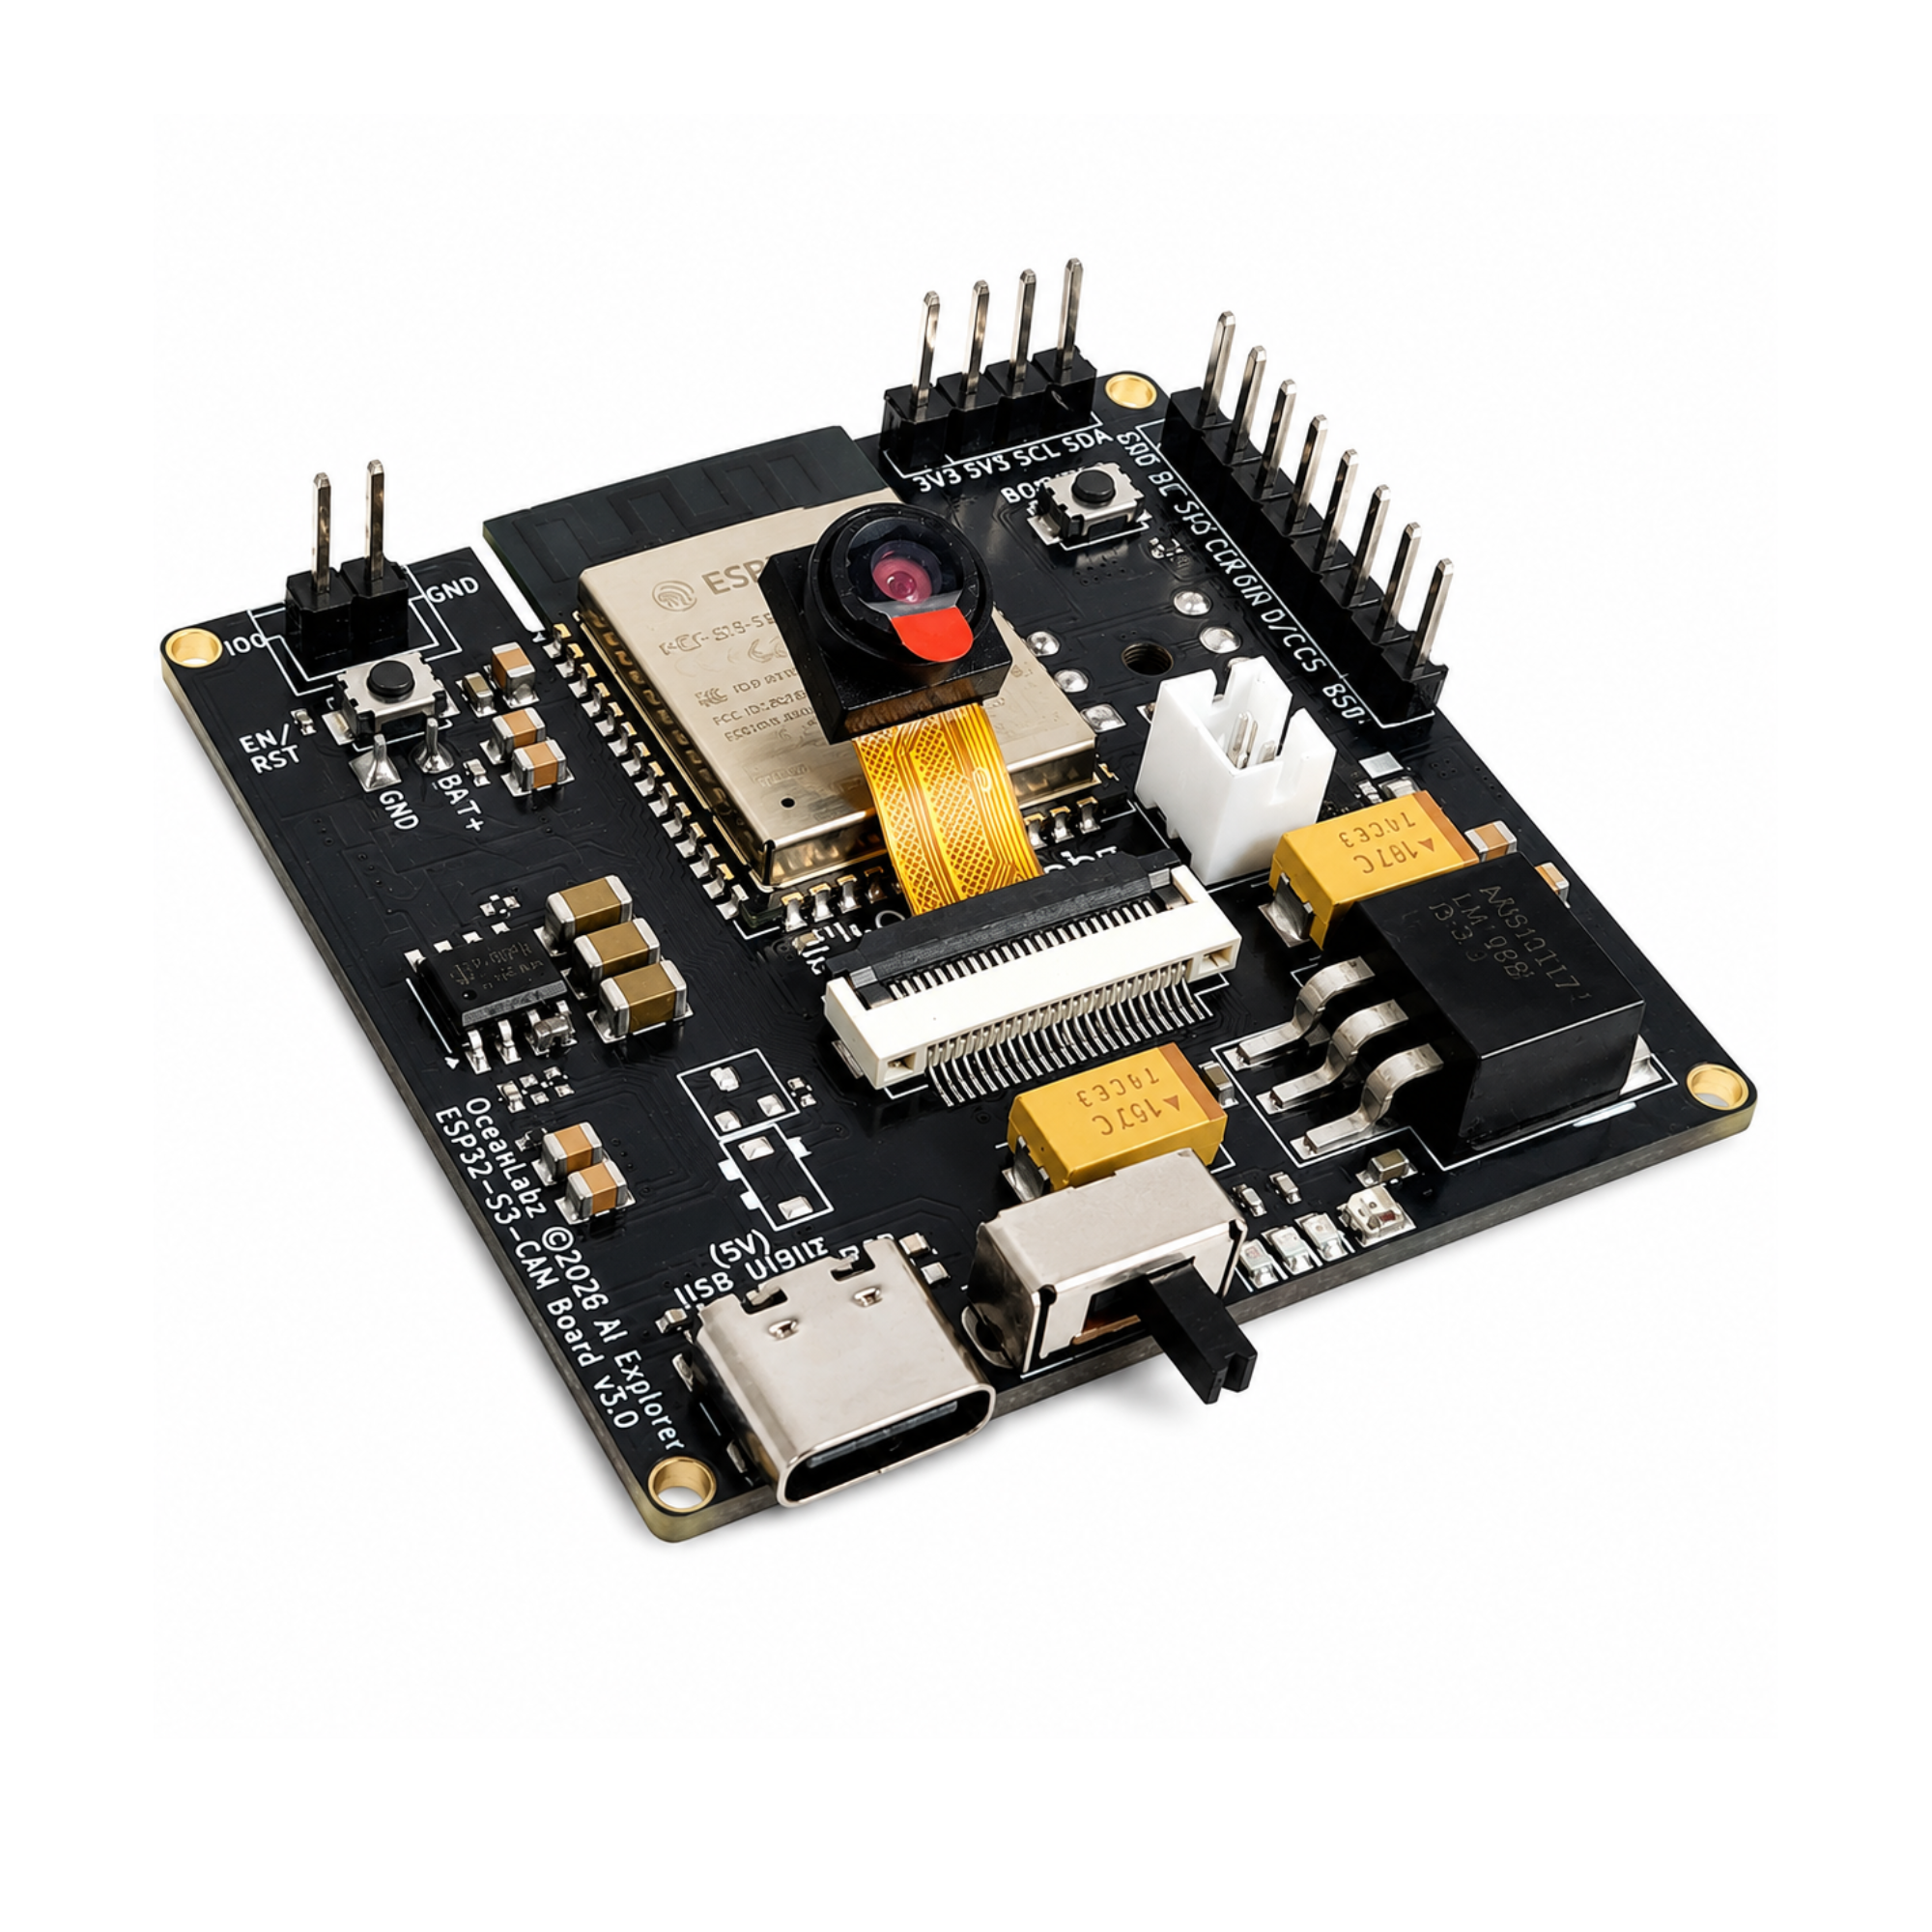
The OceanLabz ESP32-S3 AI Explorer Development Board is a powerful AI and IoT platform featuring ESP32-S3, 16MB Flash, 8MB PSRAM, Wi-Fi, Bluetooth, OV3660 camera support, INMP441 microphone, MAX98357A audio, Micro SD, and USB Type-C. Ideal for Edge AI, voice assistants, computer vision, robotics, and IoT projects with support for Arduino IDE and ESP-IDF.
In this tutorial, we will set up XiaoZhi AI on the OceanLabz ESP32-S3 AI Explorer Development Board. By the end of this guide, your board will be fully configured and ready to use as an AI voice assistant.
Required Components
| Component | Description | Qty |
|---|---|---|
| ESP32-S3 AI Explorer Board | Board | 1 |
| 2W 4Ω Speaker | 2W 4Ω Speaker or any available speaker up to 16Ω. | 1 |
| 1.8 inc TFT Display (SPI) 128×160 | Shows pairing code, Animations and more! | 1 |
Front Side
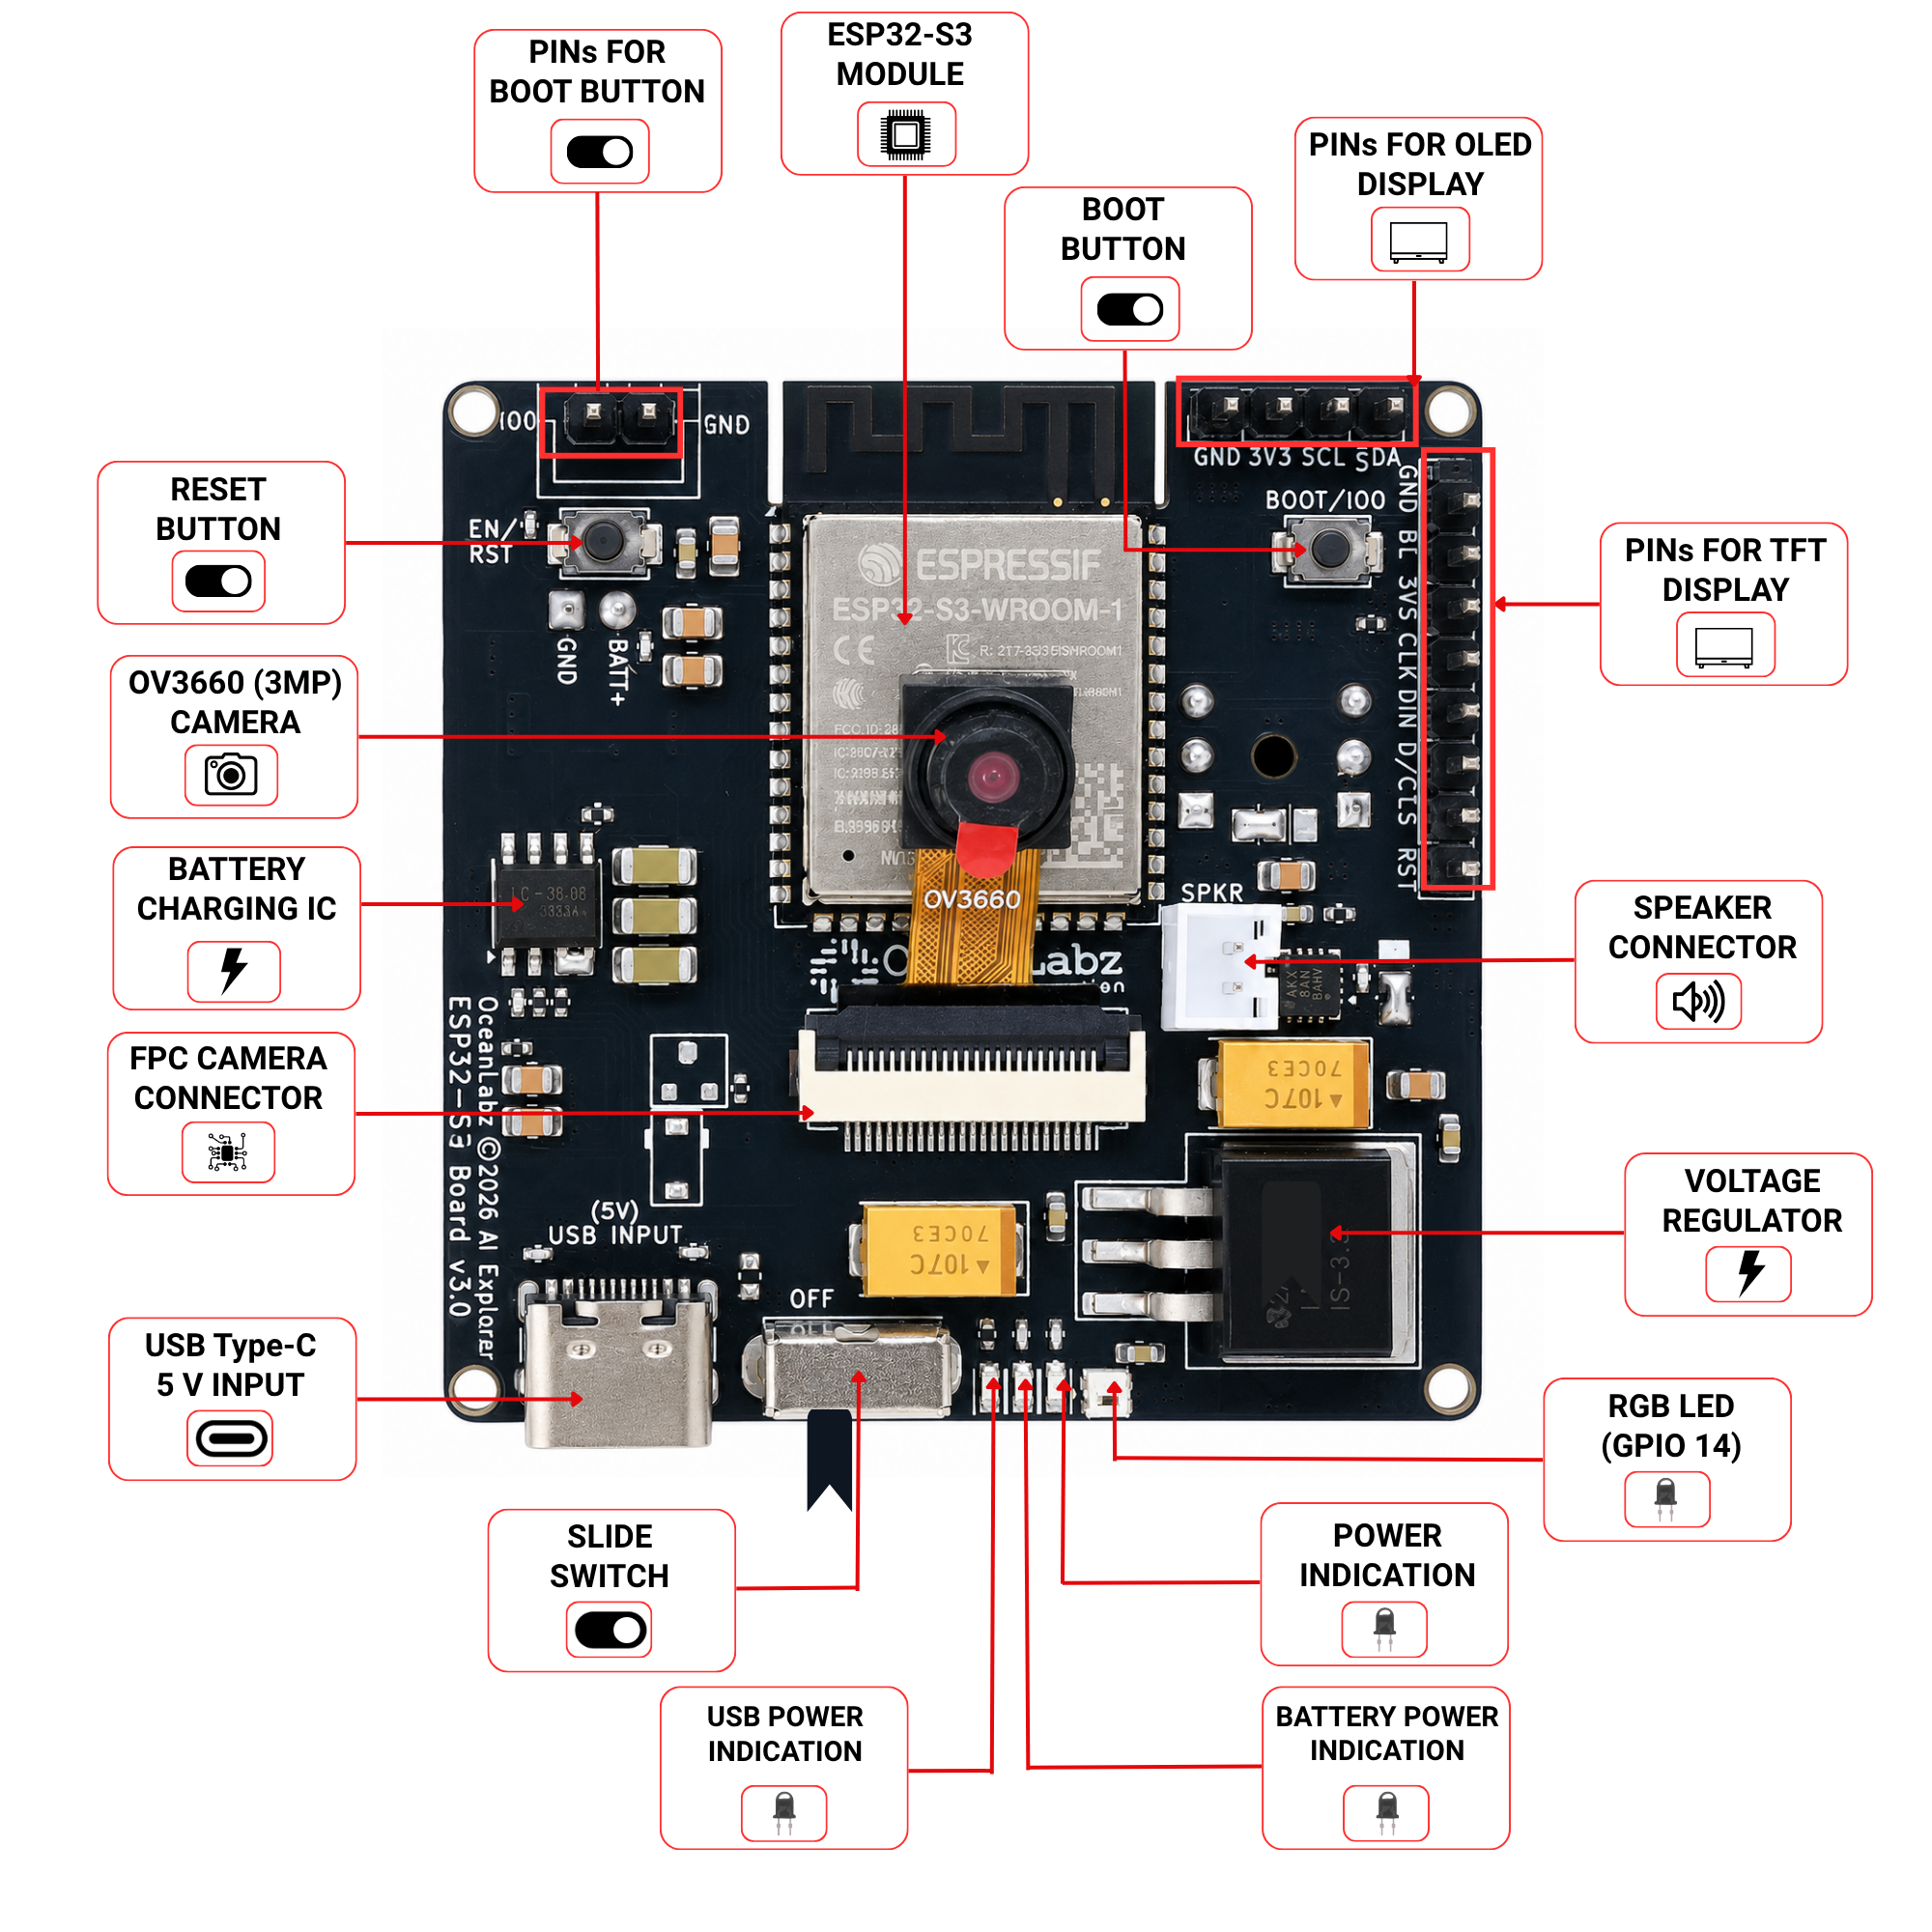
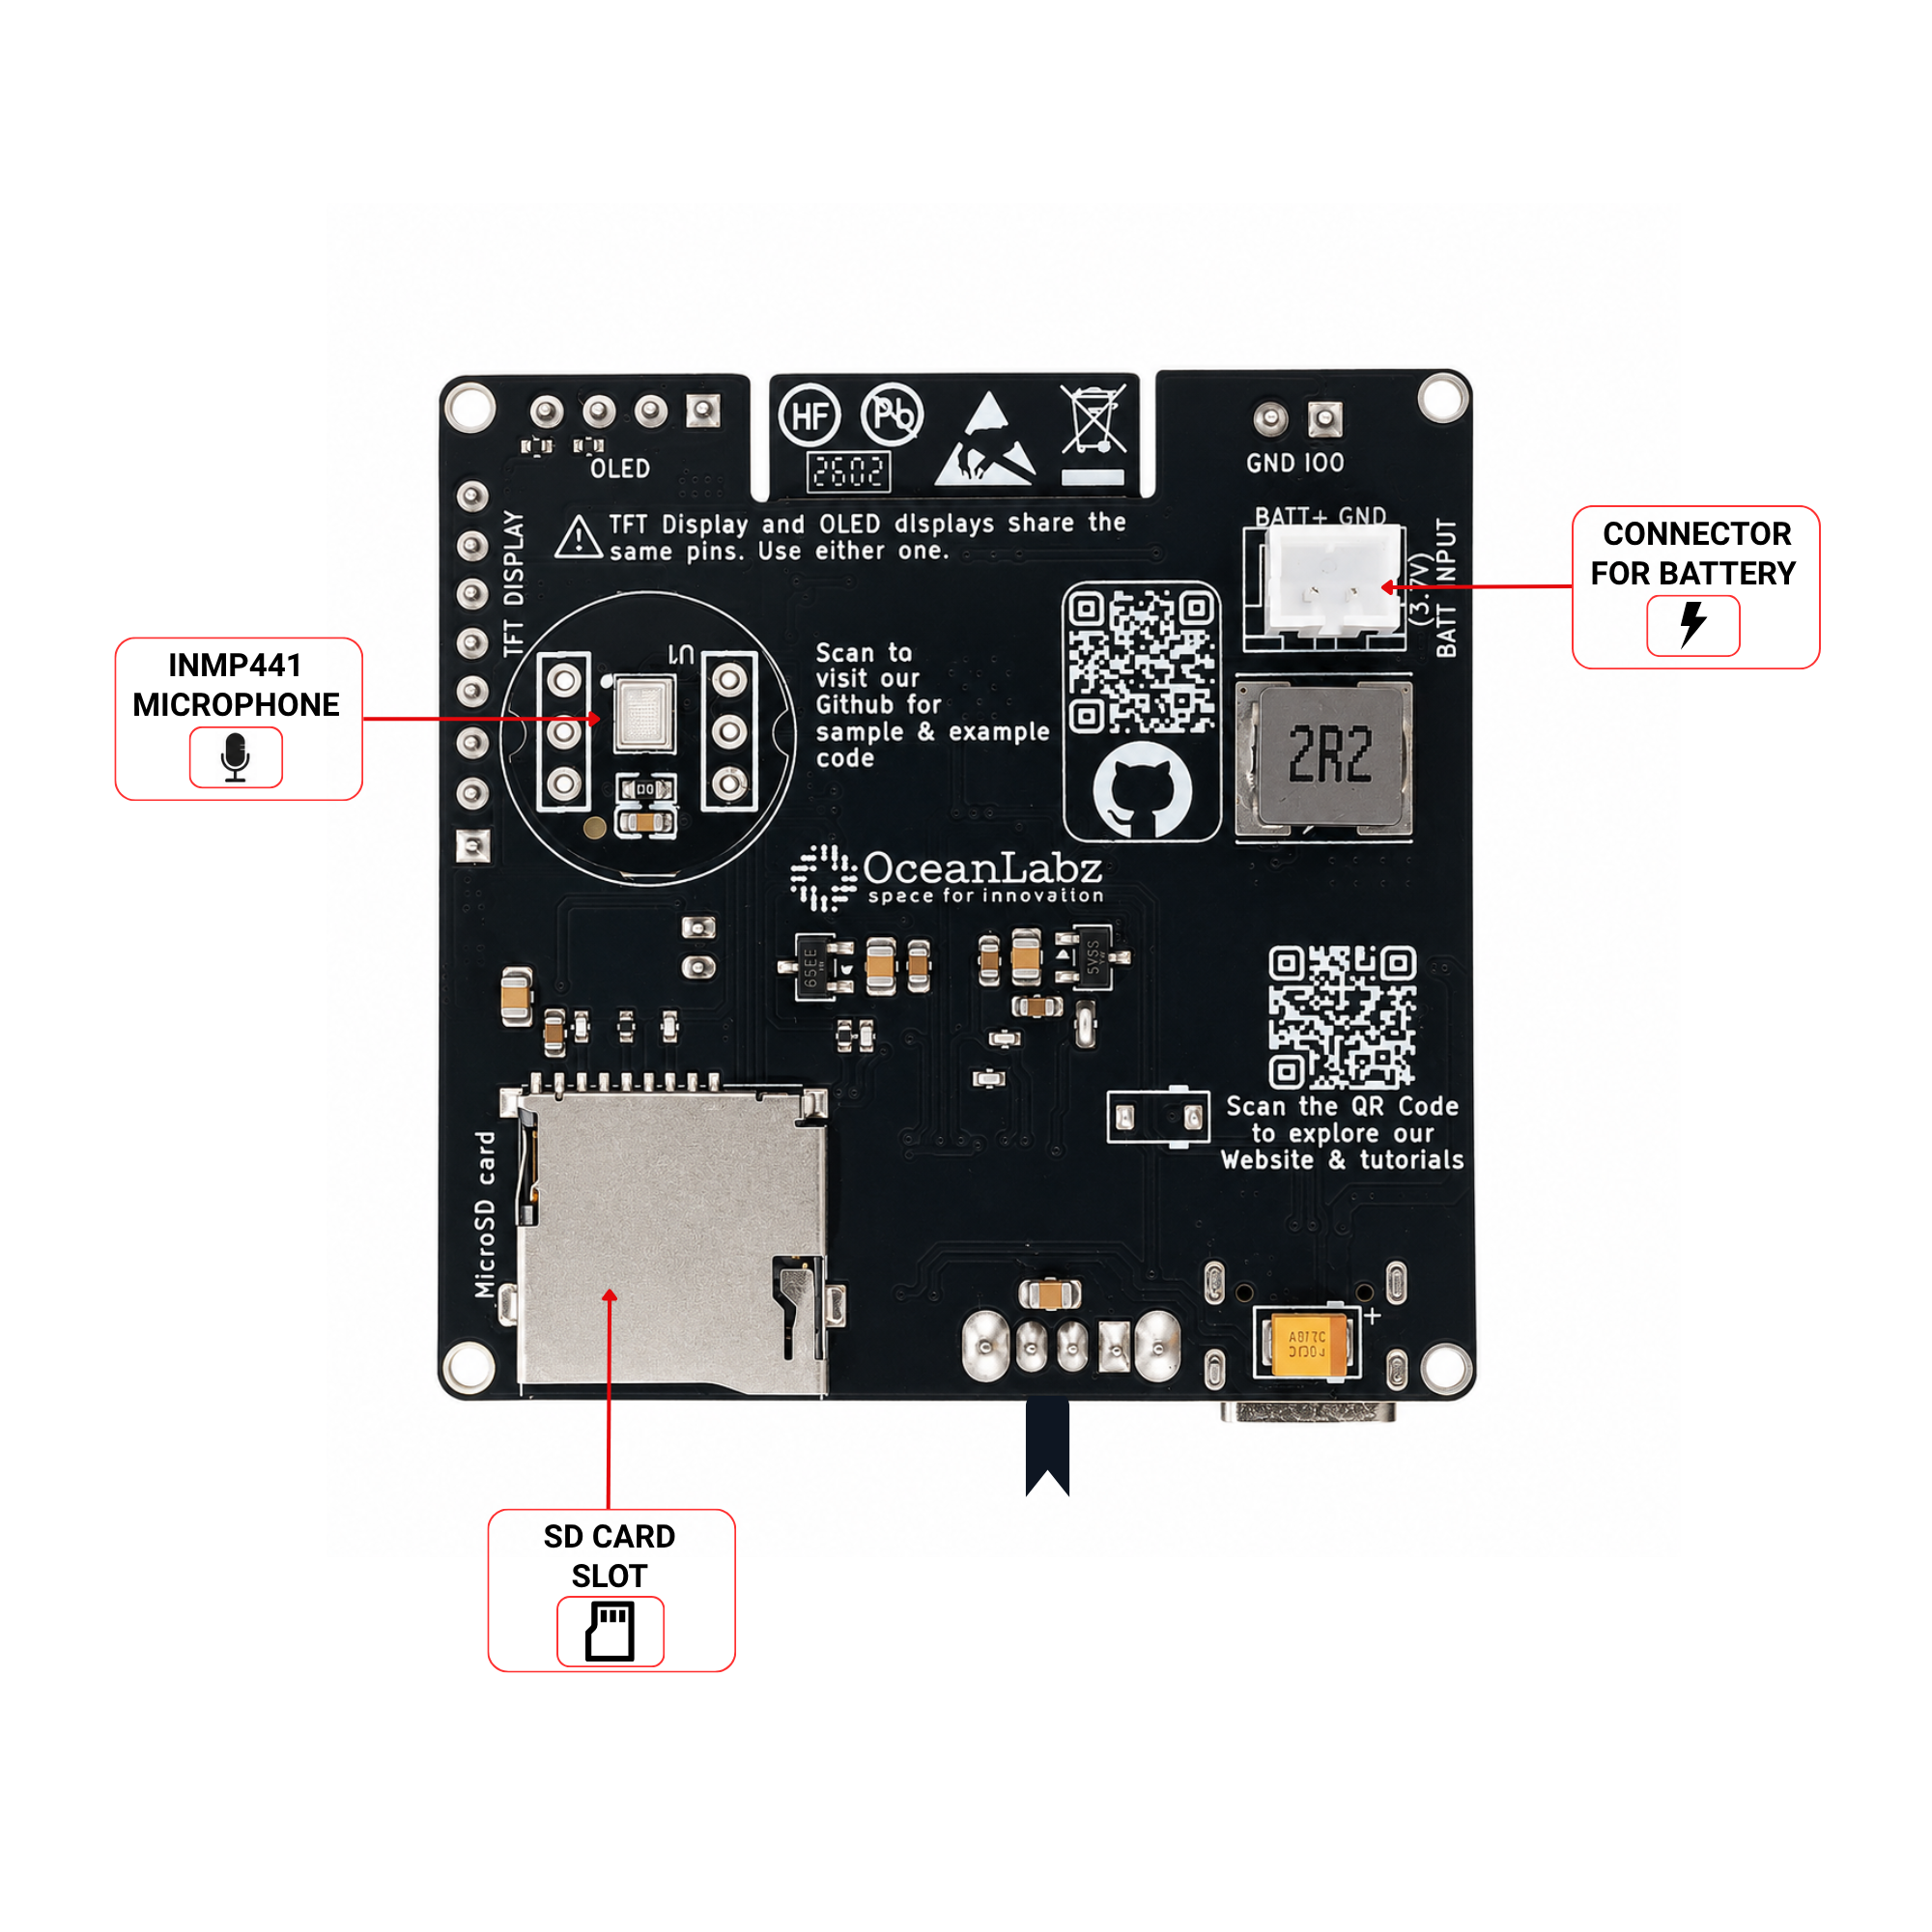
Back Side
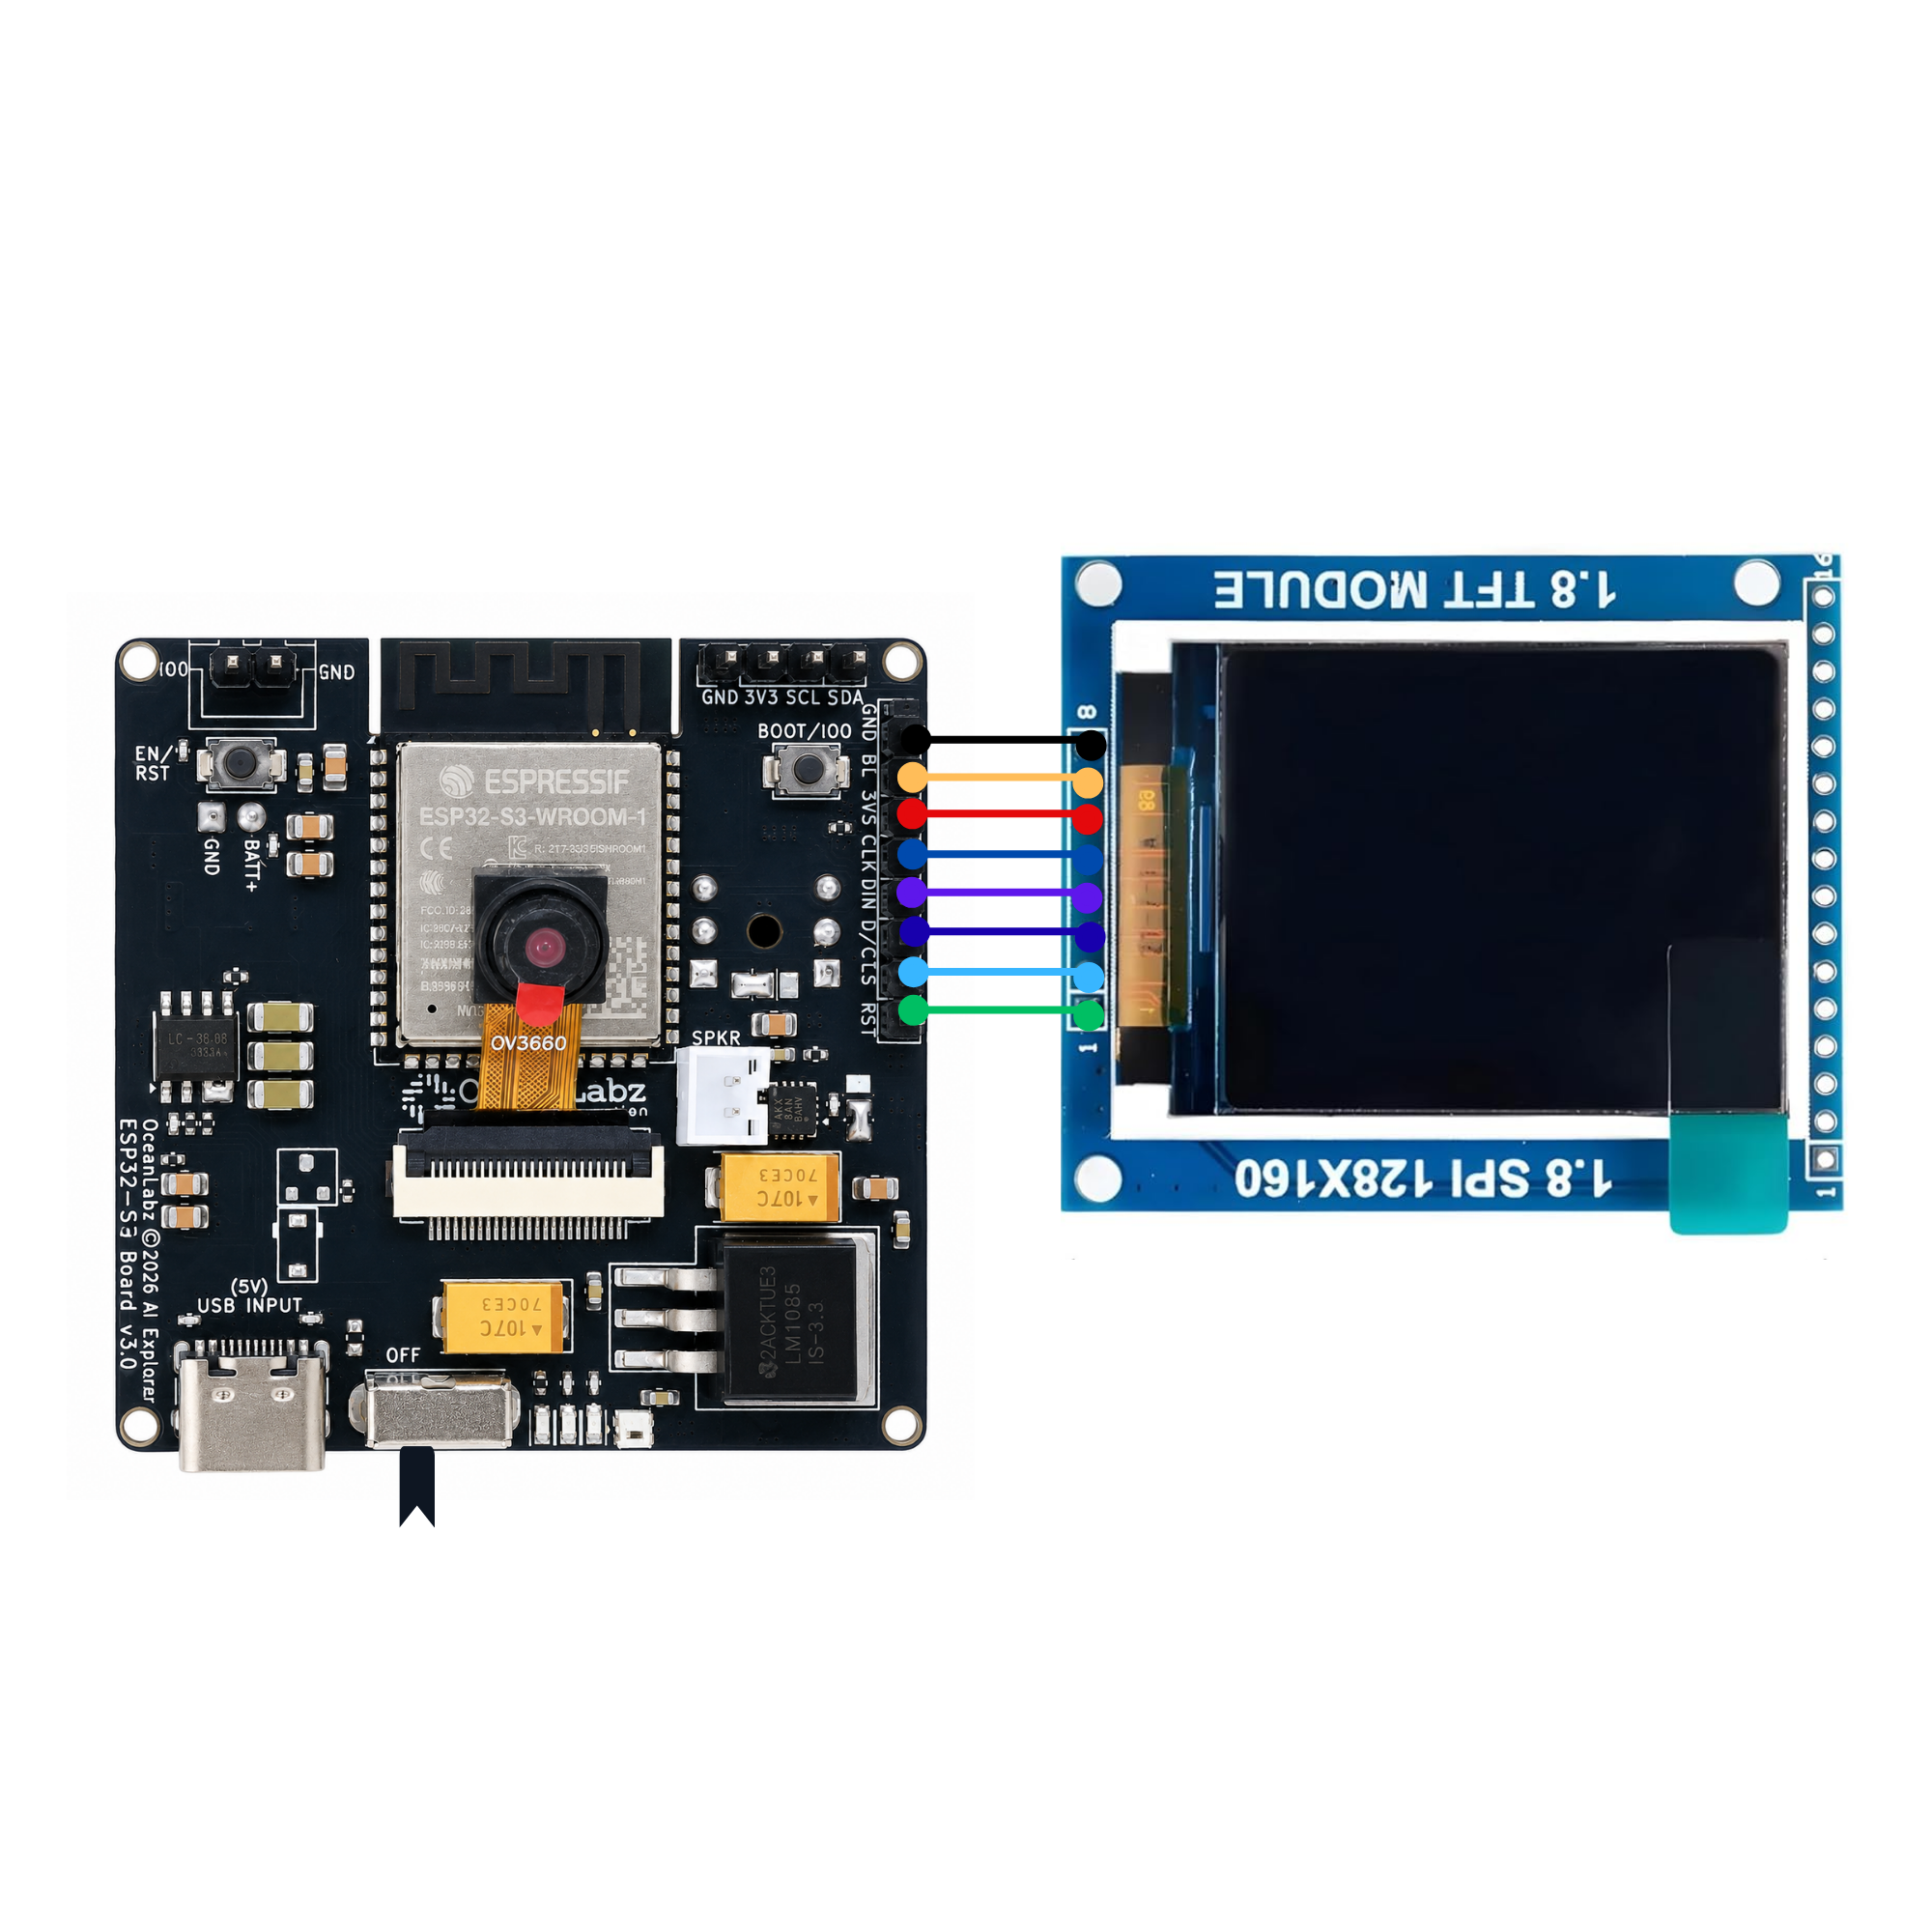
Circuit Diagram
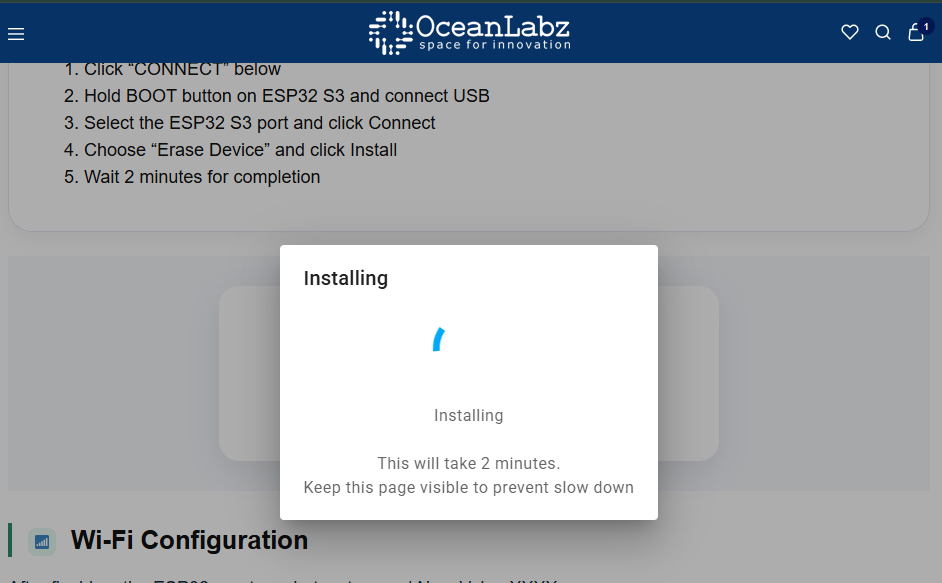
Flash Firmware (Browser-Based)
No Arduino IDE required — flash directly from your browser using Web Serial.
- Click “CONNECT” below
- Hold BOOT button on ESP32 and connect USB
- Select the ESP32 port and click Connect
- Choose “Install OceanLabz ESP32” and click Install
- Wait 2 minutes for completion
AI-EXPLORER-OV3660
Wi-Fi Configuration
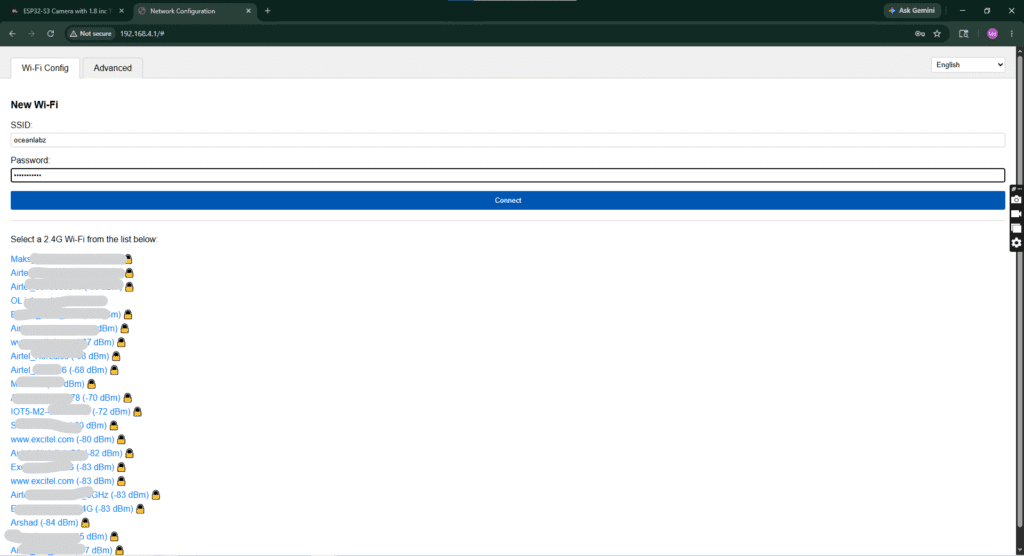
After flashing, the ESP32 creates a hotspot named Xiaozhi-XXXX.
- Connect to this Wi-Fi (no password)
- Open
192.168.4.1in browser - Select your home 2.4GHz Wi-Fi and enter password
- Device will restart and connect to your network
⚠️ ESP32 only supports 2.4GHz networks. Use a data-capable USB cable.
Create Account & Pair
1
Reconnect to your home Wi-Fi (exit the XiaoZhi hotspot).
2
Open xiaozhi.me and click on “Console”.
3
Create a free account using Google Sign-Up (fastest method).
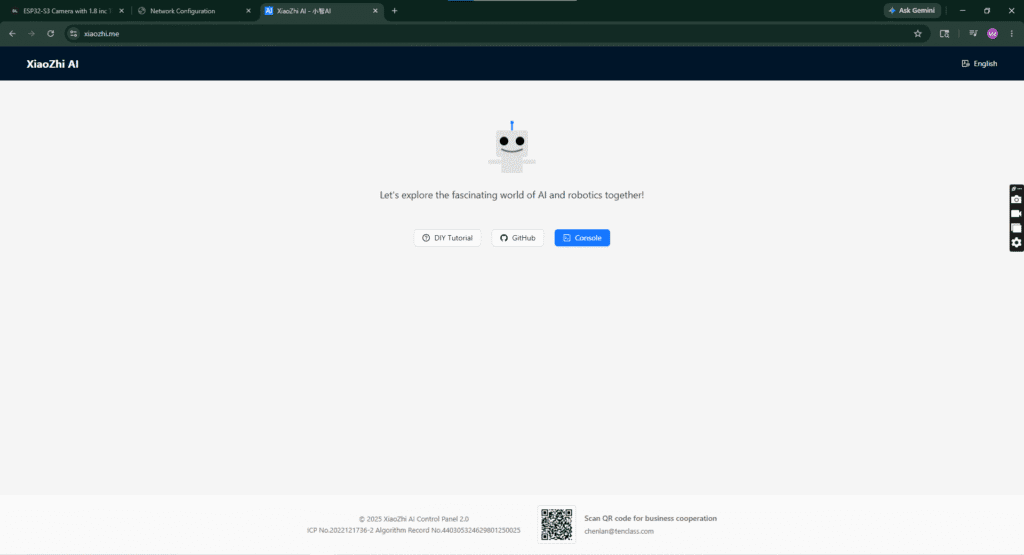
Pair Your ESP32
1
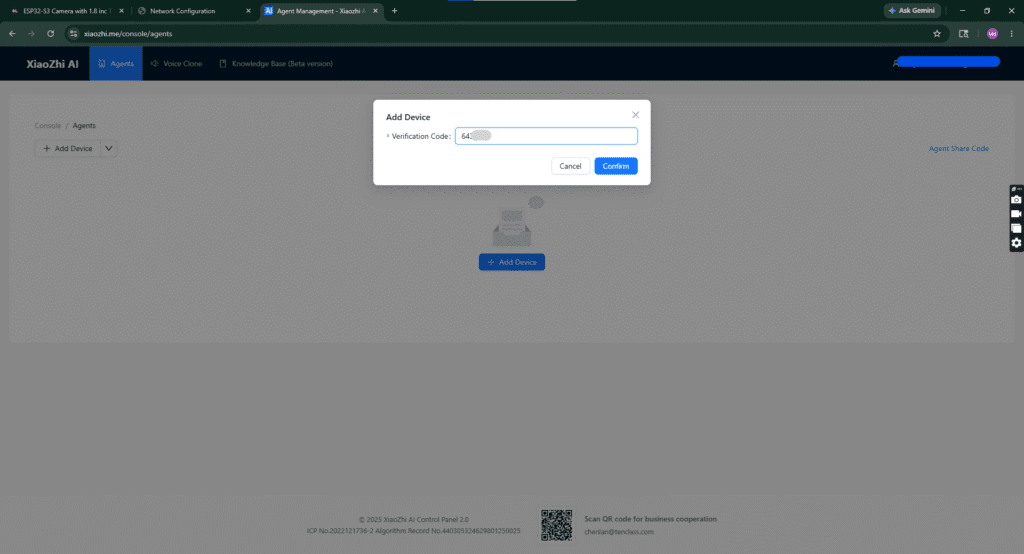
Click “+ Add Device” in the console dashboard.
2
Read the 6-digit code scrolling on the OLED display.
3
Enter the code and click Confirm to link your device.
4
Accept the agreement and click “Start Using”, then select Open Source (Free).
⚠️ The code refreshes quickly — enter it as soon as it appears.
Device Paired Successfully!
Your ESP32 is now connected and visible in the console dashboard.
Most Powerful Features & Voice Commands
🔊 Set volume to 50%
☀️ Increase brightness
🌧️ Check weather status
🎵 Play music
😉 Tell me a joke
📊 Get instant AI response
🎤 Press BOOT to activate
Auto-sleep after silence — press BOOT again to wake.