Index
Introduction
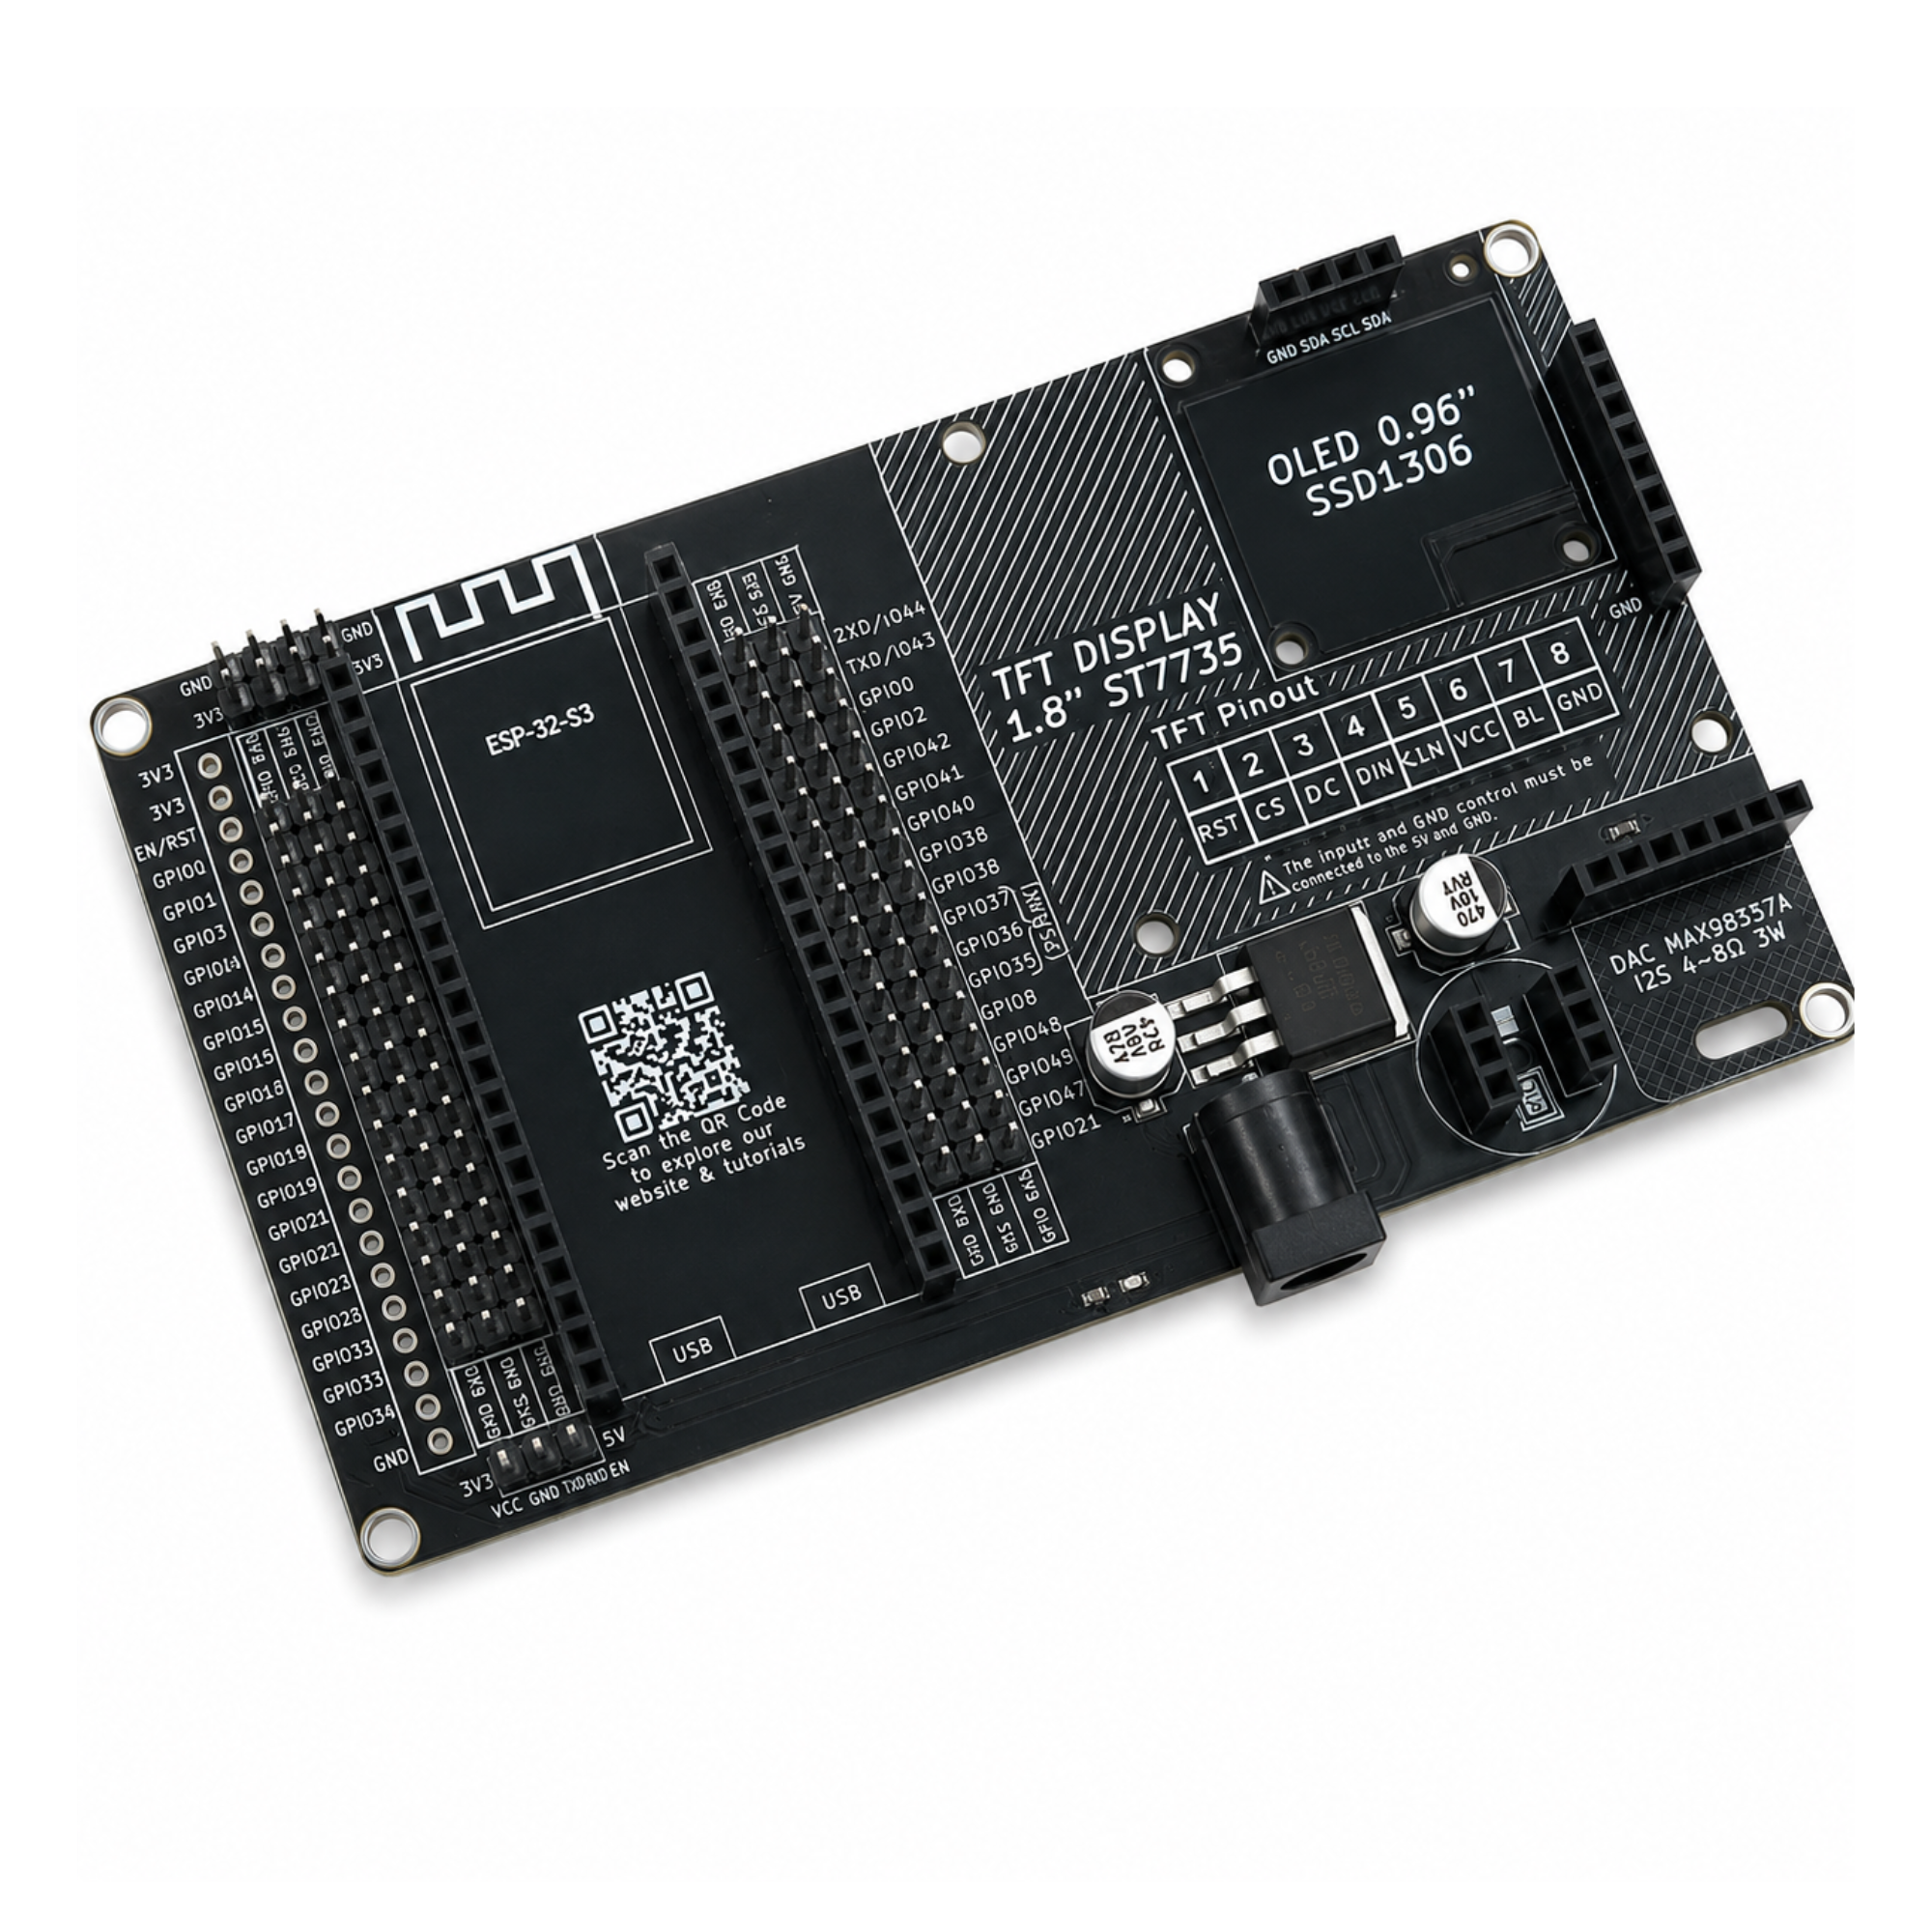
The OceanLabz ESP32-S3 Expansion Board simplifies AI and IoT development by integrating support for the ESP32-S3 N16R8 DevKit, ST7735 TFT, SSD1306 OLED, INMP441 microphone, and MAX98357A audio amplifier on a single plug-and-play board. It reduces wiring, provides GPIO expansion, and is ideal for XiaoZhi AI, TinyML, robotics, smart home, and embedded system projects.
In this tutorial, we will set up XiaoZhi AI on the OceanLabz ESP32-S3 Expansion Board step by step. By the end of this guide, your board will be ready to use as an AI voice assistant.
Features
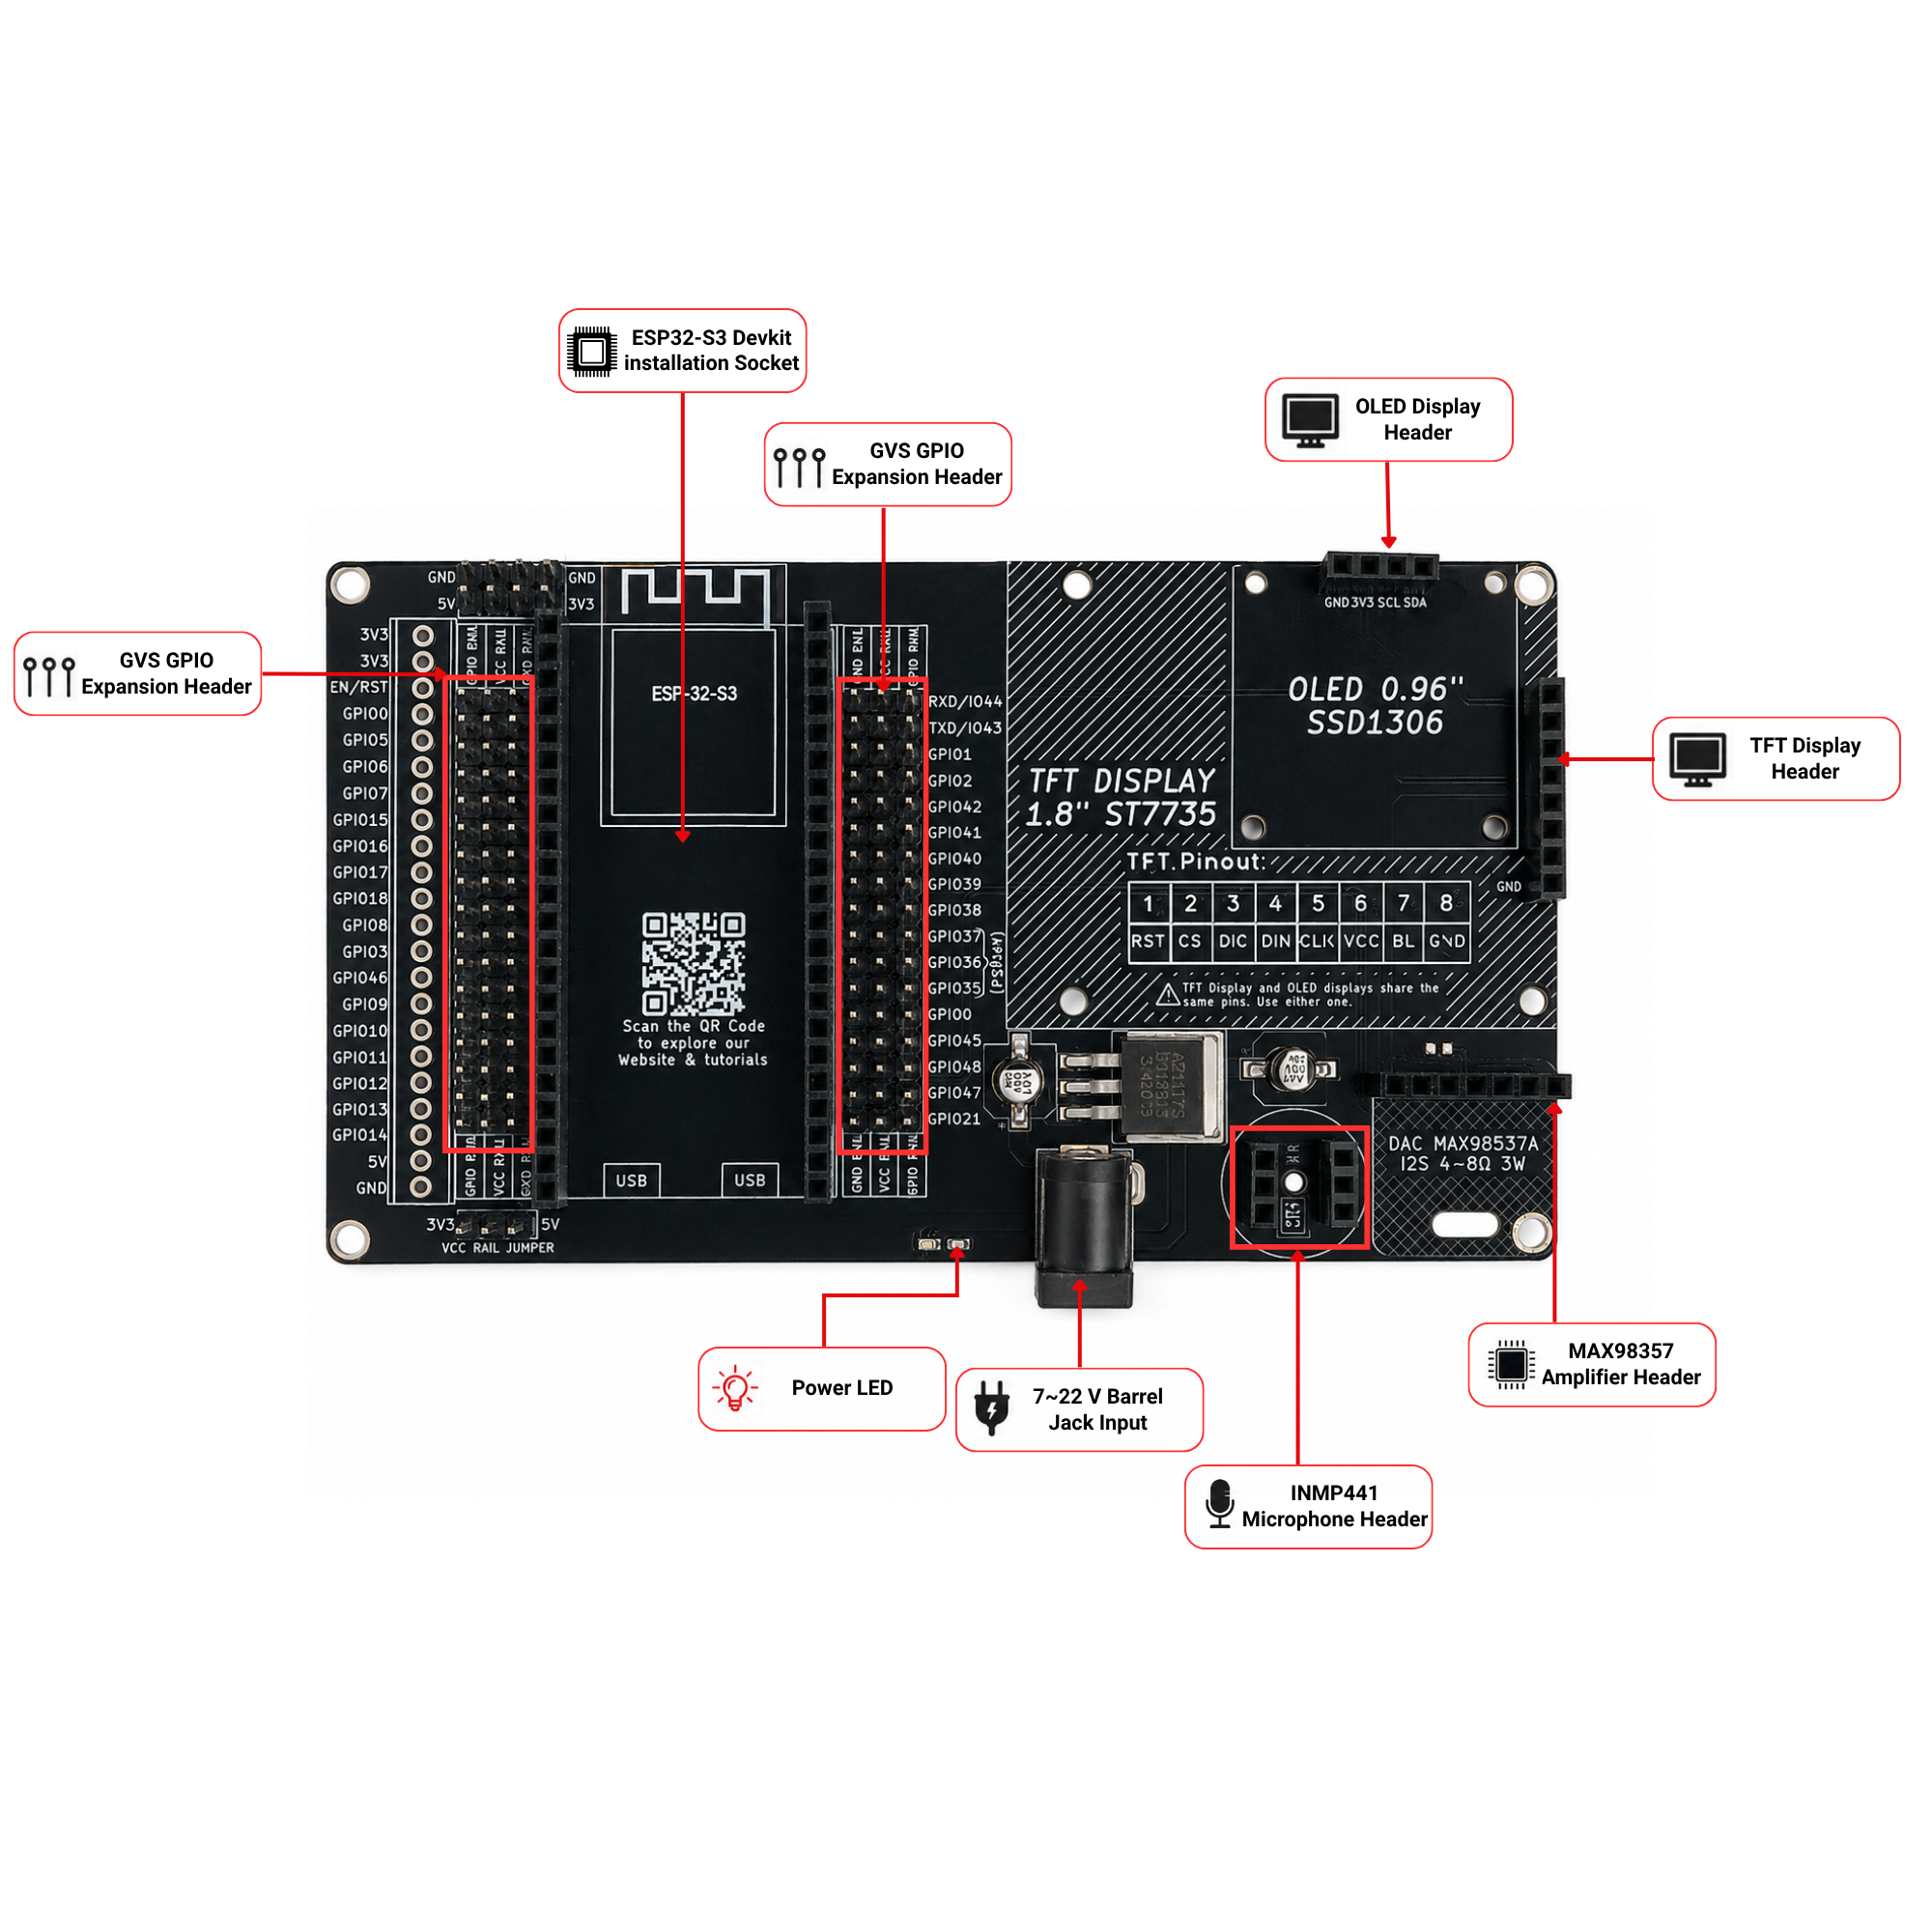
Required Components
| Component | Description | Qty |
|---|---|---|
| ESP32-S3 Dev Board | ESP32 S3 Devkit Without Camera Board | 1 |
| INMP441 I2S Mic | Digital I2S microphone | 1 |
| MAX98357A Amp | I2S audio amplifier | 1 |
| 2W 4Ω Speaker | 2W 4Ω Speaker or any available speaker up to 16Ω. | 1 |
| TFT 1.8 inc Display (I2C) 128×160 | Shows pairing code, Animations and more! | 1 |
| AI EXPANSION BOARD | For prototyping | 1 |
Circuit Connections
🎤 INMP441 Mic
VDD → 3.3V
GND → GND
L/R → GND
SD → GPIO41
WS → GPIO39
SCK → GPIO40
GND → GND
L/R → GND
SD → GPIO41
WS → GPIO39
SCK → GPIO40
🔊 MAX98357A Amp
VIN → 5V
GND → GND
LRC → GPIO21
DIN → GPIO47
GAIN → GND
BCLK → GPIO48
GND → GND
LRC → GPIO21
DIN → GPIO47
GAIN → GND
BCLK → GPIO48
📺 TFT Display
VCC → 3.3V
GND → GND
BL → GPIO42
CLK → GPIO44 RX
DIN → GPIO43 TX
D/C → GPIO38
CS → GPIO45
RST → GPIO1
GND → GND
BL → GPIO42
CLK → GPIO44 RX
DIN → GPIO43 TX
D/C → GPIO38
CS → GPIO45
RST → GPIO1
Hardware Setup
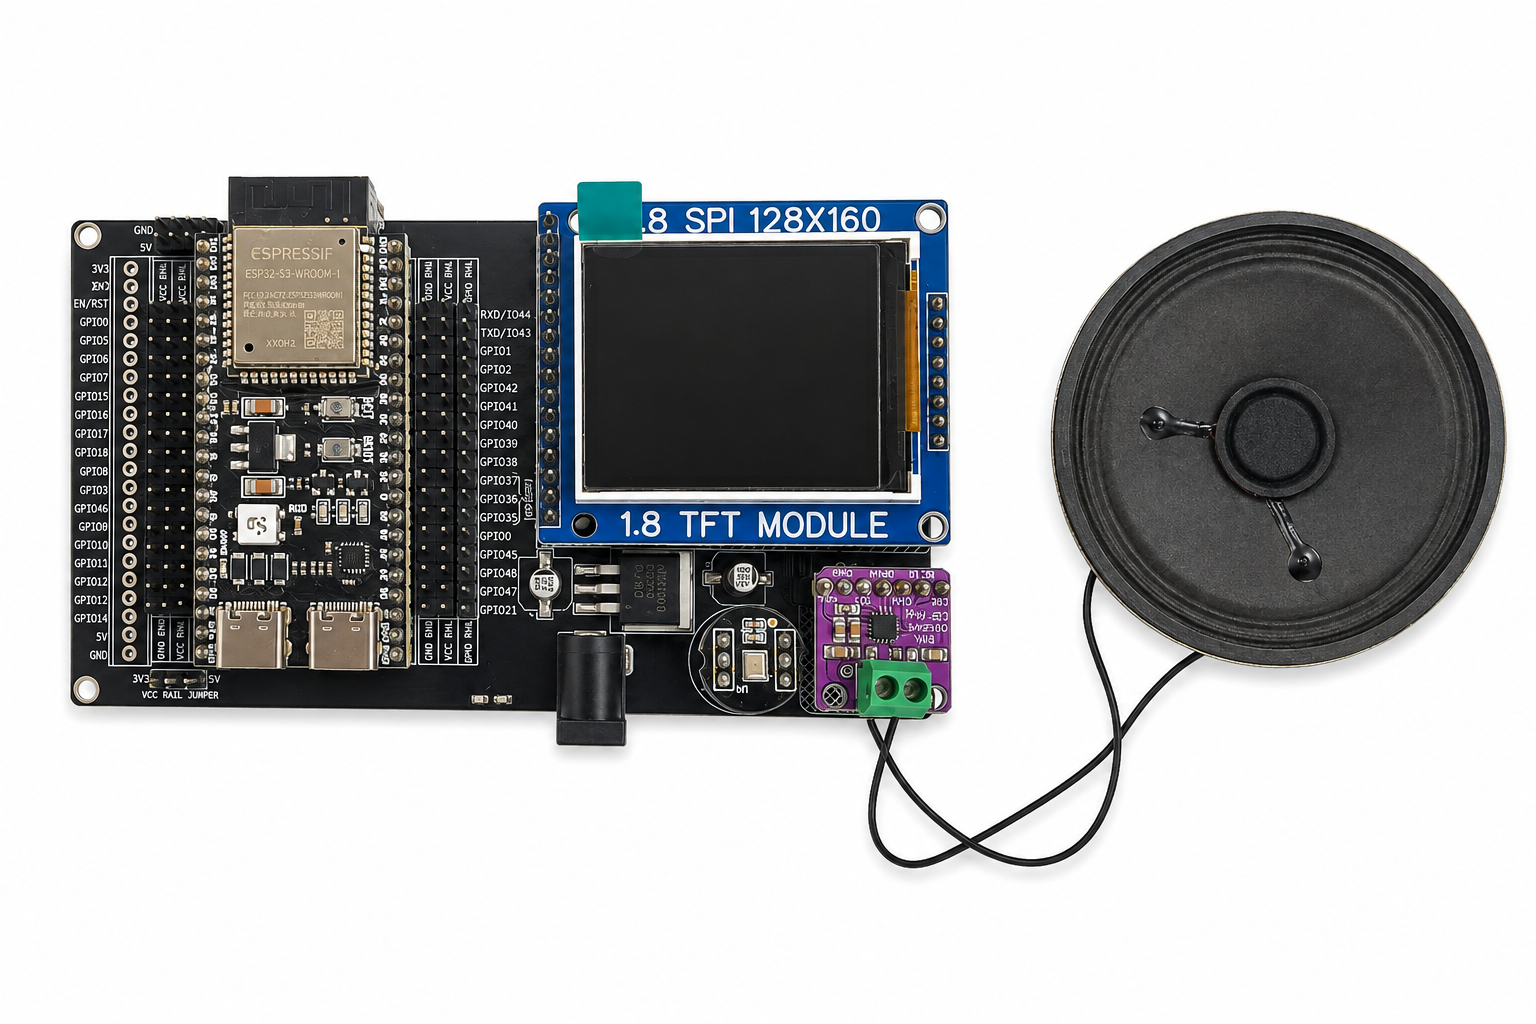
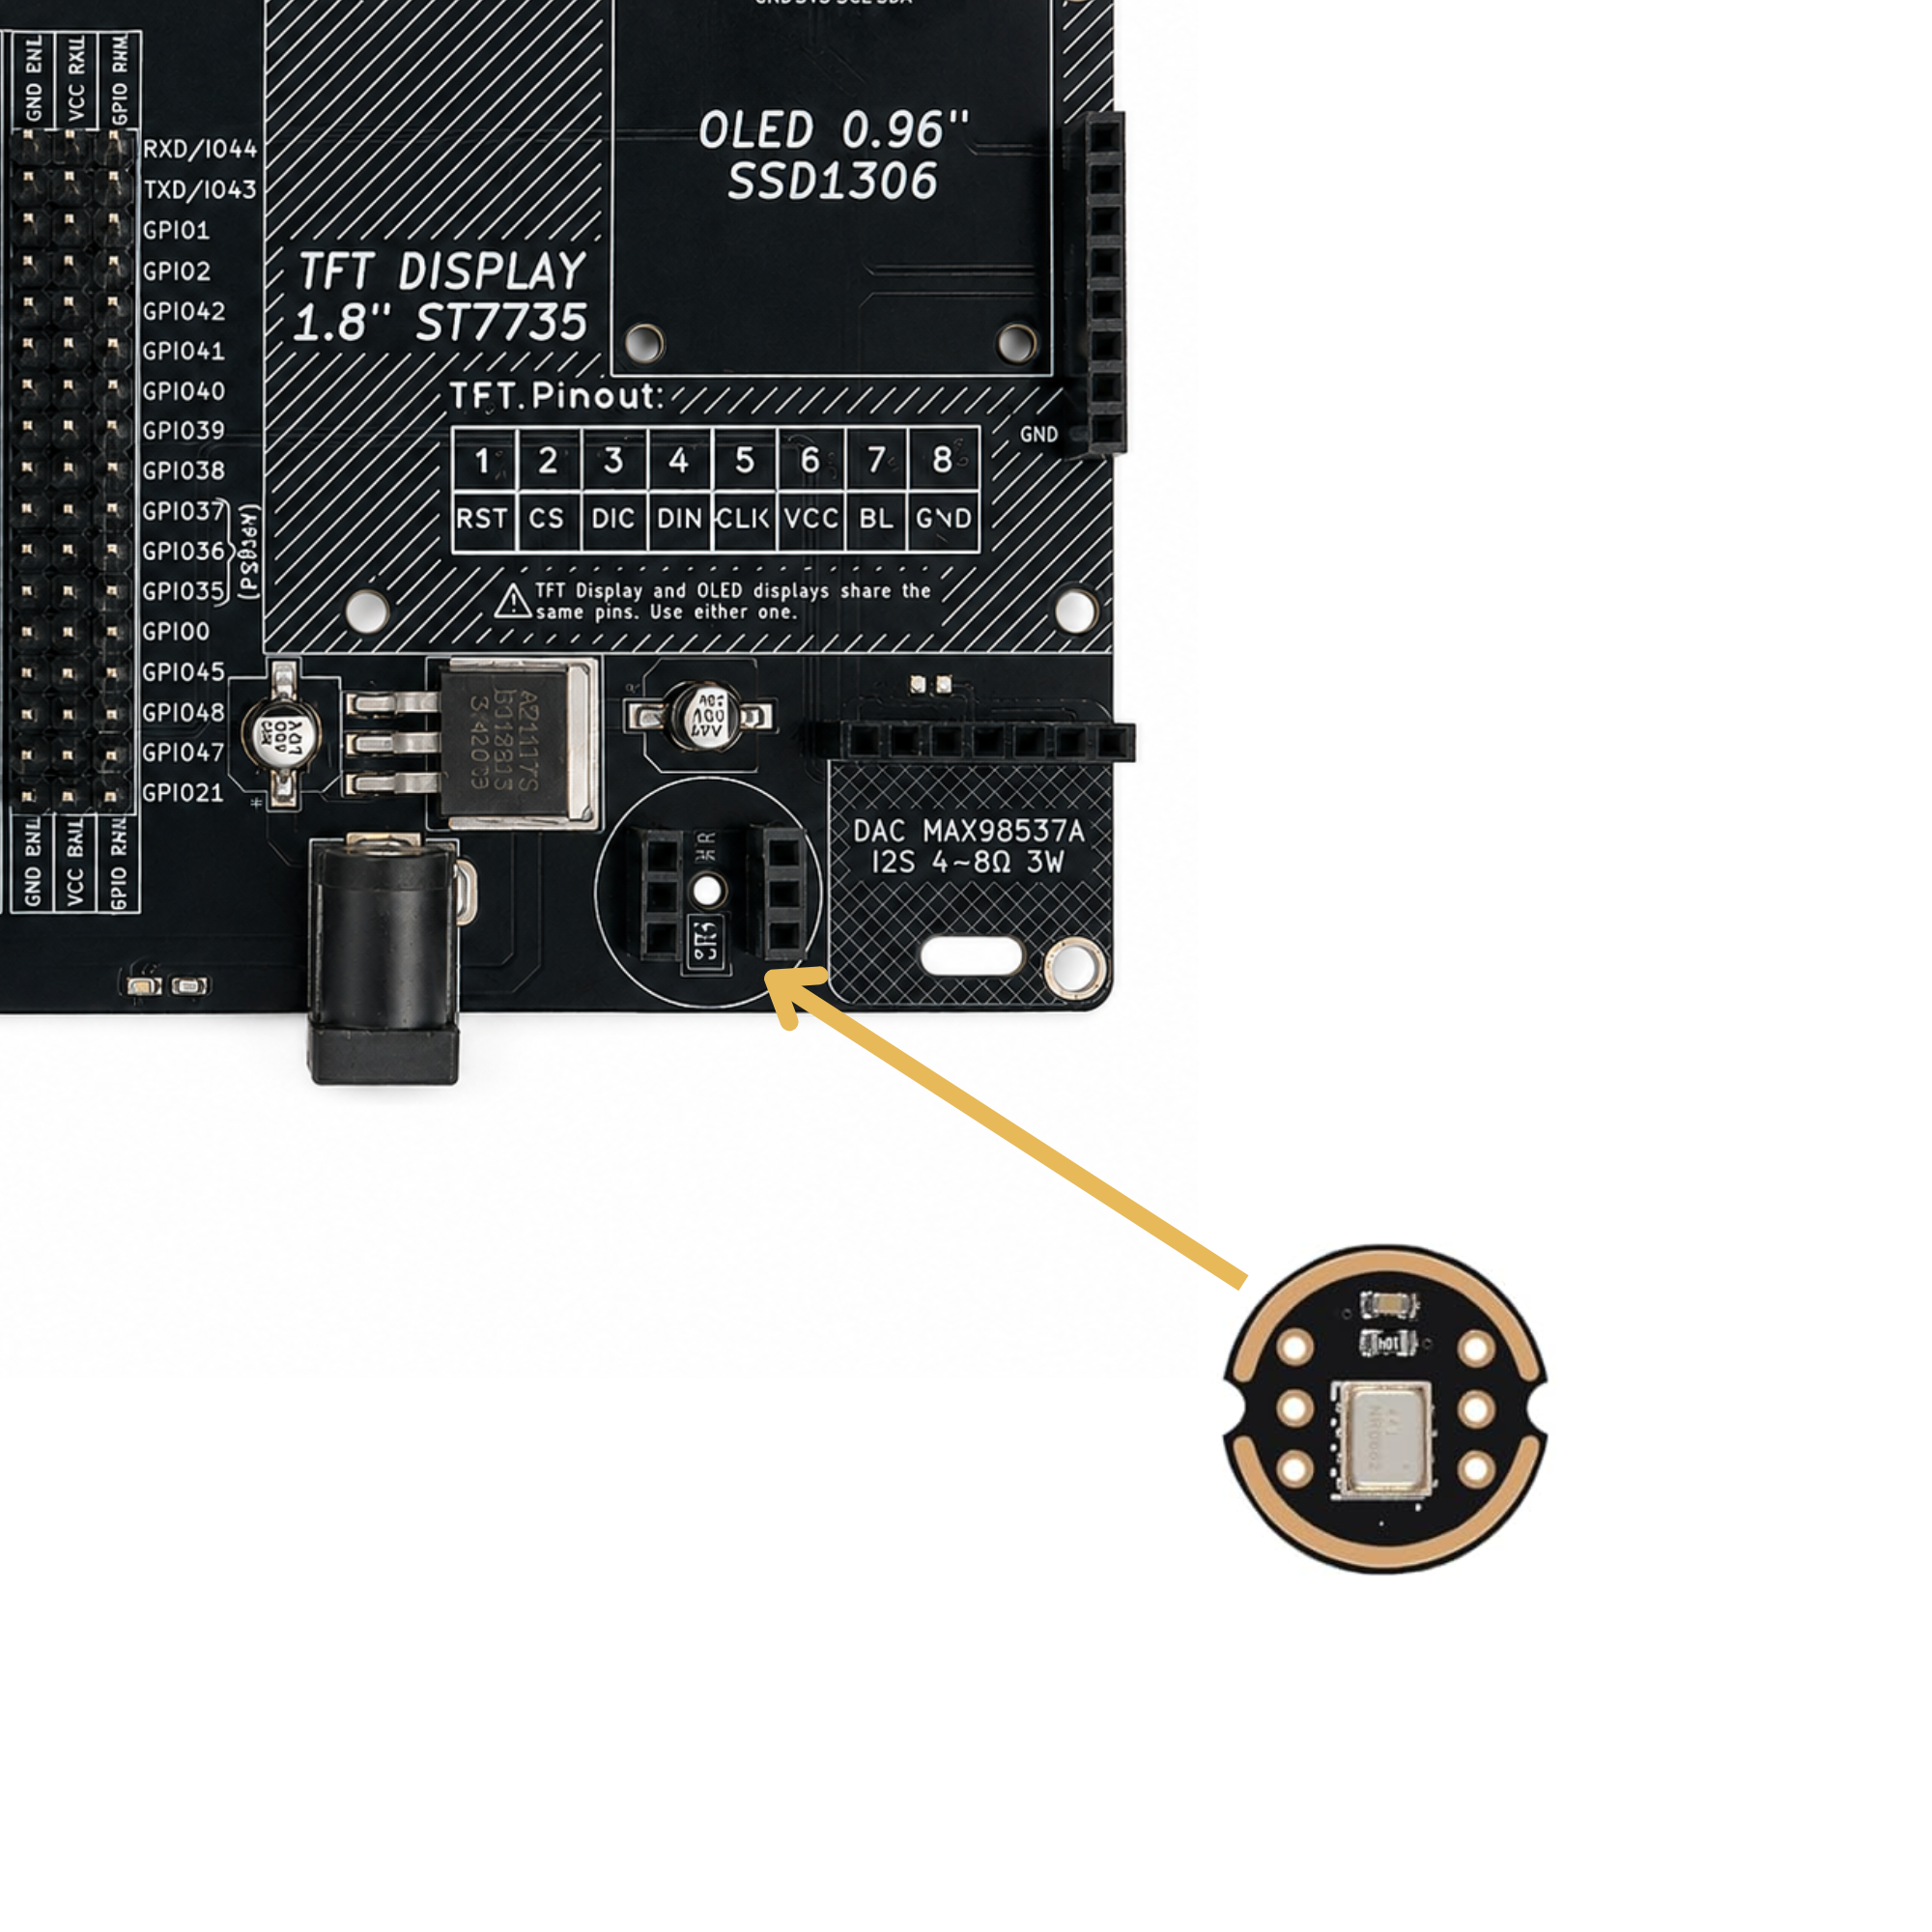
⚠️ Important: If your AI Expansion Board matches this version, install the microphone in the direction shown. Incorrect orientation may prevent the microphone from working..
Flash Firmware (Browser-Based)
No Arduino IDE required — flash directly from your browser using Web Serial.
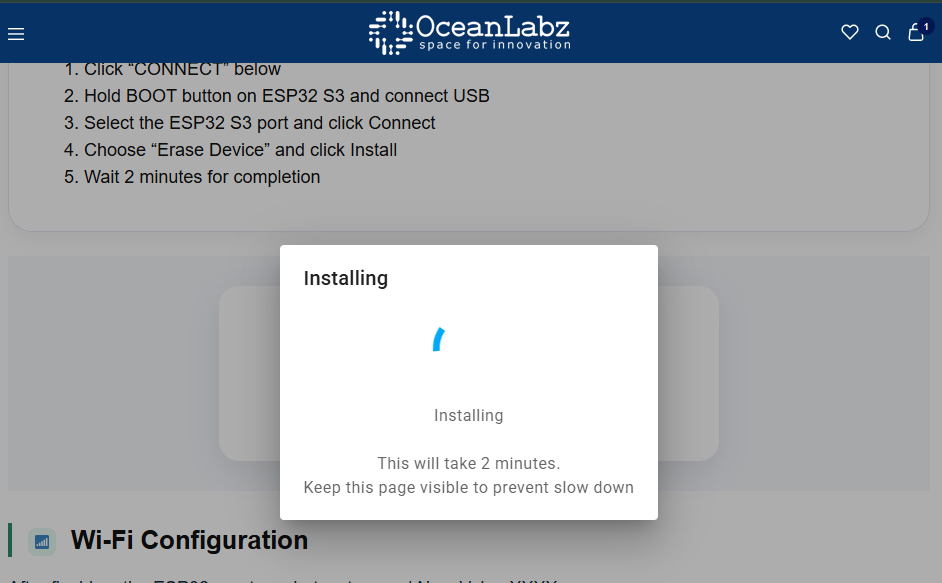
- Click “CONNECT” below
- Hold BOOT button on ESP32 and connect USB
- Select the ESP32 port and click Connect
- Choose “Install OceanLabz ESP32” and click Install
- Wait 2 minutes for completion
ESP32S3-TFT
Wi-Fi Configuration
After flashing, the ESP32 creates a hotspot named Xiaozhi-XXXX.
- Connect to this Wi-Fi (no password)
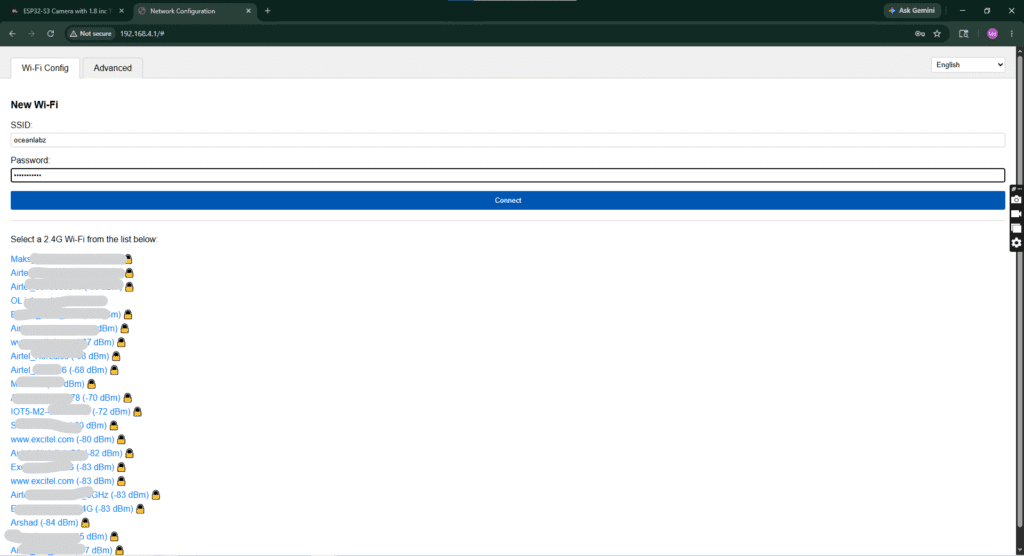
- Open
192.168.4.1in browser - Select your home 2.4GHz Wi-Fi and enter password
- Device will restart and connect to your network
⚠️ ESP32 only supports 2.4GHz networks. Use a data-capable USB cable.
Create Account & Pair
1
Reconnect to your home Wi-Fi (exit the XiaoZhi hotspot).
2
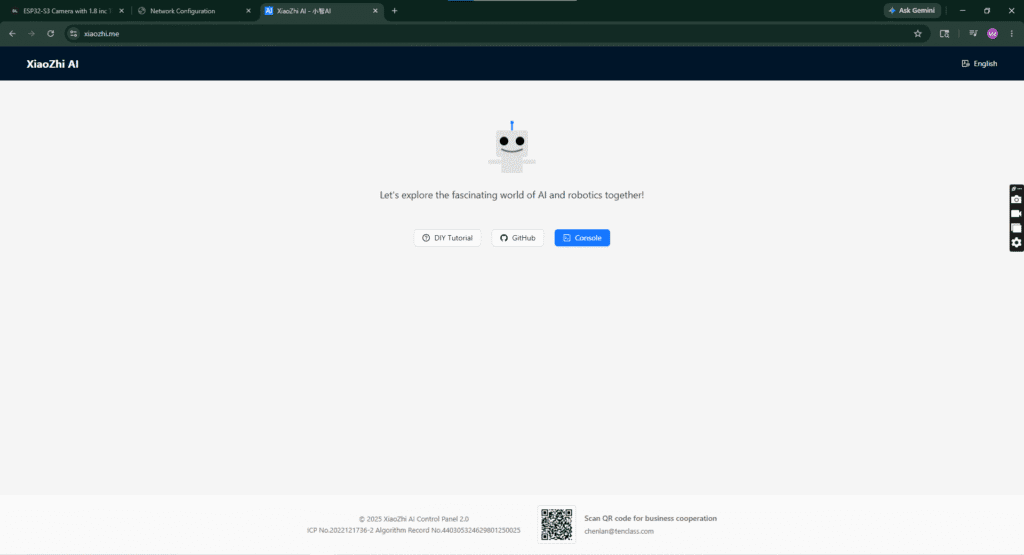
Open xiaozhi.me and click on “Console”.
3
Create a free account using Google Sign-Up (fastest method).
Pair Your ESP32
1
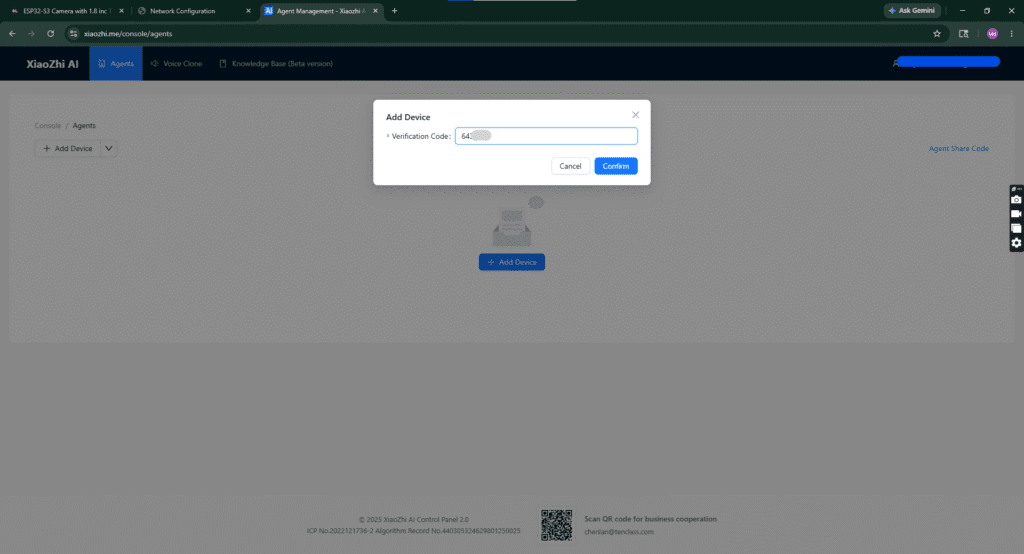
Click “+ Add Device” in the console dashboard.
2
Read the 6-digit code scrolling on the OLED display.
3
Enter the code and click Confirm to link your device.
4
Accept the agreement and click “Start Using”, then select Open Source (Free).
⚠️ The code refreshes quickly — enter it as soon as it appears.
Device Paired Successfully!
Your ESP32 is now connected and visible in the console dashboard.
Most Powerful Features & Voice Commands
🔊 Set volume to 50%
☀️ Increase brightness
🌧️ Check weather status
🎵 Play music
😉 Tell me a joke
📊 Get instant AI response
🎤 Press BOOT to activate
Auto-sleep after silence — press BOOT again to wake.