Index
What is XiaoZhi AI
XiaoZhi AI is an open-source firmware that turns an ESP32 into a powerful cloud-connected AI voice assistant with real-time speech recognition, natural language understanding, and text-to-speech using the xiaozhi.me platform.
Required Components
| Component | Description | Qty |
|---|---|---|
| ESP32 S3 Board | AI Dev Board | 1 |
| INMP441 I2S Mic | Digital I2S microphone | 1 |
| MAX98357A Amp | I2S audio amplifier | 1 |
| 2W 4Ω Speaker | 2W 4Ω Speaker or any available speaker up to 16Ω. | 1 |
| OLED Display (I2C) 128×64 | Shows pairing code | 1 |
| Breadboard & Wires | For prototyping | As required |
⚠️ Recommended: Use a zero/DOT PCB and solder all wires properly instead of a breadboard. Breadboard connections can become loose and unstable during movement, which may cause disconnections or errors.
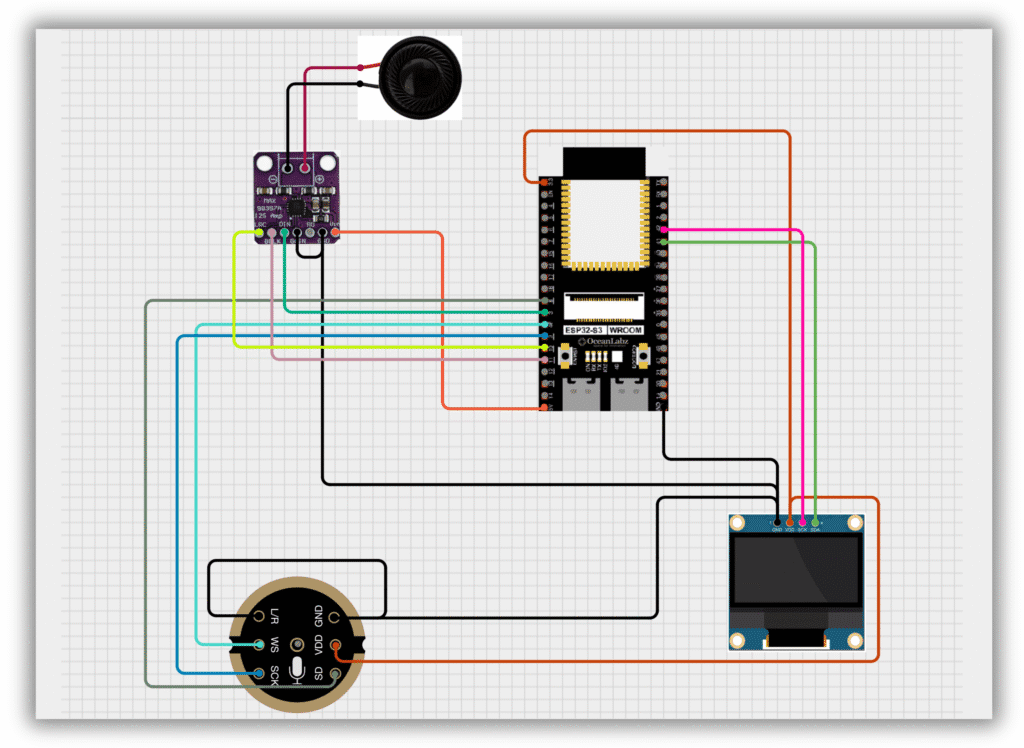
Circuit Connections
🎤 INMP441 Mic
VDD → 3.3V
GND → GND
L/R → GND
SD → GPIO8
WS → GPIO46
SCK → GPIO9
GND → GND
L/R → GND
SD → GPIO8
WS → GPIO46
SCK → GPIO9
🔊 MAX98357A Amp
VIN → 5V
GND → GND
LRC → GPIO10
DIN → GPIO3
GAIN → GND
BCLK → GPIO11
GND → GND
LRC → GPIO10
DIN → GPIO3
GAIN → GND
BCLK → GPIO11
📺 OLED Display
VCC → 3.3V
GND → GND
SCK → GPIO42
SDA → GPIO41
GND → GND
SCK → GPIO42
SDA → GPIO41
⚠️ Double-check all connections before powering on!
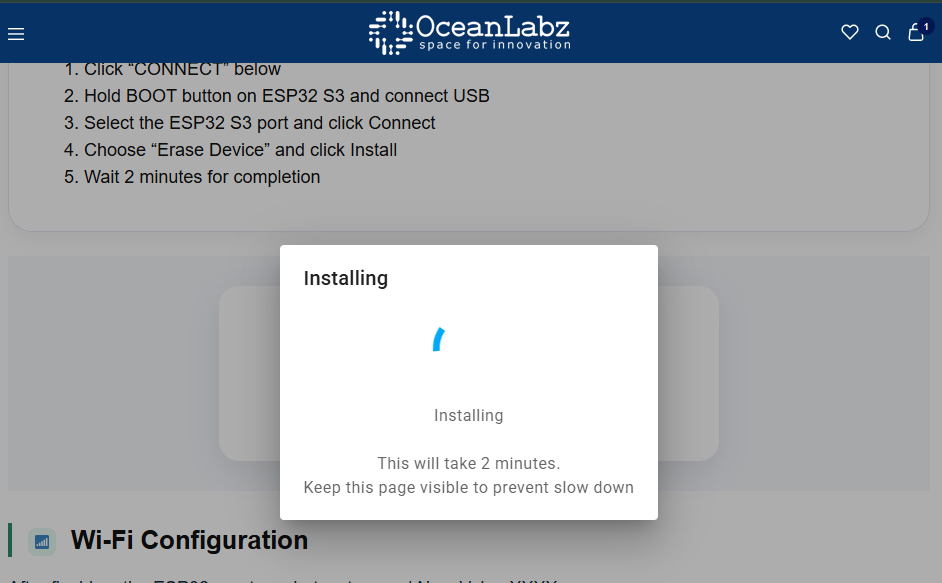
Flash Firmware (Browser-Based)
No Arduino IDE required — flash directly from your browser using Web Serial.
- Click “CONNECT” below
- Hold BOOT button on ESP32 S3 and connect USB
- Select the ESP32 S3 port and click Connect
- Choose “Install OceanLabz ESP32S3” and click Install
- Wait 2 minutes for completion
ESP32-S3 Firmware
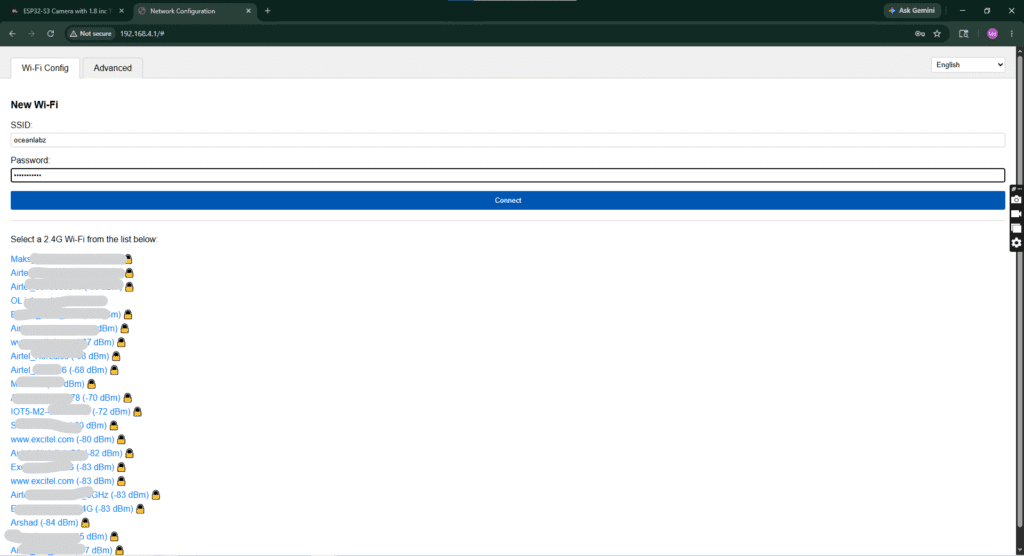
Wi-Fi Configuration
After flashing, the ESP32 creates a hotspot named Xiaozhi-XXXX.
- Connect to this Wi-Fi (no password)
- Open
192.168.4.1in browser - Select your home 2.4GHz Wi-Fi and enter password
- Device will restart and connect to your network
⚠️ ESP32 only supports 2.4GHz networks. Use a data-capable USB cable.
Create Account & Pair
1
Reconnect to your home Wi-Fi (exit the XiaoZhi hotspot).
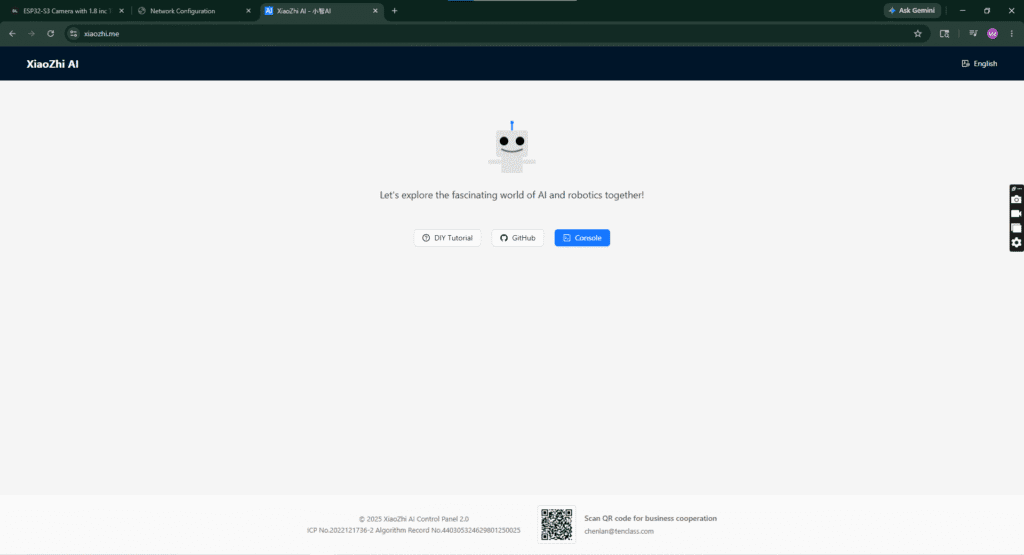
2
Open xiaozhi.me and click on “Console”.
3
Create a free account using Google Sign-Up (fastest method).
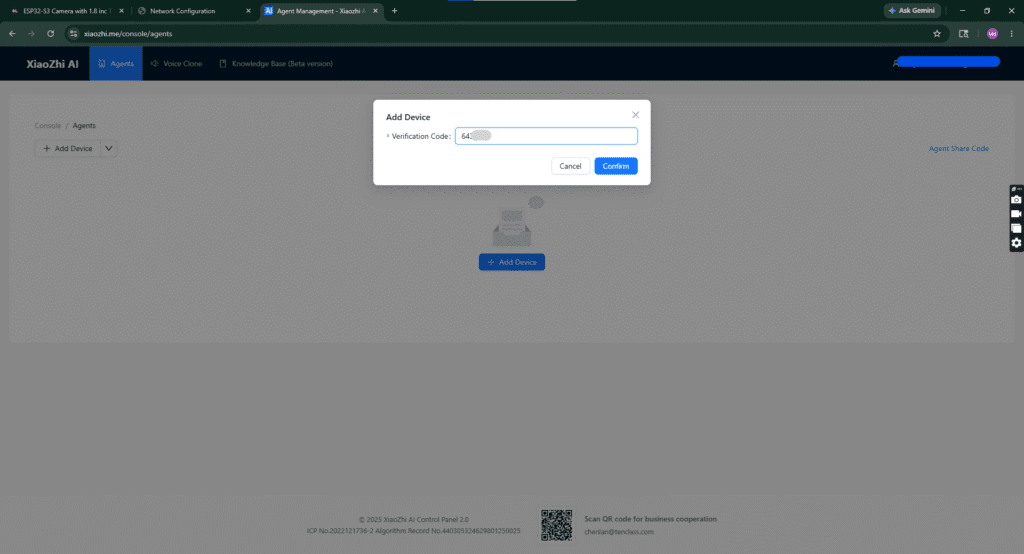
Pair Your ESP32 S3
1
Click “+ Add Device” in the console dashboard.
2
Read the 6-digit code scrolling on the OLED display.
3
Enter the code and click Confirm to link your device.
4
Accept the agreement and click “Start Using”, then select Open Source (Free).
⚠️ The code refreshes quickly — enter it as soon as it appears.
Device Paired Successfully!
Your ESP32 S3 is now connected and visible in the console dashboard.Most Powerful Features & Voice Commands
🔊 Set volume to 50%
☀️ Increase brightness
🌧️ Check weather status
🎵 Play music
😉 Tell me a joke
📊 Get instant AI response
🎤 Press BOOT to activate
Auto-sleep after silence — press BOOT again to wake.