Index
Introduction
Servo motors are precise actuators that rotate to specific angles between 0° and 180°.
With the PWM (Pulse Width Modulation) capability of the ESP32-S3 DevKit-N16R8, you can easily control the servo’s position.
This is ideal for robotics and automated systems where accurate angular movement is required.
Required Components
- ESP32-S3 Board
- Servo Motor
- Jumper wires
- Breadboard
- 5V Power Supply, Battery
Pinout

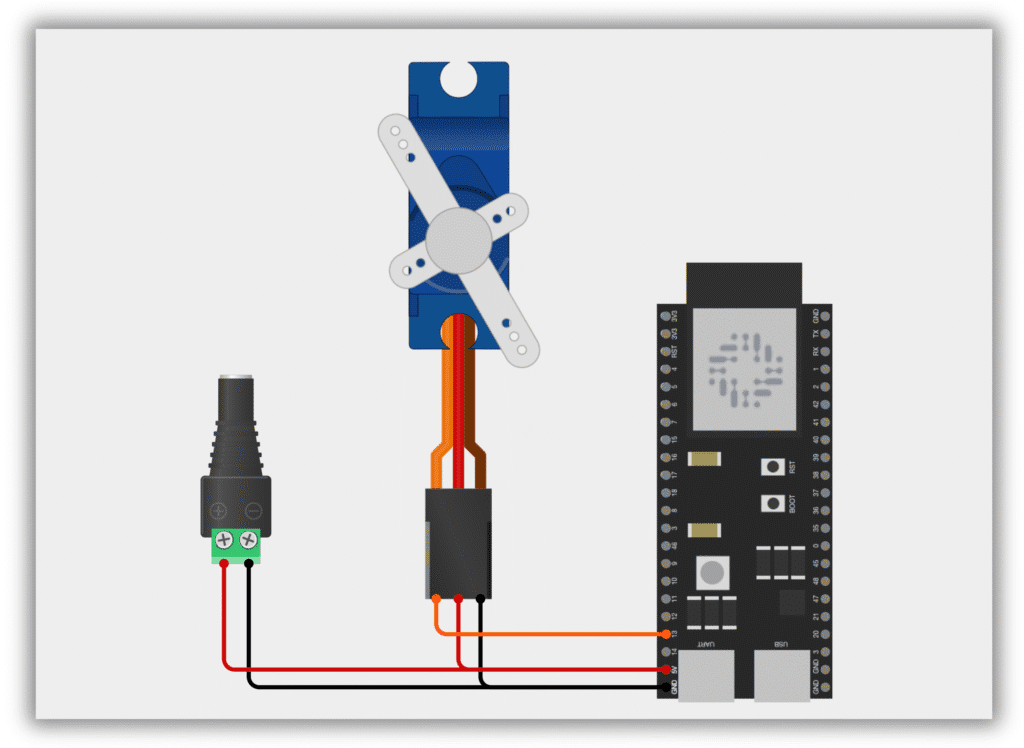
Circuit Diagram / Wiring
- SERVO (5V) → ESP32 5V an external 5V power supply
- SERVO (GND) → ESP32 GND
- SERVO (Signal) → ESP32 GPIO 13
Code / Programming
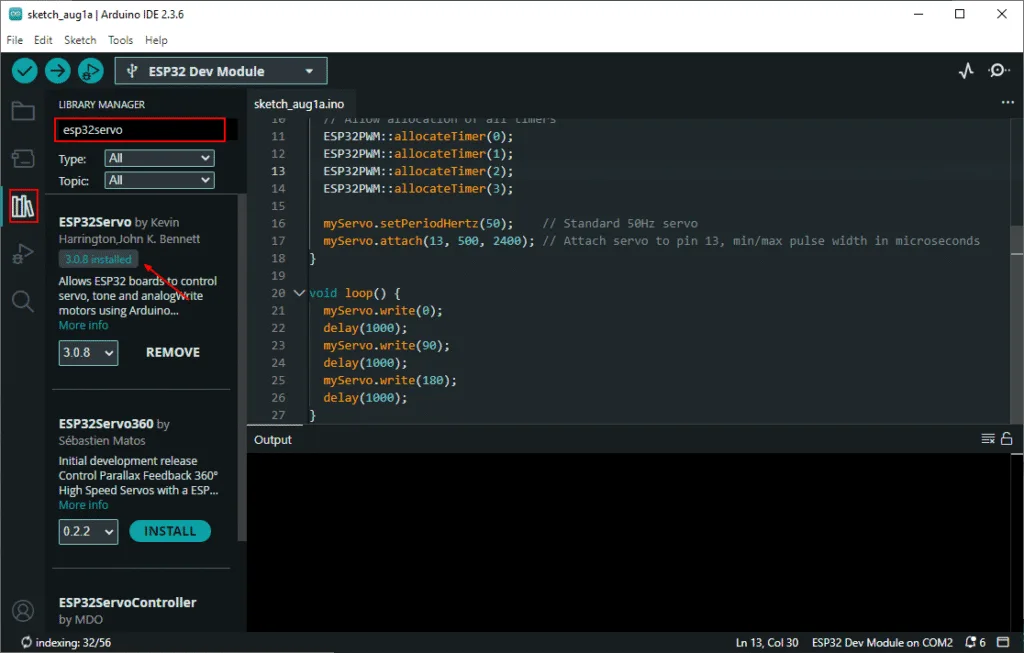
- Install Required Library (via Arduino Library Manager).
- Go to the “Libraries” tab on the left-hand side of the screen.
- Click on the “Library Manager” button (book icon) at the top of the Libraries tab.
- In the Library Manager window, type “ESP32Servo” in the search bar.
- Locate the “ESP32Servo” library click on the “Install” button next to it.
- Wait for the library to be installed, and you’re ready to use the ESP32Servo library in your projects.
/*
Filename: ol_servo_sweep.ino
Description: ESP32-S3 code to control a servo motor by sweeping it to 0°, 90°, and 180° positions with 1-second delay.
Author: www.oceanlabz.in
Modification: 1/4/2025
*/

#include <ESP32Servo.h>

Servo myServo;

void setup() {
  // Allow allocation of all timers
  ESP32PWM::allocateTimer(0);
  ESP32PWM::allocateTimer(1);
  ESP32PWM::allocateTimer(2);
  ESP32PWM::allocateTimer(3);

  myServo.setPeriodHertz(50);    // Standard 50Hz servo
  myServo.attach(13, 500, 2400); // Attach servo to pin 13, min/max pulse width in microseconds
}

void loop() {
  myServo.write(0);
  delay(1000);
  myServo.write(90);
  delay(1000);
  myServo.write(180);
  delay(1000);
}
Explanation
- Optimized for ESP32: Uses the ESP32Servo library specifically designed for better PWM control on ESP32 chips
- Precise PWM Configuration: Sets 50Hz servo frequency and custom pulse widths (500-2400μs) for accurate positioning
- Simple Sweep Control: Moves servo between 0°, 90°, and 180° positions with 1-second delays between movements
Troubleshooting
- Servo Not Moving? Check wiring (power, ground, signal) and ensure power supply provides enough current (5V/1A+)
- Jittery Movement? Add a capacitor (100-1000μF) across servo power pins or use a separate power source
- Incorrect Positions? Calibrate pulse widths in
myServo.attach()(adjust 500,2400 values) for your specific servo model