Introduction
This project demonstrates how to create a smooth RGB color transition using the onboard RGB LED on the ESP32-S3 DevKit-N16R8. The RGB LED is connected to GPIO 48 and controlled using the Adafruit NeoPixel library.
The code cycles through the full HSV color spectrum using ColorHSV() to produce smooth and vibrant transitions. This effect runs continuously, making it perfect for learning color blending, PWM control, and RGB animation on the ESP32-S3.
Note:
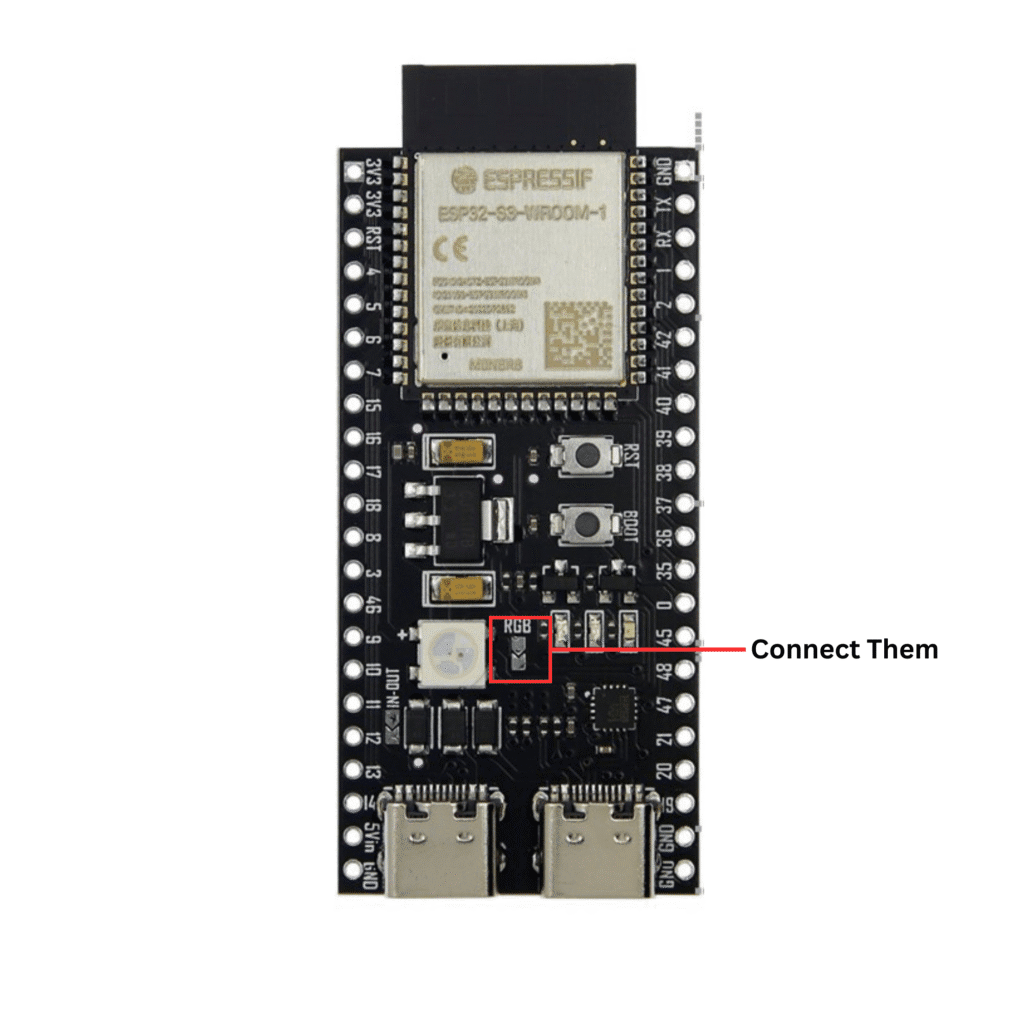
To make the onboard RGB LED work, you’ll need to solder the necessary pads or headers on the board, as shown in the image below. This step ensures proper electrical connection to GPIO 48.
Copy the provided code into Arduino IDE, and upload it to your ESP32-S3 DevKit-N16R8.
/*
Filename: ol_S3_RGB_LED.ino
Description: Smooth color transition using onboard RGB LED (GPIO 48) on ESP32-S3 DevKit-N16R8. Uses Adafruit NeoPixel library to cycle through HSV colors.
Author: www.oceanlabz.in
Modification: 1/4/2025
*/

#include <Adafruit_NeoPixel.h>

#define RGB_PIN     48      // Onboard RGB LED pin
#define NUM_PIXELS  1       // Only one LED

Adafruit_NeoPixel pixel(NUM_PIXELS, RGB_PIN, NEO_GRB + NEO_KHZ800);

void setup() {
  pixel.begin();
  pixel.setBrightness(100); // Adjust brightness (0-255)
  Serial.begin(115200);

}

void loop() {
  static uint16_t hue = 0; // Hue goes from 0 to 65535 for full cycle

  // Convert HSV to RGB and set LED color
  uint32_t color = pixel.gamma32(pixel.ColorHSV(hue));
  pixel.setPixelColor(0, color);
  pixel.show();

  hue += 256; // Smooth step (smaller = slower transition)
  delay(20);  // Adjust speed of transition
  Serial.println("Hello Everyone!");
}
After uploading the code, you can see the onboard RGB LED smoothly transitioning through different colors, while “Hello Everyone!” is printed repeatedly on the Serial Monitor.