Index
Introduction
The OLED (Organic Light Emitting Diode) display module is an efficient and vibrant screen choice for ESP32-S3 projects.
It offers superior contrast, wide viewing angles, and fast response times compared to traditional displays.
This tutorial will guide you through connecting the OLED display to an ESP32-S3 and writing code to display text and graphics.
Get ready to enhance your projects with this powerful visual output tool!
Required Components
- ESP32-S3 Board
- OLED Display
- Jumper Wires
- Breadboard (optional)
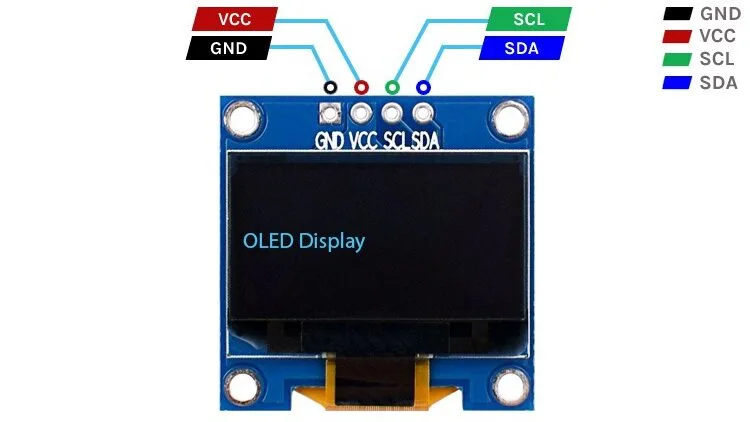
Pinout
- OLED Display
- GND: Ground pin
- VCC: Power supply pin (3.3V to 5V)
- SCL: Serial Clock pin for I2C communication
- SDA: Serial Data pin for I2C communication
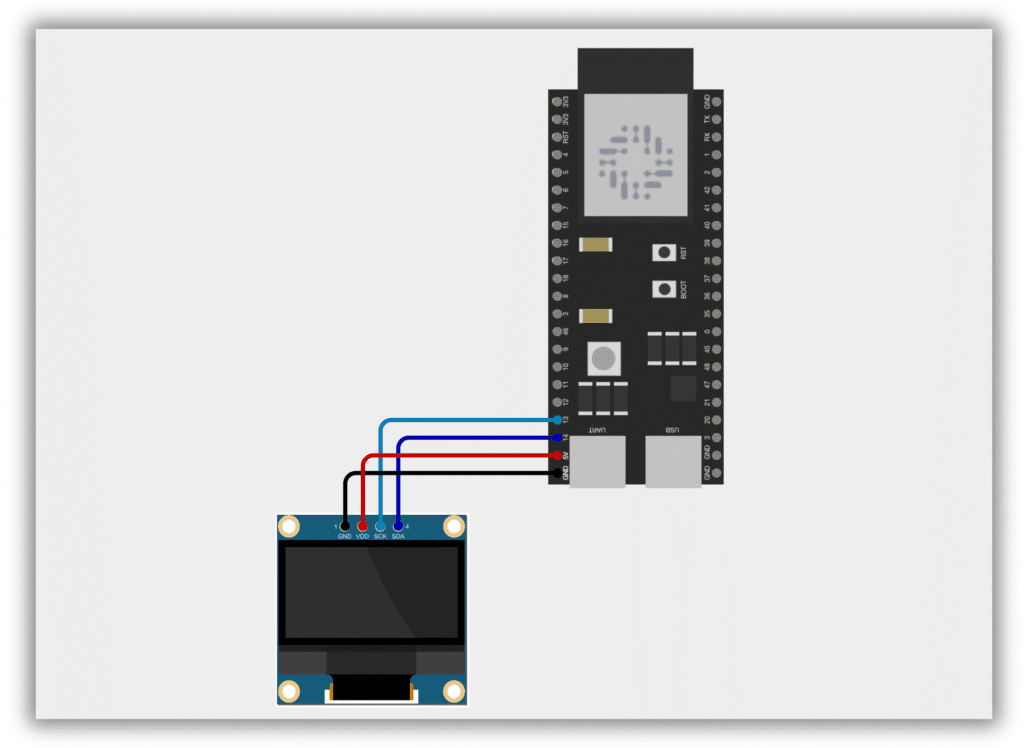
Circuit Diagram / Wiring
- OLED VCC → 3.3V, 5V (ESP32-S3)
- OLED GND → GND (ESP32-S3)
- OLED SDA → Pin 14 (ESP32-S3)
- OLED SCK → Pin 13 (ESP32-S3)
Code / Programming
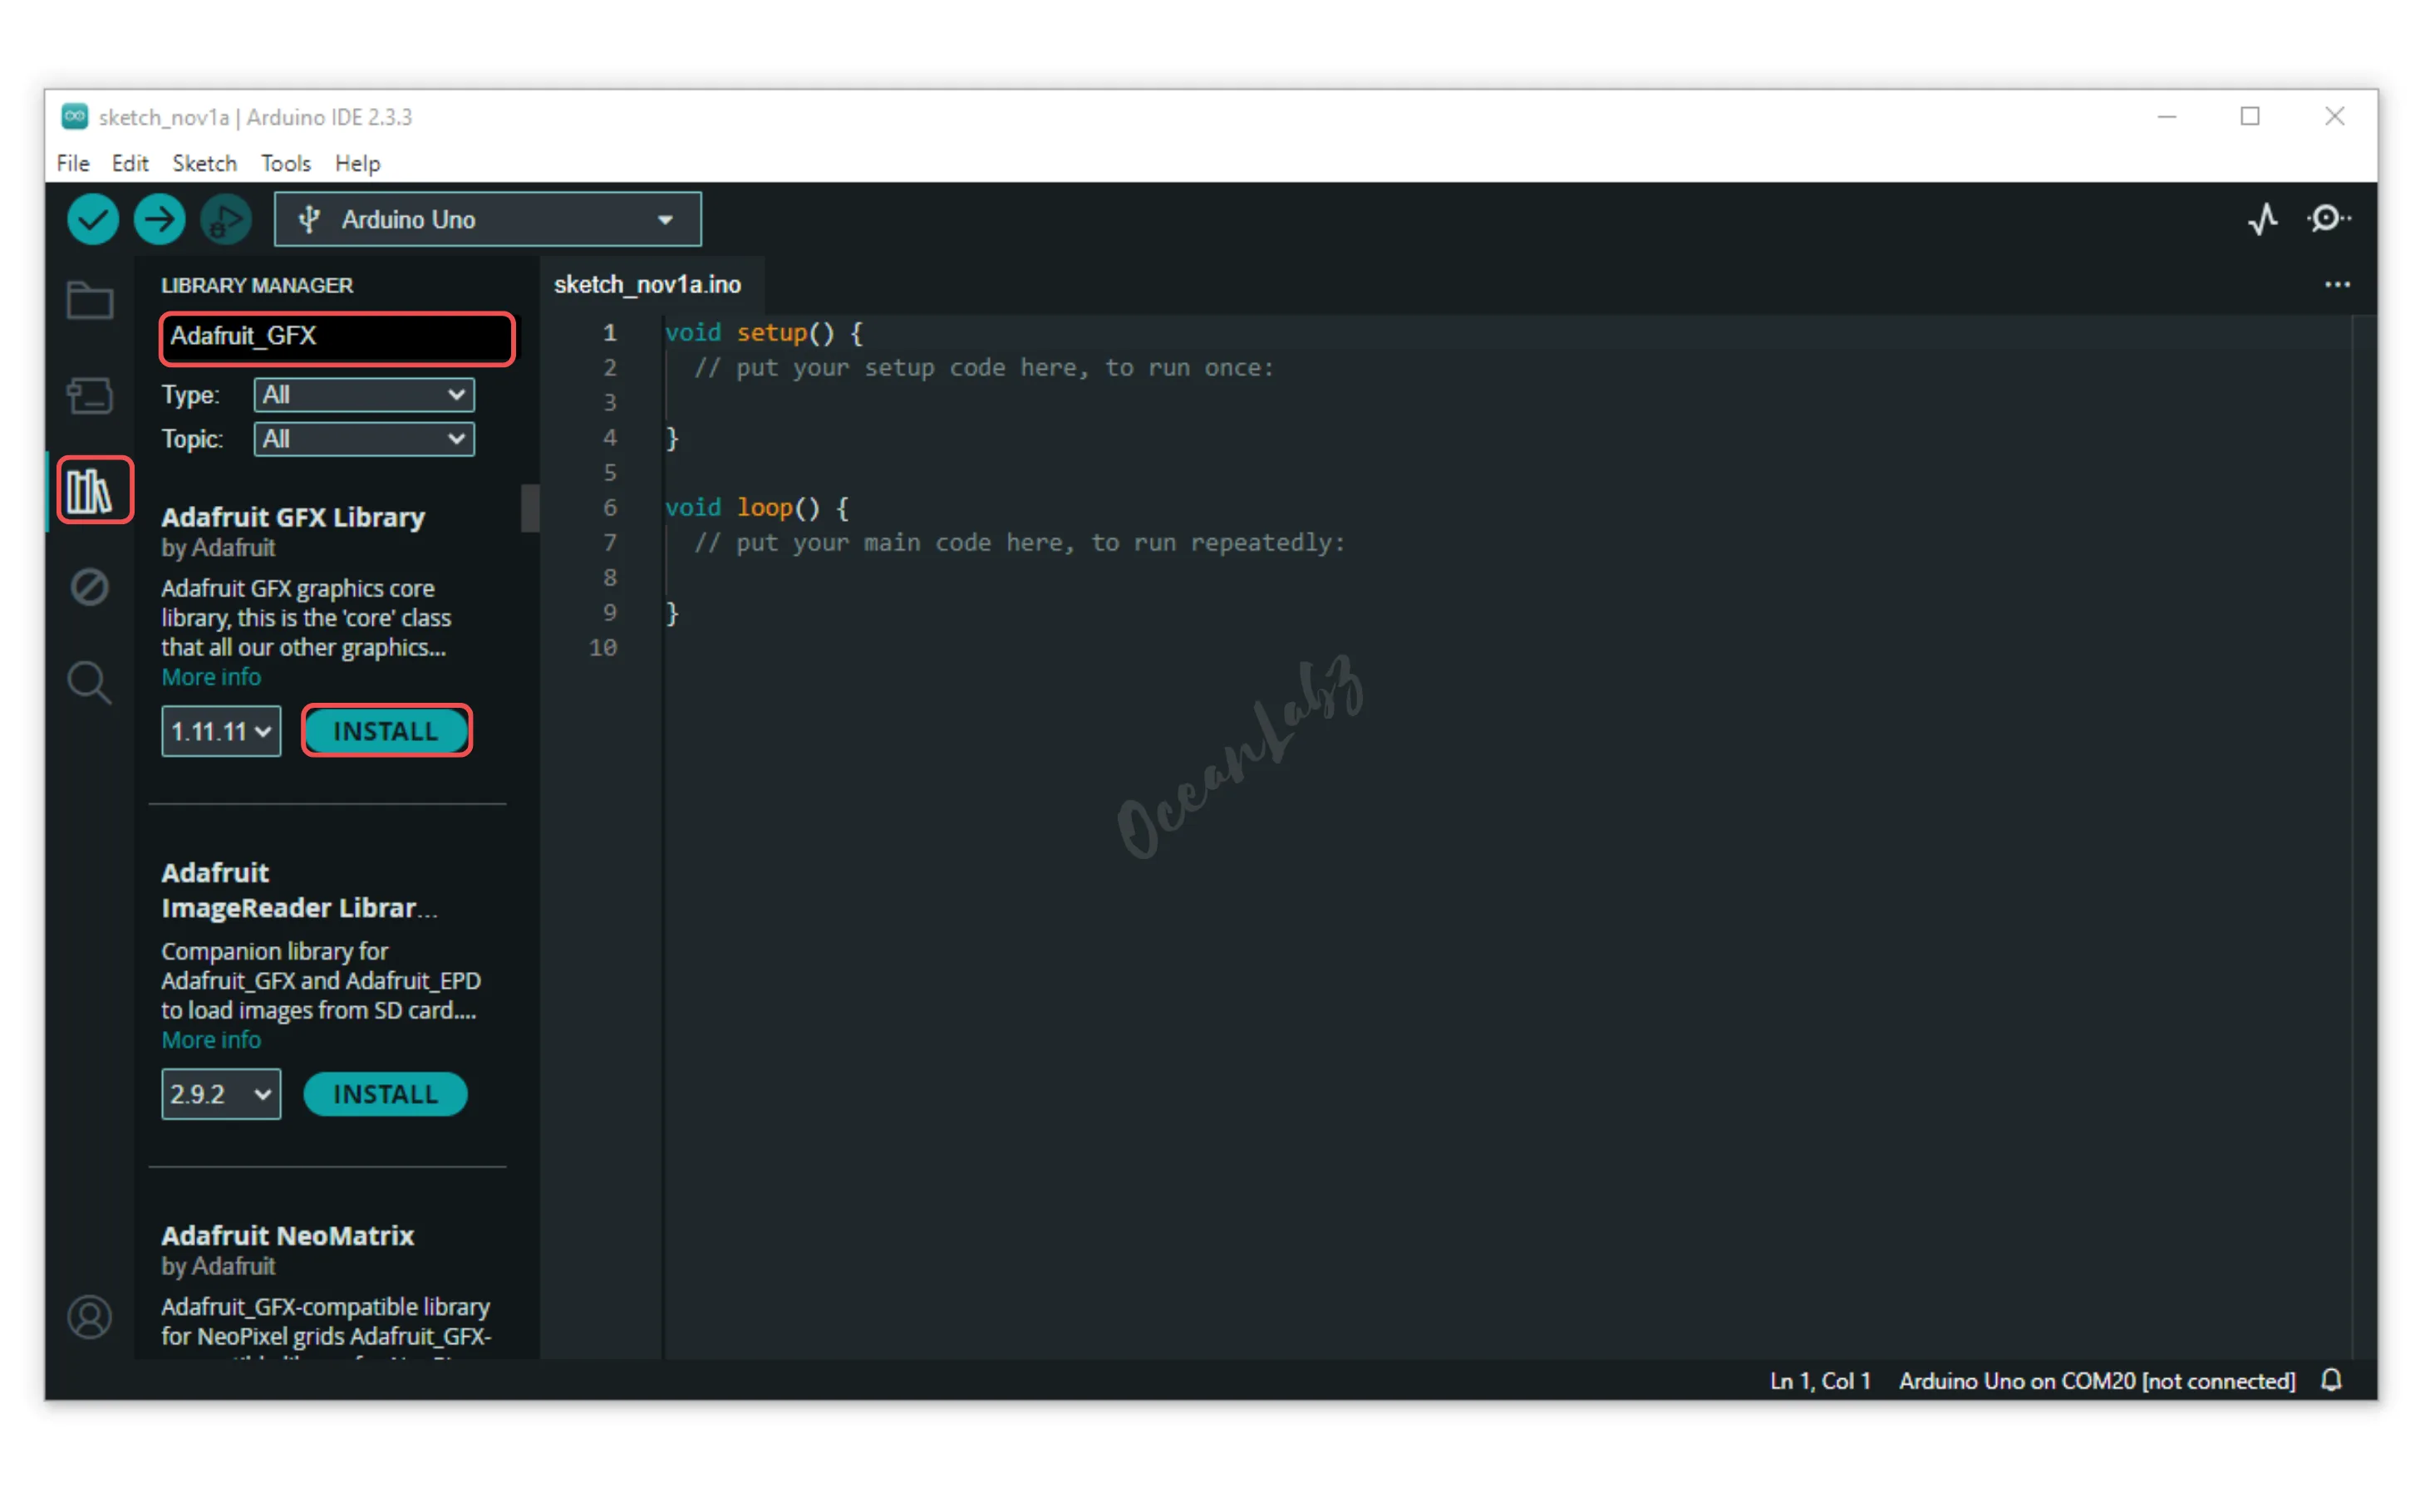
- Install Required Libraries (via Arduino Library Manager).
- Go to the “Libraries” tab on the left-hand side of the screen.
- Click on the “Library Manager” button (book icon) at the top of the Libraries tab.
- In the Library Manager window, type “Adafruit GFX” in the search bar, locate the library, and click on the “Install” button next to it.
- Repeat the process for “Adafruit SSD1306” to install the SSD1306 library.
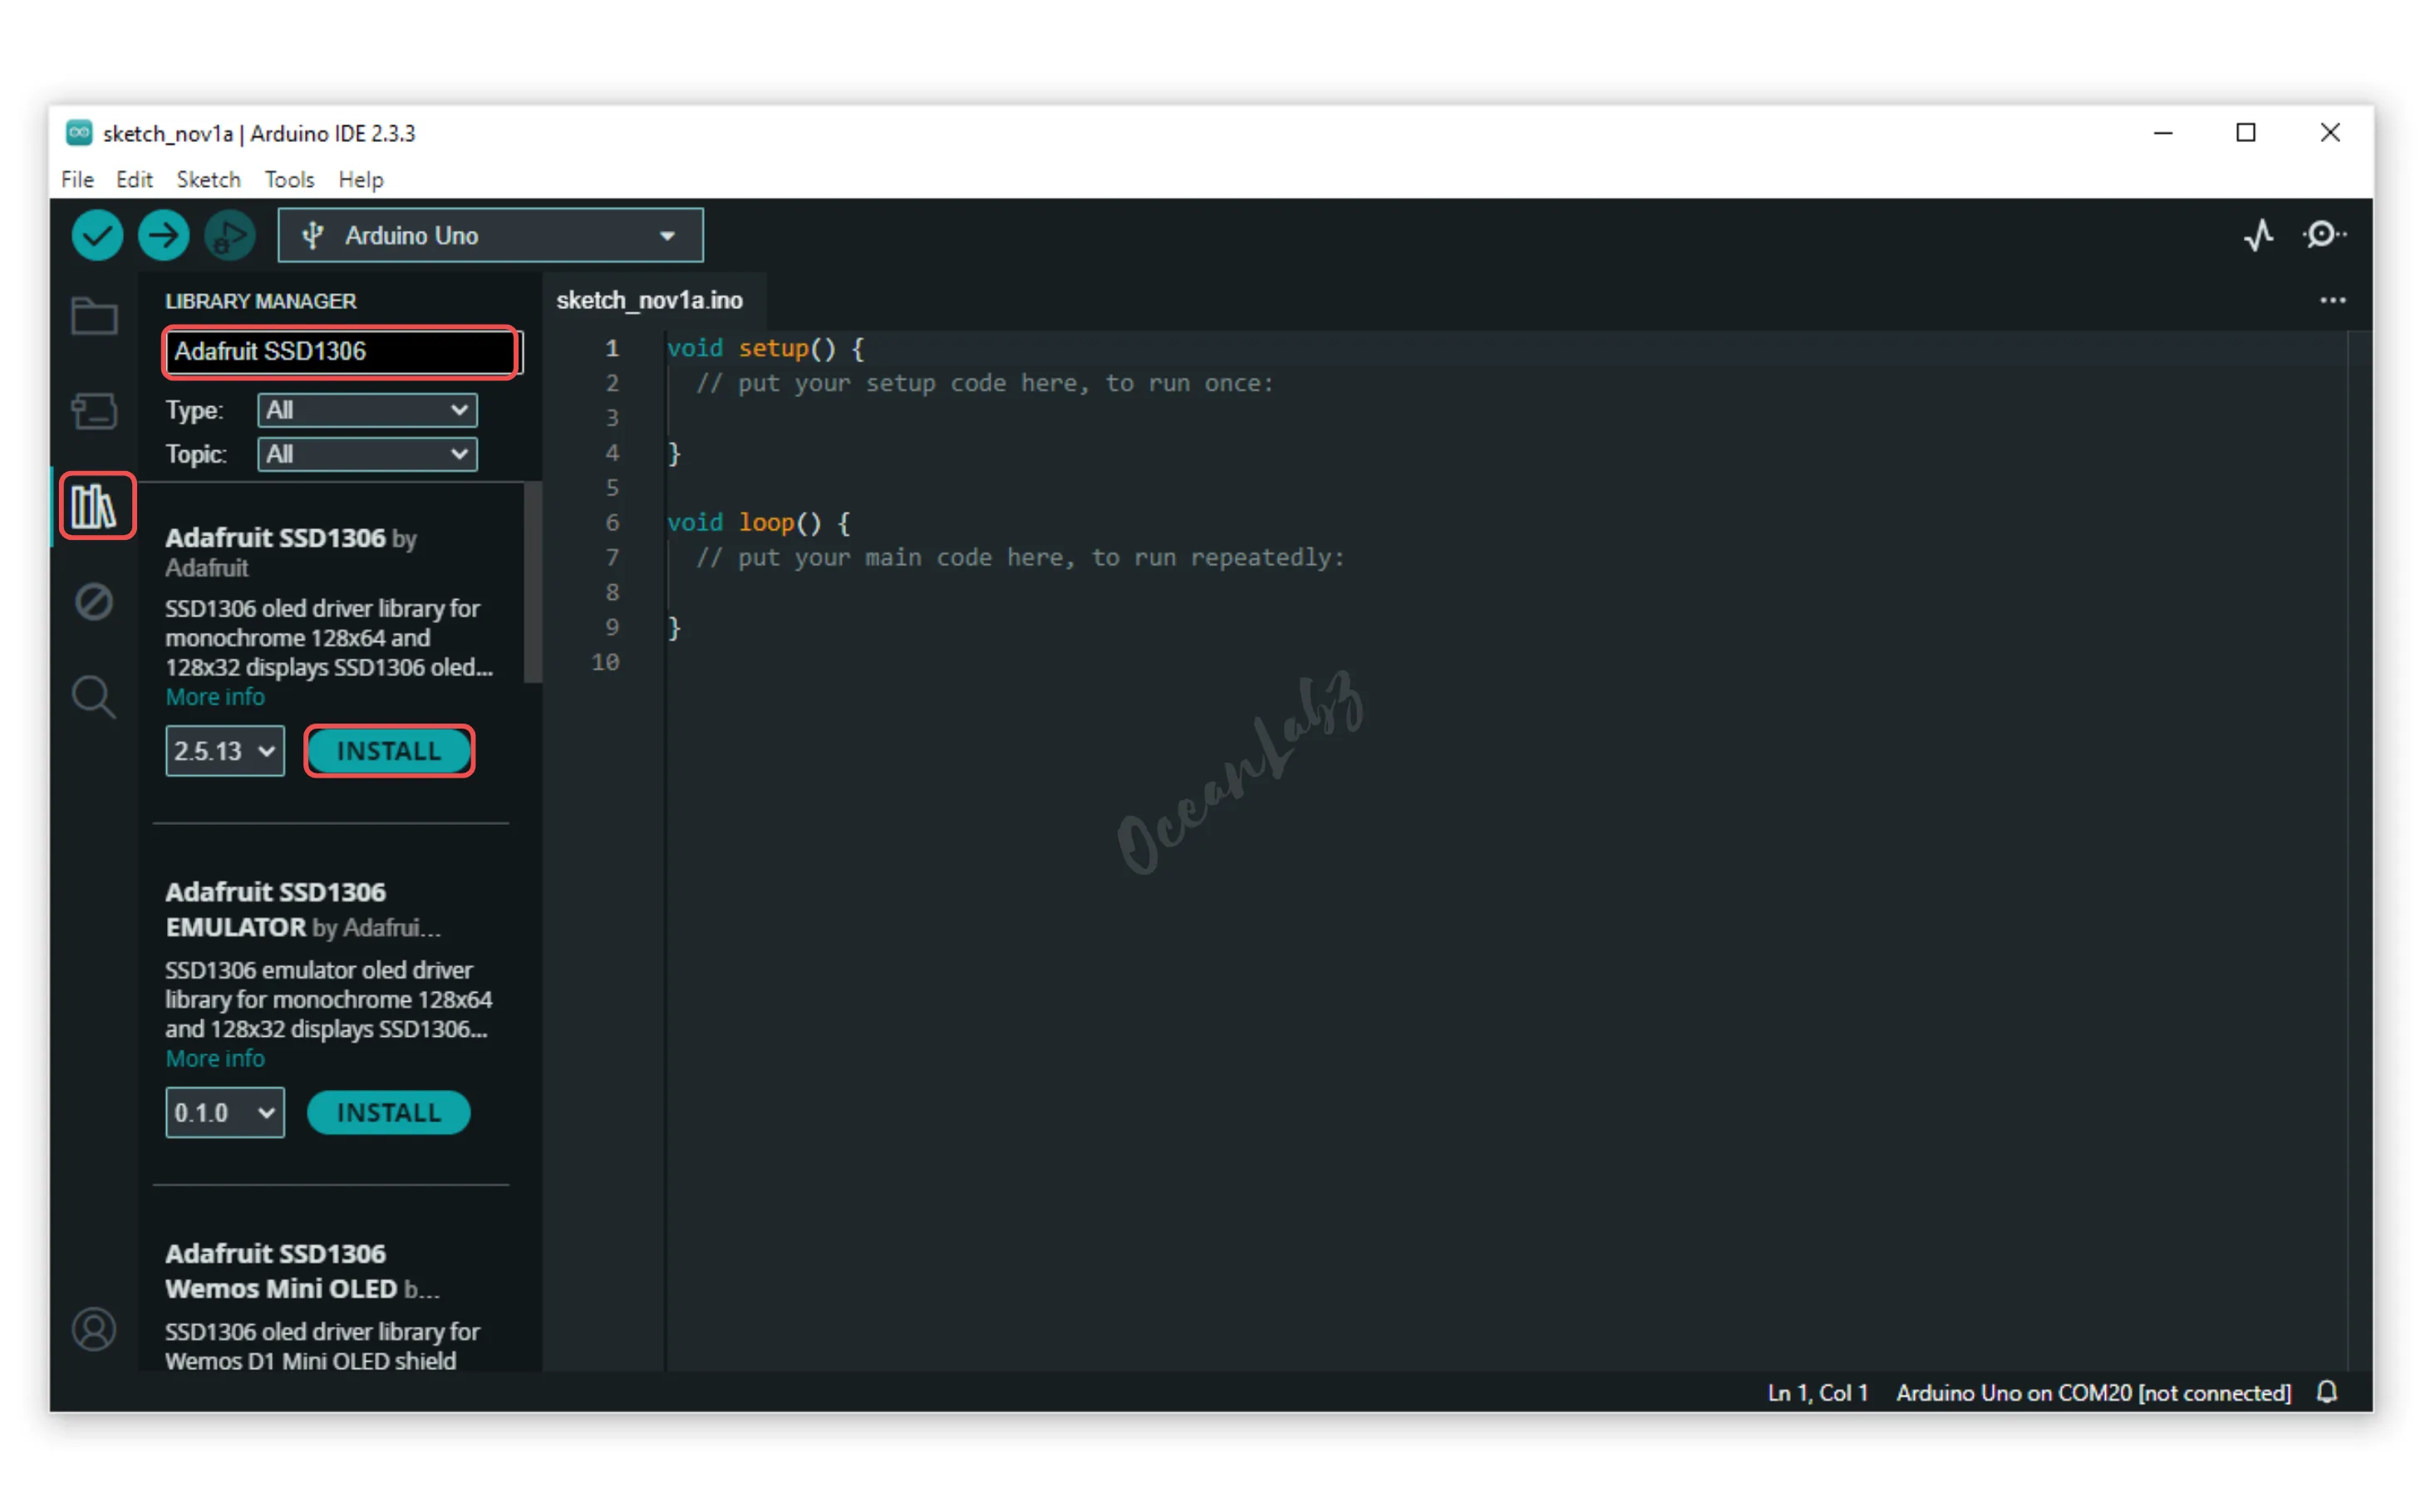
The Wire library is included by default, so no installation is needed.
- Copy the provided code into your Arduino IDE.
/*
  Filename: ESP32-S3_oled_typewriter.ino
  Description: Displays "OceanLabz" on OLED with typewriter animation using ESP32-S3
  Author: www.oceanlabz.in
  Modification: 1/4/2025
*/


#include <Wire.h>
#include <Adafruit_GFX.h>
#include <Adafruit_SSD1306.h>

// Define screen dimensions
#define SCREEN_WIDTH 128
#define SCREEN_HEIGHT 64

// Define I2C pins for ESP32-S3(modify if needed)
#define OLED_SDA 14
#define OLED_SCL 13

// Create display object with custom I2C
Adafruit_SSD1306 display(SCREEN_WIDTH, SCREEN_HEIGHT, &Wire, -1);

void setup() {
  Serial.begin(115200);

  // Start I2C on custom pins (for ESP32-S3)
  Wire.begin(OLED_SDA, OLED_SCL);

  // Initialize the OLED display
  if (!display.begin(SSD1306_SWITCHCAPVCC, 0x3C)) {
    Serial.println(F("SSD1306 initialization failed"));
    while (true);  // Stop execution if display fails to initialize
  }

  display.clearDisplay();
  display.display();

  display.setTextSize(2);
  display.setTextColor(SSD1306_WHITE);
}

void loop() {
  display.clearDisplay();
  display.setCursor(0, 20);

  const char* text = "OceanLabz";

  // Typewriter animation
  for (int i = 0; i < strlen(text); i++) {
    display.print(text[i]);
    display.display();
    delay(200);
  }

  delay(2000);

  display.clearDisplay();
  display.display();
  delay(500);
}
Explanation
- The OLED display uses the I2C protocol and connects to the ESP32-S3 via SDA (GPIO14) and SCL (GPIO13).
- The
Adafruit_SSD1306andAdafruit_GFXlibraries allow you to easily display text, graphics, and animations. - This project shows a typewriter-style animation to print text character by character on the OLED screen.
Troubleshooting
- If the screen stays blank, check if the I2C address is 0x3C, and confirm wiring to SDA/SCL pins.
- Make sure you install both libraries:
Adafruit SSD1306andAdafruit GFXfrom Library Manager. - Use a logic level-compatible OLED (3.3V or 5V), and verify I2C is working by scanning with an I2C scanner sketch.

