Index
Introduction
In this tutorial, we are using a pulse sensor with ESP32-S3 to measure heart rate.
The sensor detects blood flow changes in the fingertip using infrared light.
The ESP32-S3 reads the analog signal and processes it to determine real-time heartbeats.
It’s commonly used in DIY health monitors and wearable fitness projects.
Required Components
- ESP32-S3 Board
- Pulse Sensor
- Jumper wires
- Breadboard
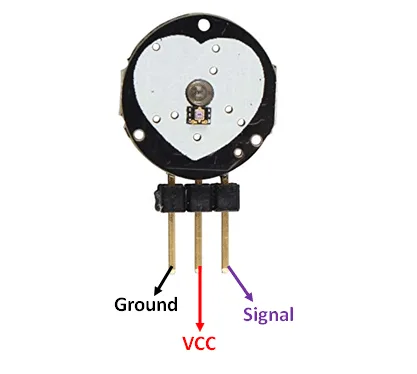
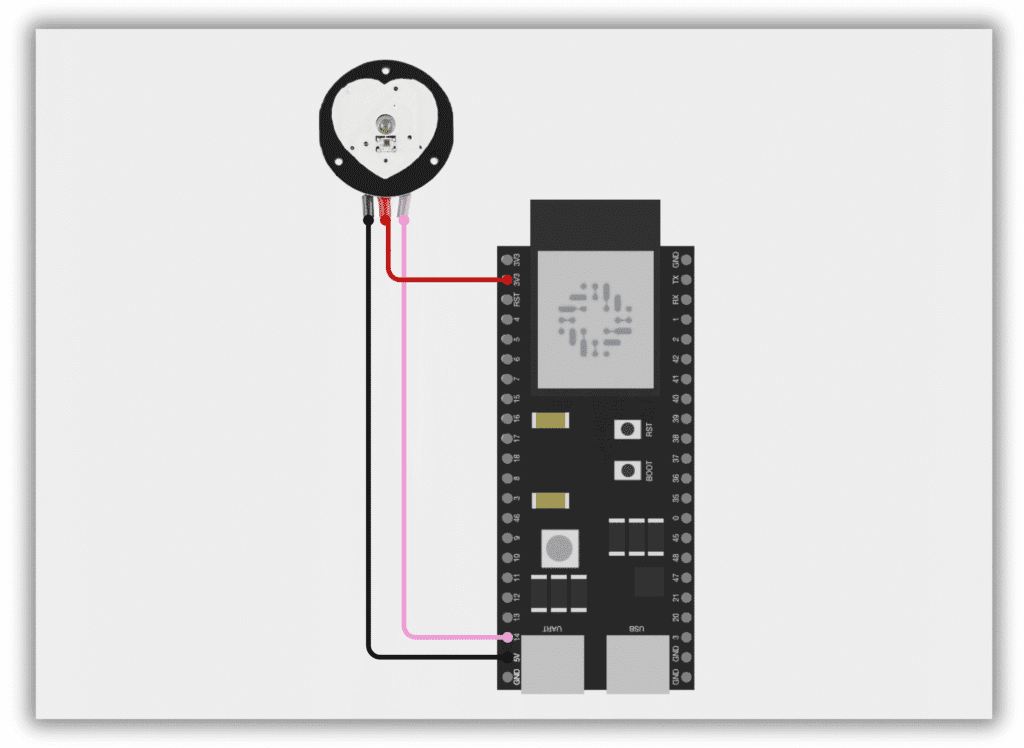
Pinout
Circuit Diagram / Wiring
- Pulse Sensor VCC → 3.3V (ESP32-S3)
- Pulse Sensor GND → GND (ESP32-S3)
- Pulse Sensor Signal → 14 (ESP32-S3)
Code / Programming
/*
  Filename: ESP32-S3_pulse_sensor_read.ino
  Description: Reads analog pulse signal from a pulse sensor using ESP32-S3 and prints to Serial Monitor.
  Author: www.oceanlabz.in
  Modification: 1/4/2025
*/


const int pulsePin = 14; // Pulse sensor connected to GPIO34 (ADC1)
int signal = 0;          // Variable to store pulse value

void setup() {
  Serial.begin(115200); // Use higher baud rate for ESP32-S3
  Serial.println("Pulse Sensor Initialized");
}

void loop() {
  signal = analogRead(pulsePin);   // Read analog signal from pulse sensor
  Serial.println(signal);          // Print pulse value to Serial Monitor
  delay(10);                       // Small delay for stable reading
}
Explanation
- The pulse sensor detects blood flow changes in your fingertip using infrared light.
- The ESP32-S3 reads this data via analog input (e.g., GPIO14) to monitor real-time heart activity.
- The signal can be visualized using the Serial Plotter to identify heartbeats clearly.
Troubleshooting
- If you get flat or noisy readings, ensure firm, stable finger contact and avoid movement.
- If the Serial Monitor shows zero or static values, check wiring and sensor orientation.