Index
Learn how to permanently resolve the “Fatal Error Occurred: Failed to connect to ESP32: Timed out waiting for packet header” issue when uploading code to your ESP32 board. Follow the steps in this guide to ensure a smooth and reliable upload process.
![[SOLVED] Failed to connect to ESP32: Timed out waiting for packet header](https://i0.wp.com/randomnerdtutorials.com/wp-content/uploads/2019/02/esp32-waiting-for-packet-header-featured.jpg?resize=828%2C466&quality=100&strip=all&ssl=1)
Why are you getting this error?
Some ESP32 development boards (see [Best ESP32 boards]) don’t automatically enter flashing/uploading mode when uploading new code. If you’re experiencing this issue, follow the troubleshooting steps in this guide.
If your ESP32 doesn’t enter flashing/uploading mode automatically, the Arduino IDE will fail to connect, resulting in the following error message:

Holding the BOOT/FLASH button
One way to solve this issue is by holding down the “BOOT/FLASH” button on your ESP32 board while uploading a new sketch. However, doing this every time can be tedious, especially when testing and debugging your code.
Fortunately, you can fix this permanently, eliminating the need to manually press the “BOOT/FLASH” button every time you upload code.
How to fix the Error?
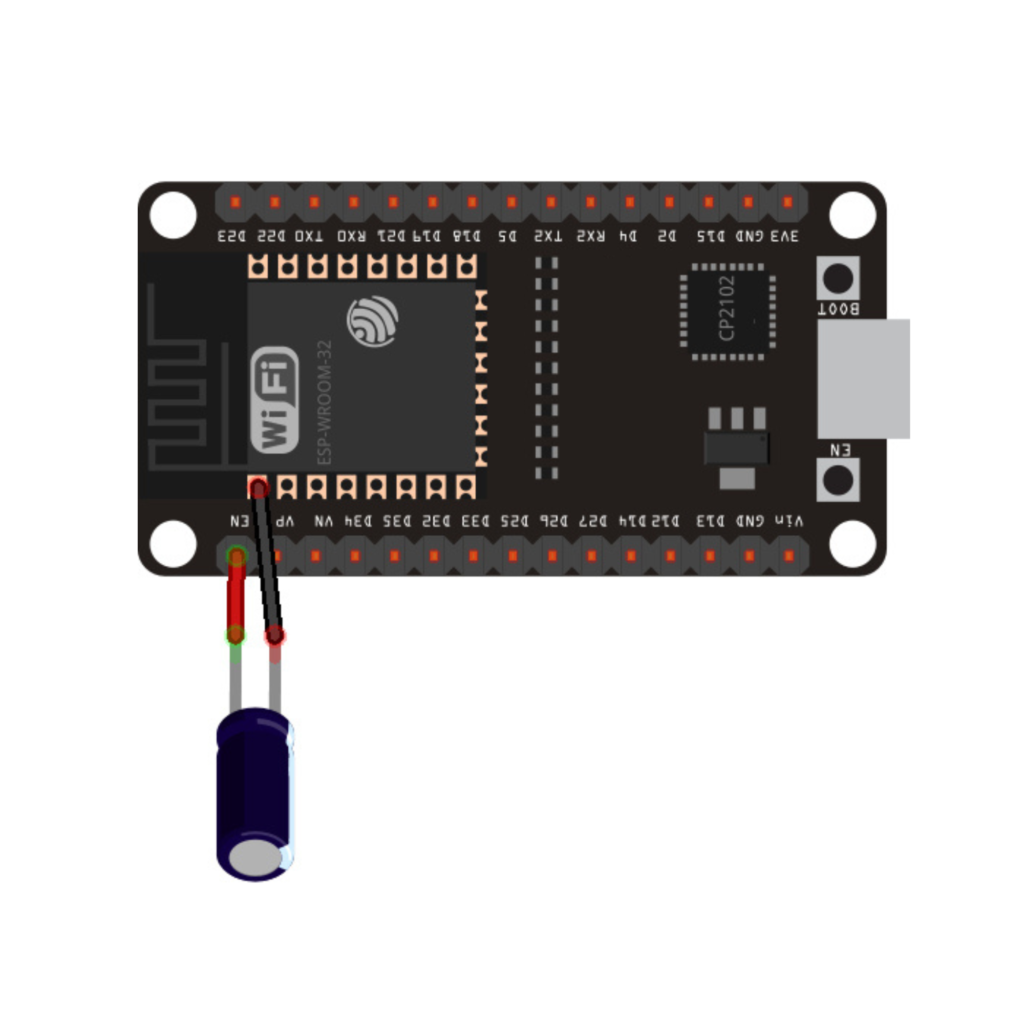
To make your ESP32 board enter flashing/uploading mode automatically, connect a 10 µF electrolytic capacitor between the EN pin and GND. This simple modification eliminates the need to manually press the BOOT/FLASH button during uploads.
You may want to test this setup first on a breadboard to make sure it works for your ESP32 development board.

Note: electrolytic capacitors have polarity. The white/grey stripe indicates the negative lead.
If it works, then you can solder the 10 uF electrolytic capacitor to the board. Since the EN and GND pins are far apart from each other, you can simply connect the capacitor between the EN and the GND of the ESP32 chip as shown in the schematic diagram below:
Recommended: ESP32 Pinout Reference: Which GPIO pins should you use?
The following figure shows how my ESP32 looks like after soldering the capacitor. It doesn’t occupy much space, and fortunately you won’t get more trouble connecting to the ESP32 when uploading new code.

Before trying to upload a new code, you should check the connections with a multimeter in continuity mode – check that you haven’t inadvertently solder anything to the next pin.

If everything is soldered properly, you won’t need to press the BOOT button when uploading new code. You also won’t get the Fatal Error Occurred: “Failed to connect to ESP32: Timed out waiting for packet header”.