Index

What is ESP32 WebSerial?
Normally, to see Serial Monitor output (like Serial.println()),
you need a USB cable connected between your ESP32 and your computer.
But with WebSerial, you can:
- See Serial Monitor messages directly on a webpage (wireless!)
- Send messages from browser to ESP32
- No USB cable needed after setup — just Wi-Fi!
This is super useful when your ESP32 is installed far away, inside a machine, or deployed somewhere.
Why Use WebSerial?
- Debug wirelessly without physical connection.
- View ESP32 logs from any device (phone, laptop, tablet).
- Send simple commands to ESP32 from a browser.
- Faster and more flexible testing.
What You Need
- ESP32 Development Board
- Arduino IDE (latest version)
Arduino Code
Install Libraries
- Go to the “Libraries” tab on the left side (or click
Tools > Manage Libraries). - Click the “Library Manager” button (book icon).
- In the Library Manager window, type the name of the library in the search bar.
- Find the correct library (
ESPAsyncWebServer,AsyncTCP,WebSerial.).
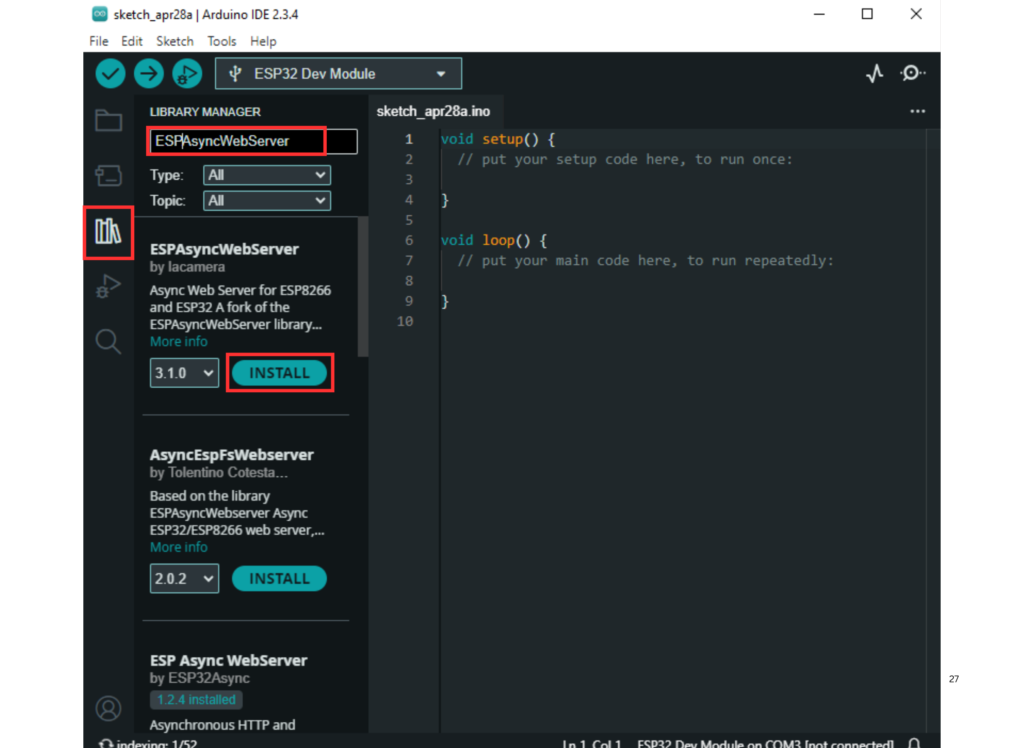
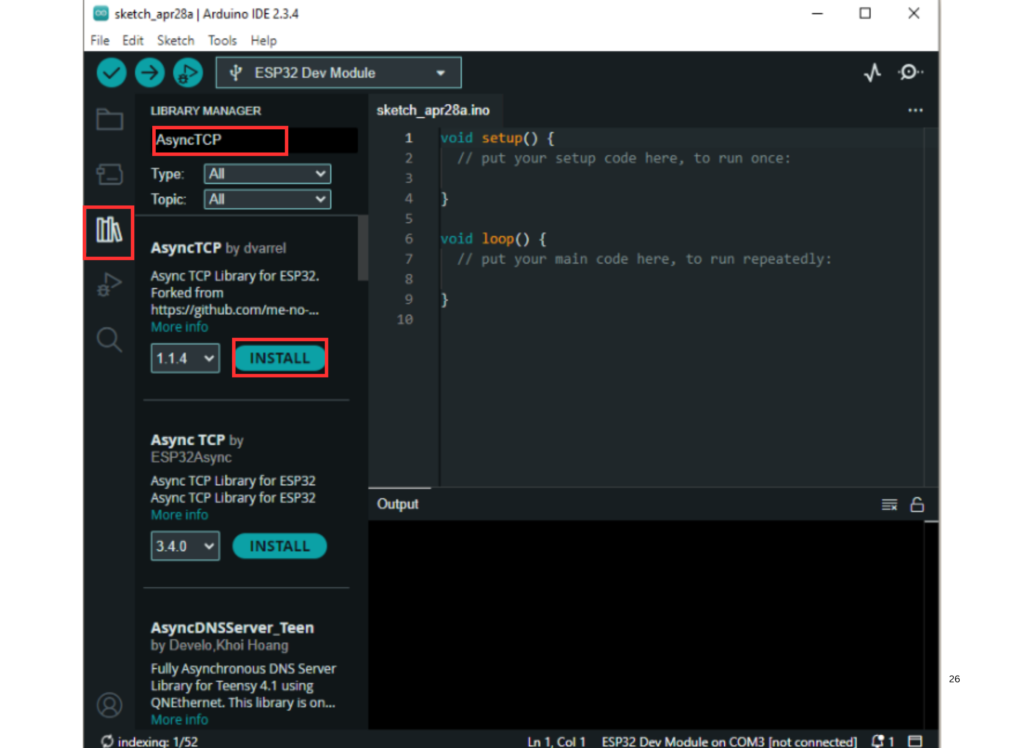

- Click on the “Install” button next to it.
- Wait for the installation to complete — and you’re ready to use the library in your code!
#include <WiFi.h>
#include <AsyncTCP.h>
#include <ESPAsyncWebServer.h>
#include <WebSerial.h>

const char* ssid = "YOUR_SSID";      // Your Wi-Fi name
const char* password = "YOUR_PASS";  // Your Wi-Fi password

AsyncWebServer server(80);

// This function will be called when data is received from the browser
void recvMsg(uint8_t *data, size_t len){
  String msg;
  for (size_t i = 0; i < len; i++) {
    msg += (char)data[i];
  }
  Serial.print("Received: ");
  Serial.println(msg);
}

void setup() {
  Serial.begin(115200);

  WiFi.begin(ssid, password);
  Serial.println("Connecting to WiFi...");

  while (WiFi.status() != WL_CONNECTED) {
    delay(500);
    Serial.print(".");
  }

  Serial.println("\nConnected to WiFi.");
  Serial.print("IP Address: ");
  Serial.println(WiFi.localIP());

  WebSerial.begin(&server);
  WebSerial.msgCallback(recvMsg);

  server.begin();

  // Send some test messages
  WebSerial.println("Welcome to ESP32 WebSerial Monitor!");
  WebSerial.println("Send something from your browser!");
}

void loop() {
  // You can send periodic updates here if you want
  delay(10000);
  WebSerial.println("ESP32 is running...");
}
How to Use This WebSerial Project
1. Upload the code
- Enter your real Wi-Fi SSID and password in the code.
- Upload it to your ESP32 using Arduino IDE.
2. Connect to ESP32
- Open Serial Monitor (baud rate 115200) and wait.
- You will see the IP address printed, for example:
Connected to WiFi.
IP Address: 192.168.1.123
3. Open Browser
- Open Chrome / Firefox / Edge on your phone or laptop.
- Type in the IP address followed by
/webserial, like:
http://192.168.1.123/webserial
- Press Enter.
4. Welcome to WebSerial Page!
- You will see the WebSerial page.
- It will show ESP32’s printed messages in real-time.
- You can type messages in the text box and send them to ESP32!
Your WebSerial Page Looks Like
Extra Features You Can Add
| Feature | How to do it |
|---|---|
| Custom HTML Page | Modify the WebSerial page HTML and CSS |
| Password Protection | Use HTTP Basic Authentication to protect the WebSerial page |
| JSON Commands | Parse incoming messages as JSON to control ESP32 functions |
| OTA (Over-the-Air) Updates | Combine WebSerial with OTA firmware updates wirelessly |
| Debug Multiple Devices | Run different ESP32s on different IP addresses |
Important Points to Remember
- ESP32 and your phone/computer must be on the same Wi-Fi network.
- Some browsers cache old pages — refresh if you don’t see updates.
- WebSerial library works better on modern browsers like Chrome or Firefox.
- Too much heavy serial printing (without delay) might cause Wi-Fi disconnection.
Summary
- ESP32 WebSerial lets you monitor and control your ESP32 remotely over Wi-Fi
- No more USB cables or physical connections needed
- Very easy to set up and use for beginners
- Opens up advanced wireless debugging possibilities