Index
Introduction
In this guide, you’ll learn how to set up the ESP32‑CAM (OV2640) for live video streaming, face detection, and face recognition using the Arduino IDE
Requirements
- ESP32‑CAM board
- FTDI USB‑to‑TTL programmer or ESP32 CAM MB
- jumper wires
- Wi‑Fi network
- Breadboard (Optional)
Using the FTDI Adapter
If you choose to use an FTDI adapter, here are the steps to connect it to the ESP32-CAM module.
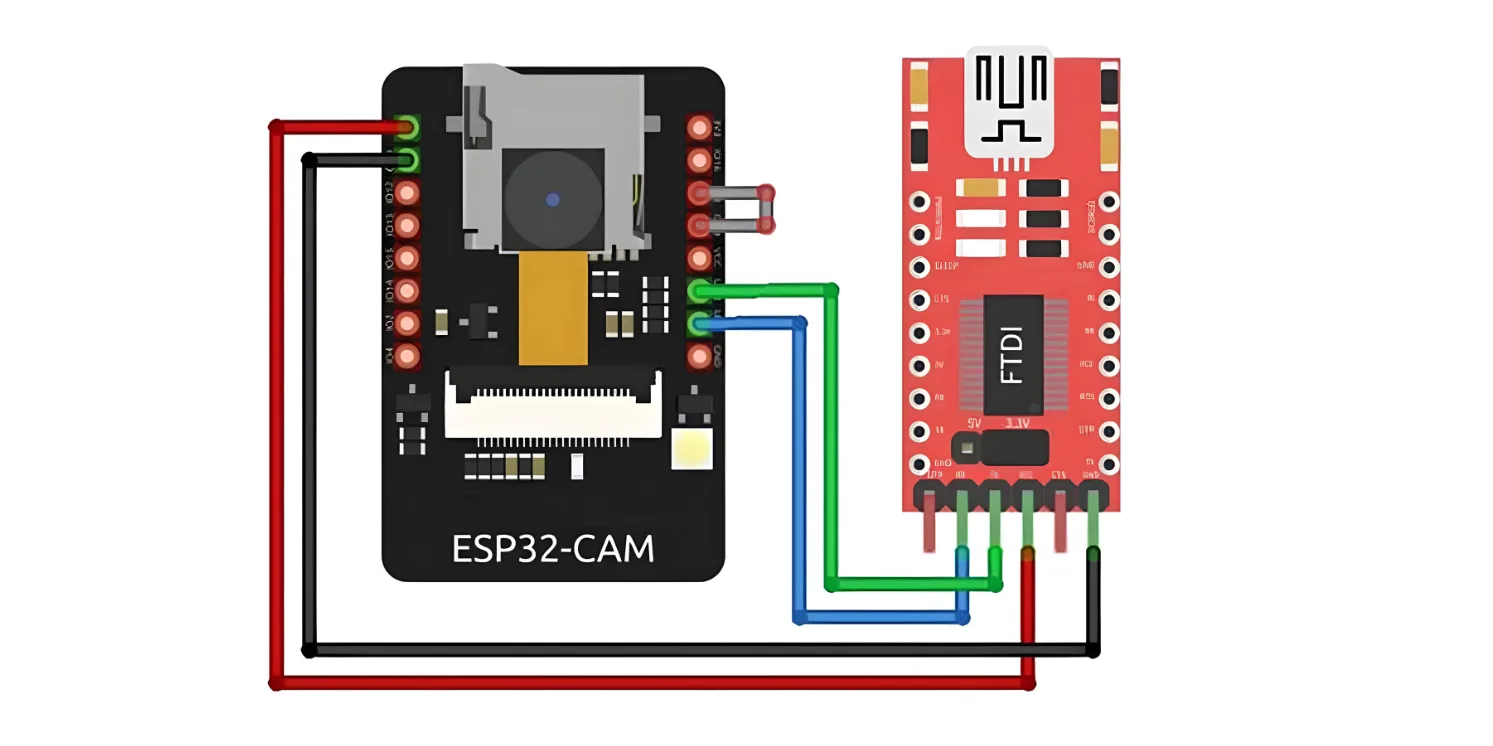
Many FTDI programmers feature a jumper to select between 3.3V and 5V. Since we are powering the ESP32-CAM with 5V, ensure the jumper is set to 5V.
| Note that the GPIO 0 pin must be connected to Ground during programming. This connection is required only while uploading code to the ESP32-CAM. After programming, you need to disconnect this connection. |
| Remember, you’ll need to reconnect GPIO 0 to Ground each time you upload a new sketch. |
Using the ESP32-CAM-MB Adapter (Recommended)
Programming the ESP32-CAM with an FTDI Adapter can be cumbersome. Therefore, many vendors now offer the ESP32-CAM board with an additional small daughterboard known as the ESP32-CAM-MB.
To program your ESP32-CAM, simply stack it onto the daughterboard, connect a micro USB cable, and click the Upload button. It’s as easy as that.
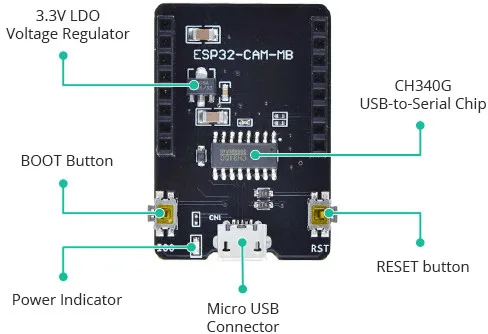
The standout feature of this board is the CH340G USB-to-Serial converter, which handles data transfer between your computer and the ESP32-CAM. Additionally, it includes a RESET button, a BOOT button, a power indicator LED, and a voltage regulator to provide ample power to the ESP32-CAM.
Setting Up the Arduino IDE
Installing the ESP32 Board
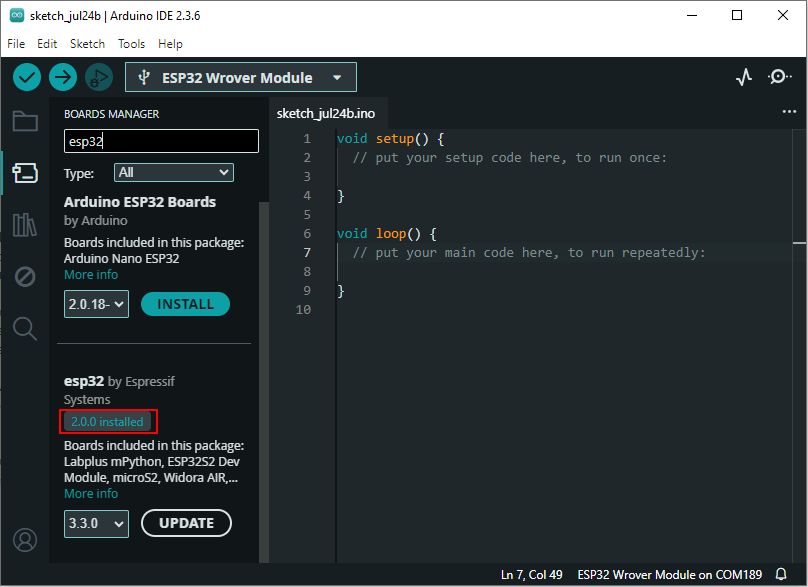
To use the ESP32-CAM, or any ESP32, with the Arduino IDE, you must first install the ESP32 board package (also known as the ESP32 Arduino Core) through the Arduino Board Manager.
If you haven’t already, follow this tutorial to install the ESP32 board
Selecting the Board and Port
| Note: For face recognition to work correctly, please install ESP32 Board Version 2.0.0 in the Arduino IDE. |
| Important: Unfortunately, the latest version of the example no longer covers face detection and recognition. |
Open Example
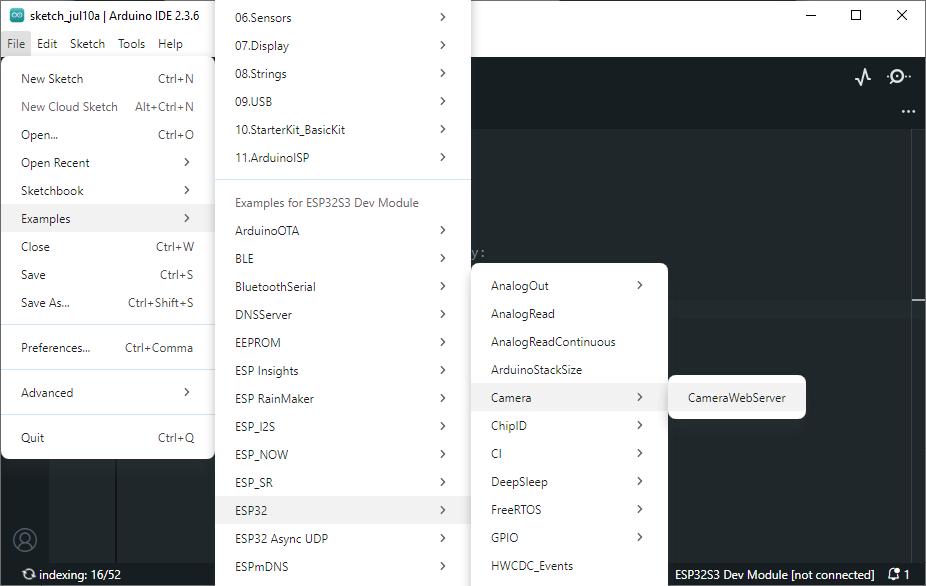
- Navigate to File → Examples → ESP32 → Camera → CameraWebServer.
Before uploading the code, you need to insert your network credentials in the following variables:
const char* ssid = "********";
const char* password = "********";
Then comment all the other models and uncomment the CAMERA_MODEL_AI_THINKER:
// Select camera model
//#define CAMERA_MODEL_WROVER_KIT
//#define CAMERA_MODEL_ESP_EYE
//#define CAMERA_MODEL_M5STACK_PSRAM
//#define CAMERA_MODEL_M5STACK_WIDE
#define CAMERA_MODEL_AI_THINKER
Copy and paste the following two lines next to the marked area in the image where the face recognition options are shown.
#define CONFIG_ESP_FACE_DETECT_ENABLED 1
#define CONFIG_ESP_FACE_RECOGNITION_ENABLED 1

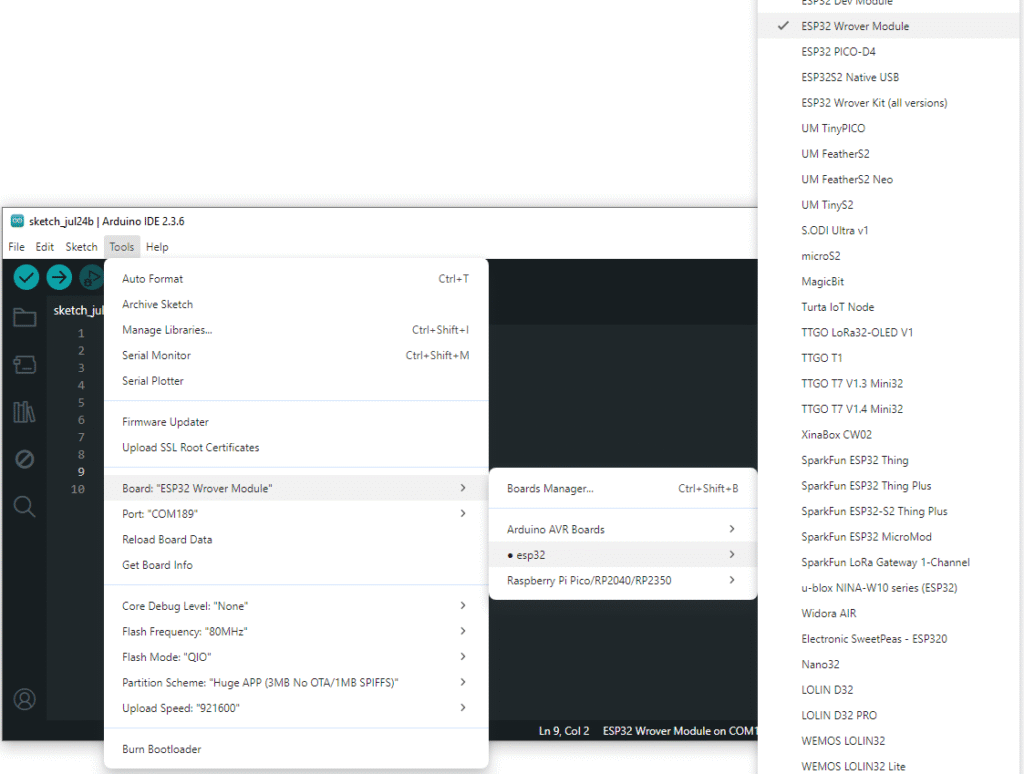
Go to Tools > Board > ESP32 Arduino and choose ESP32 Wrover Module from the list.
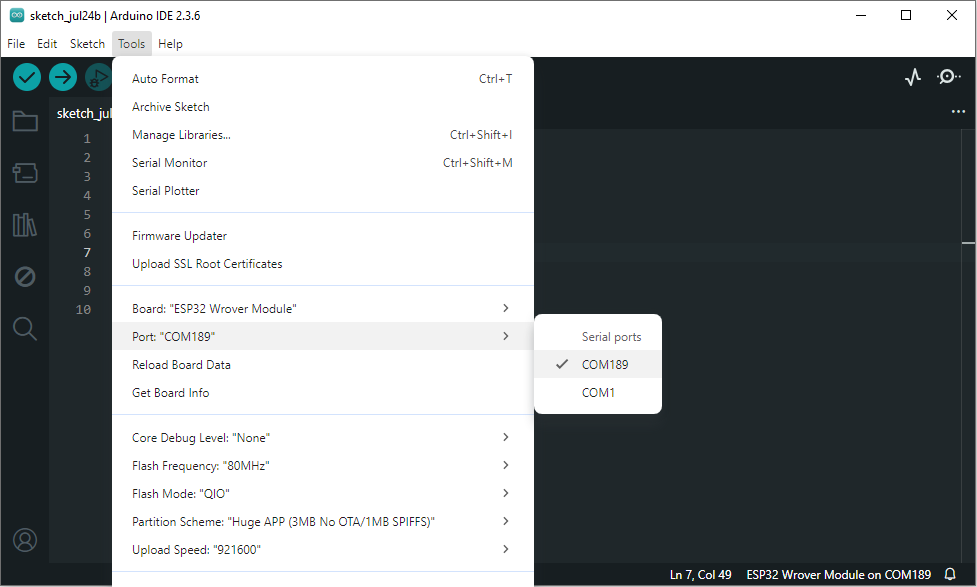
Now, connect the ESP32-CAM to your computer using a USB cable. Then, go to Tools > Port and select the COM port that the ESP32-CAM is connected to.
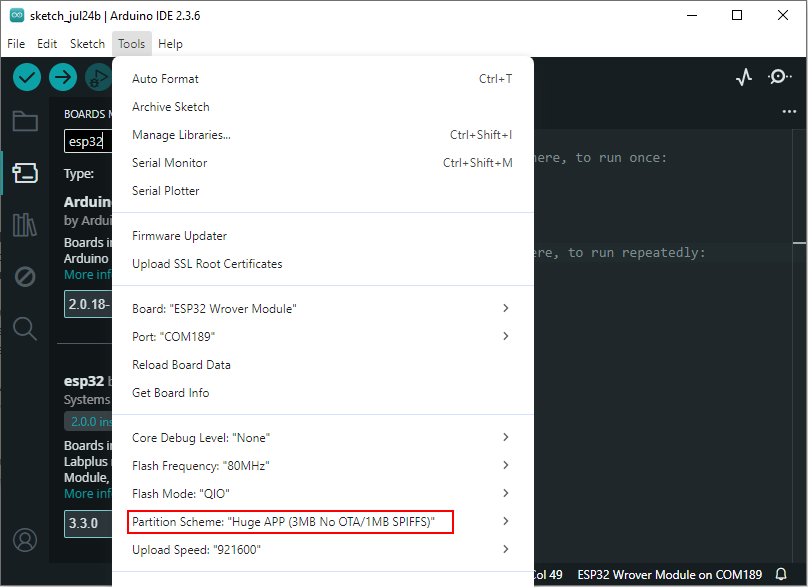
After selecting the Port (under Tools > Port), go to Tools > Partition Scheme and set it to: “Huge App (3MB No OTA/1MB SPIFFS)”
Upload the Sketch
- Hit upload. If needed, press RESET to initiate flashing.
- Once complete, disconnect GPIO0 from GND and reset again. If you use FTDI programmer.
Access the Webserver
Open Serial Monitor at 115200 and press RESET.
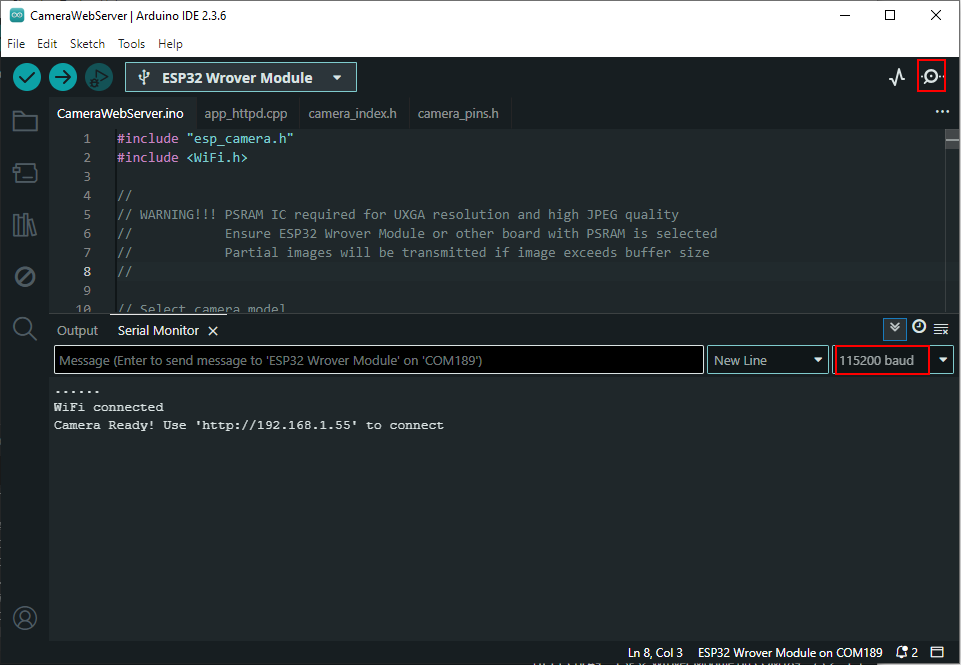
After uploading the code and pressing the reset button, open the Serial Monitor at 115200 baud rate. You will see the IP address assigned to your ESP32-CAM. Copy this IP address and paste it into your browser.
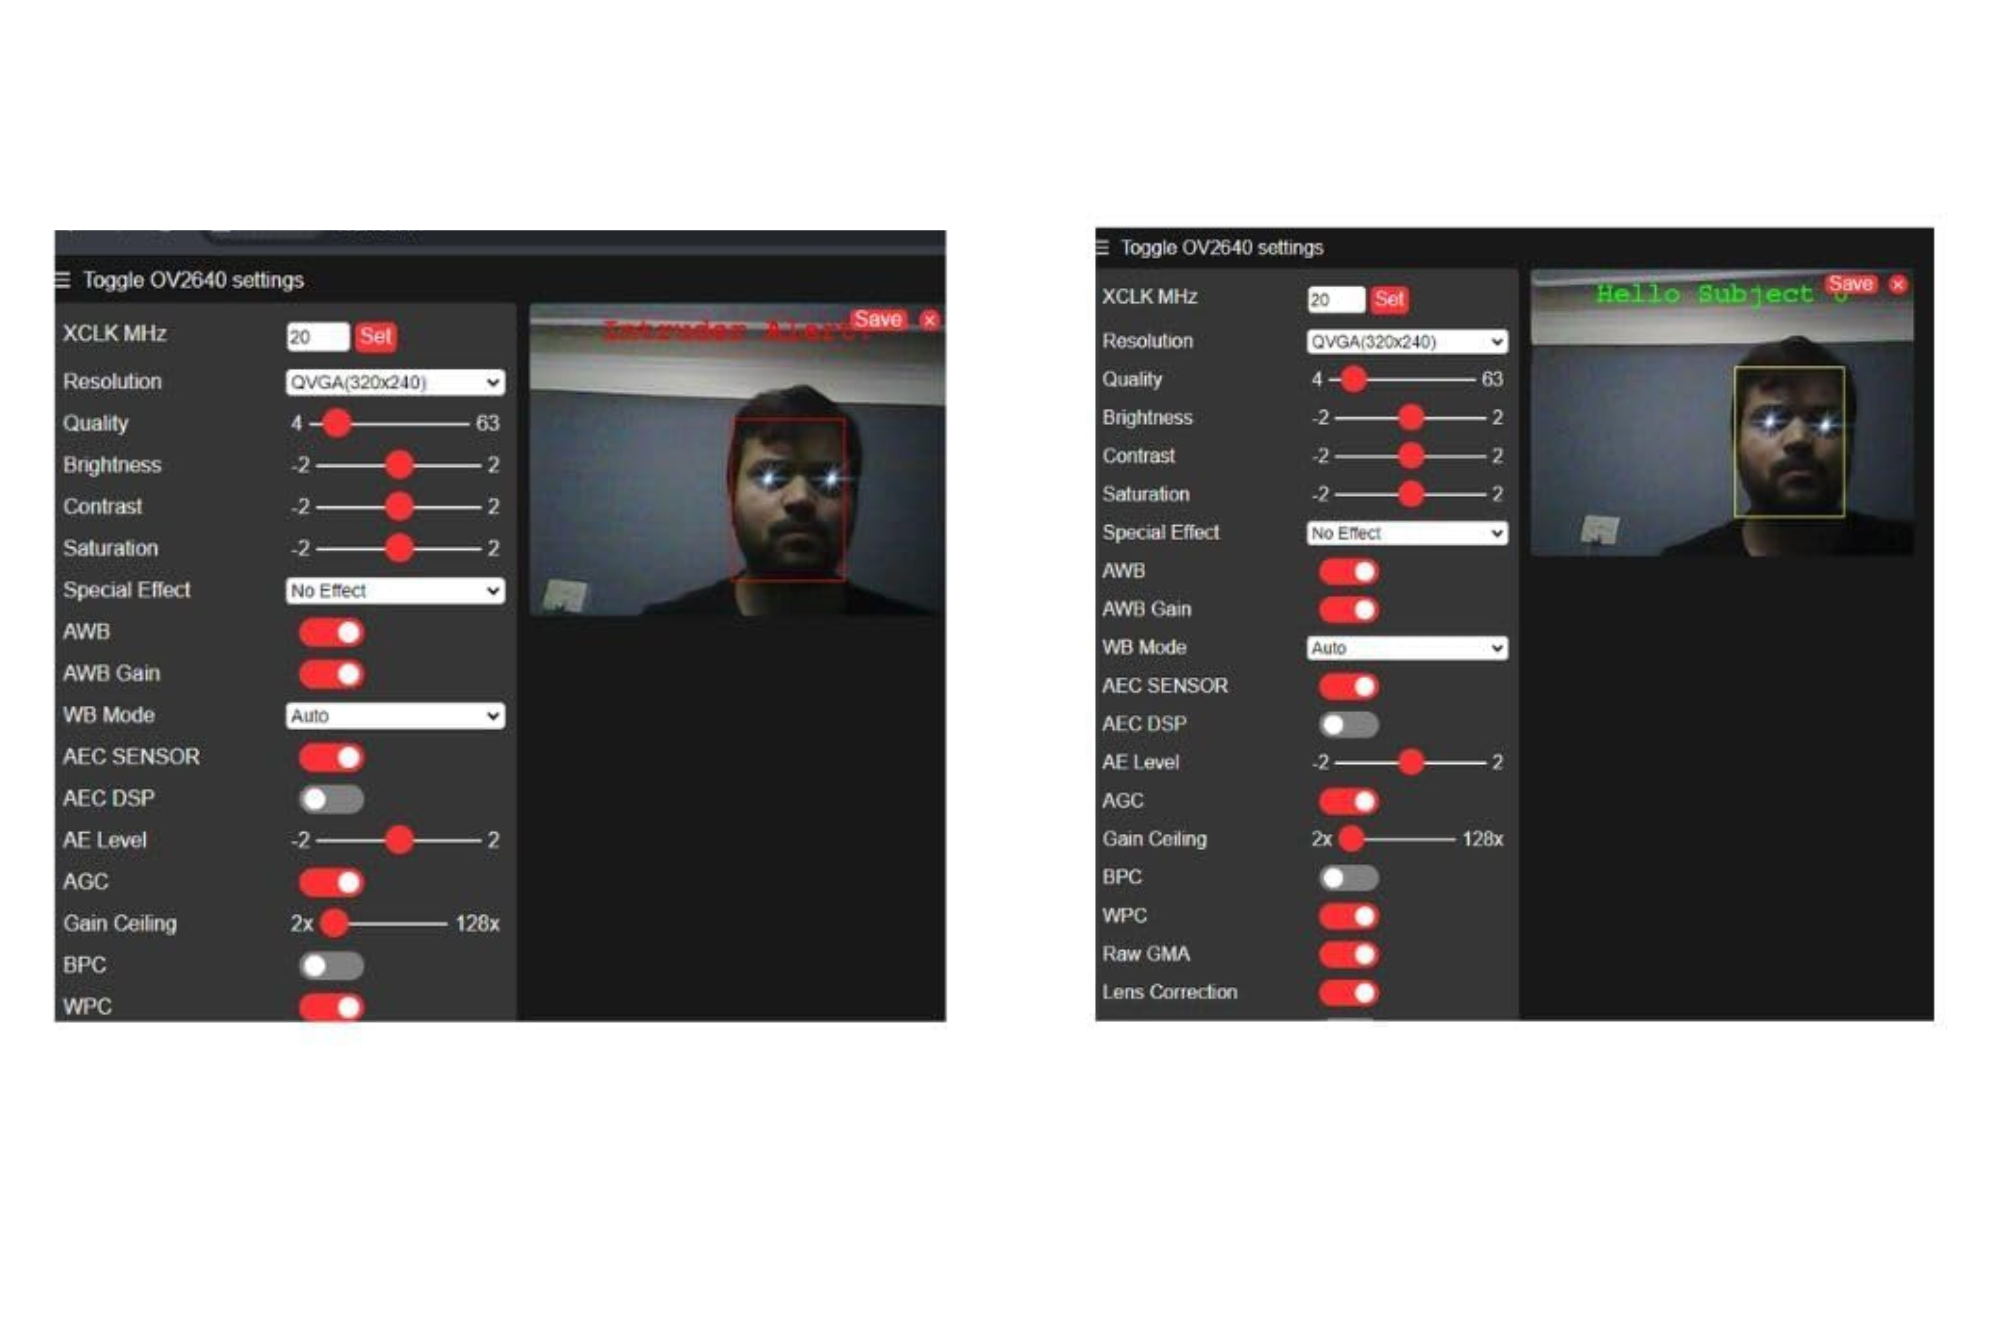
Once the web interface opens, you’ll see a “Start Stream” button — click it to begin the live camera stream.
Below the stream, you’ll find options for Face Detection and Face Recognition.
Enable both options by clicking them. This allows your camera to detect faces in real time and recognize enrolled faces.
To register a face, simply click the “Enroll Face” button while your face is clearly visible in the frame.
The system will save this face as a reference. After enrollment, whenever your face is detected again, it will be automatically recognized.
Wrapping Up
With just a few components and some simple setup in the Arduino IDE, you’ve now created a working face detection and recognition system using the ESP32-CAM. This project is a great entry point into AI at the edge, allowing your microcontroller to handle real-time vision without needing a cloud connection.