Index
Introduction
This lesson introduces the most basic electronic circuit used in digital electronics: controlling an LED using a push button.
This project helps beginners understand how electricity flows, how a switch works, and why a resistor is necessary.
This lesson does not require any programming and is fully hardware-based.
What Is This Project?
In this project, we connect an LED to a push button so that:
- When the button is pressed, the LED turns ON
- When the button is released, the LED turns OFF
This simulates how switches work in real electronic devices.
Why Is This Project Important?
This project is important because it teaches:
- How current flows from power source to ground
- How a push button acts as a digital input
- How an LED works as an output device
- Why a resistor is mandatory with LEDs
- How to use a breadboard correctly
This lesson builds the foundation for all future logic gate projects.
Components Required
- Breadboard
- LED (any color)
- 220Ω resistor
- Push button
- 5V power supply module
- Jumper wires (As required)
Pinout
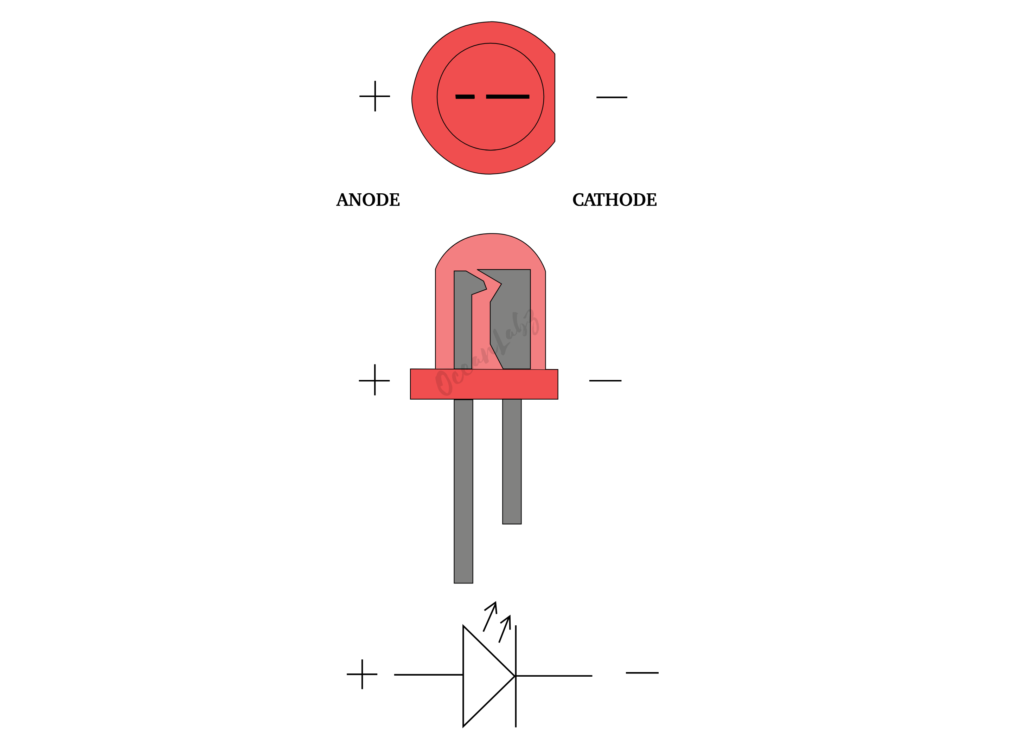
LED
Push Button
Understanding the Circuit
Circuit Flow
| 5V → Push Button → Resistor → LED → GND |
Explanation:
- 5V supplies power
- Push Button controls the circuit
- Resistor protects the LED
- LED glows when current flows
- GND completes the circuit
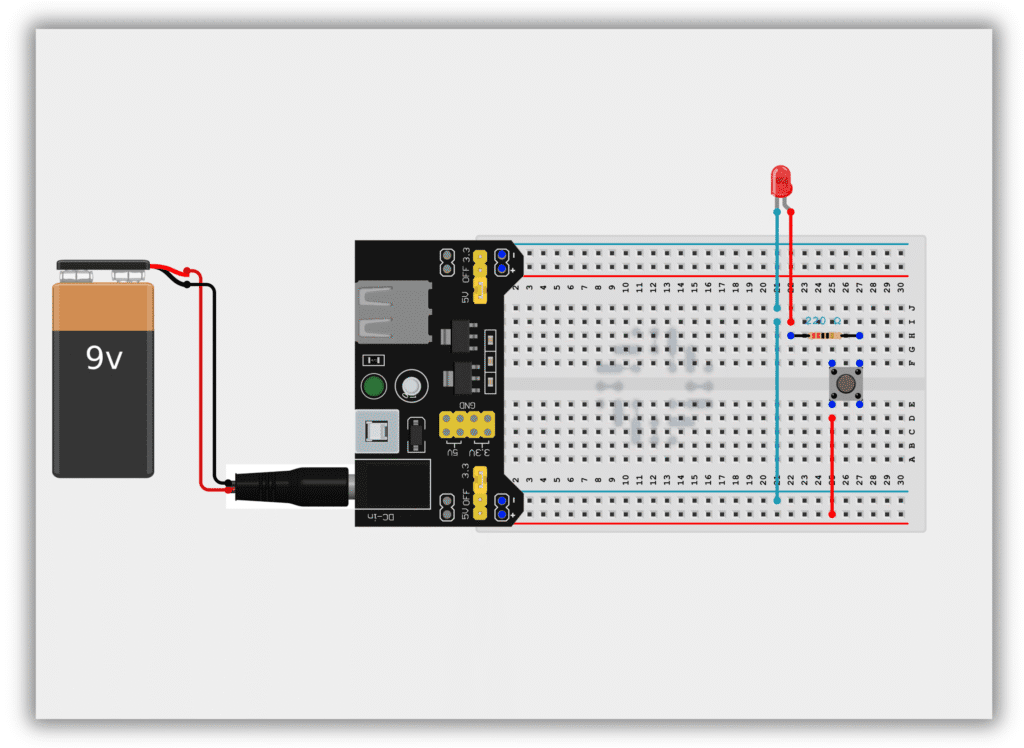
Circuit Diagram / Wiring
- Insert the LED into the breadboard
- Long leg → Positive
- Short leg → Ground
- Connect one end of the resistor to the LED’s long leg
- Connect the other end of the resistor to one terminal of the push button
- Connect the second terminal of the push button to 5V
- Connect the LED’s short leg to GND
Working
- When the button is not pressed, the circuit is open → LED OFF
- When the button is pressed, the circuit is closed → LED ON
This is a basic digital action:
- OFF = Logic 0
- ON = Logic 1
Common Mistakes & Troubleshooting
❌ LED not glowing
✔ Check LED polarity
❌ LED burnt
✔ Always use a resistor
❌ Loose connections
✔ Press jumper wires firmly
Real-Life Applications
- Doorbell buttons
- Power switches
- Keyboard keys
- Control panels