Index
Introduction
Create your own live streaming camera server using the ESP32-S3 WROOM N16R8 module with the OV2640 camera. This powerful board lets you set up a real-time video stream over Wi-Fi, accessible through any browser on your local network.
What You’ll Need
- ESP32-S3 WROOM N16R8 Board with OV2640 camera support
- USB-C cable
- Wi-Fi network credentials
Connect
Connect ESP32-S3 to the computer using the USB cable.

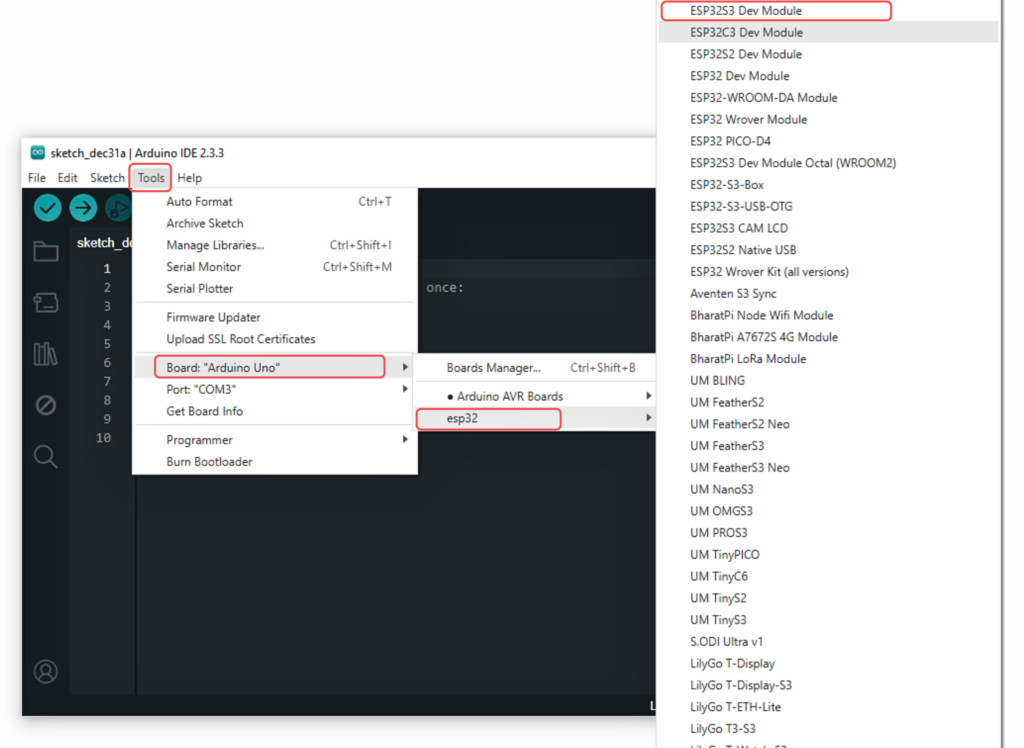
Select Your Board:
- Tools > Board >
ESP32S3 Dev Module
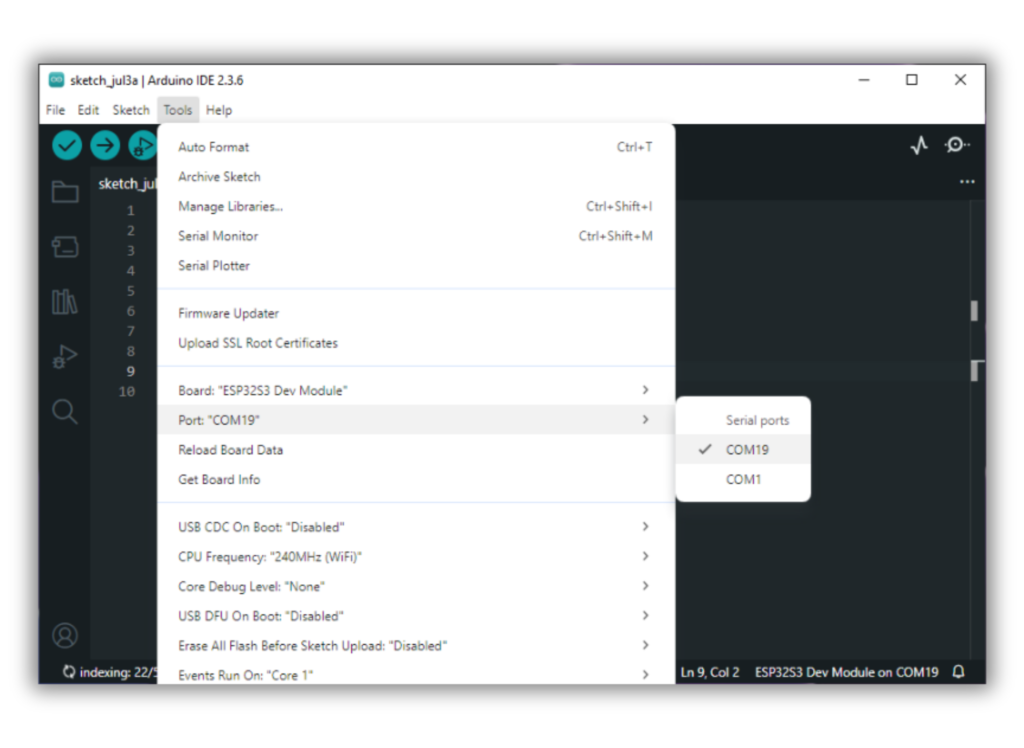
Now, connect the ESP32S3 Dev Module to your computer using a USB cable. Then, go to Tools > Port and select the COM port that the ESP32S3 Dev Module is connected to.
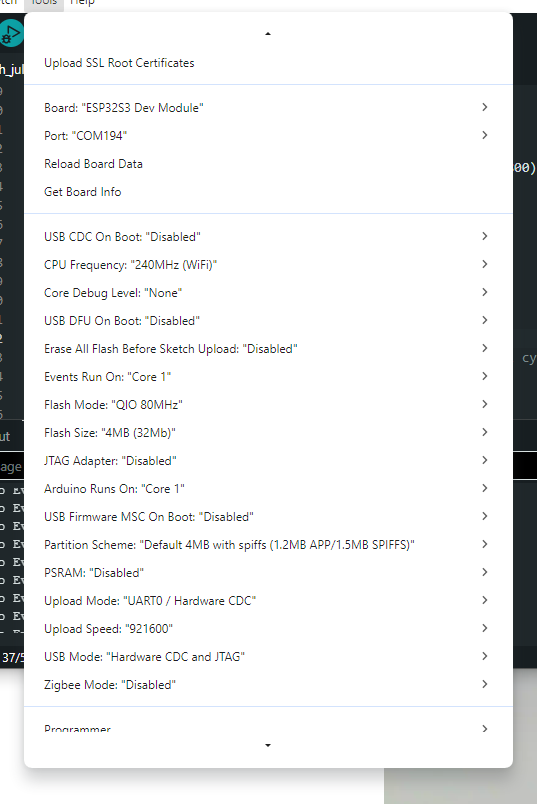
Go to Tools menu and apply the following settings:
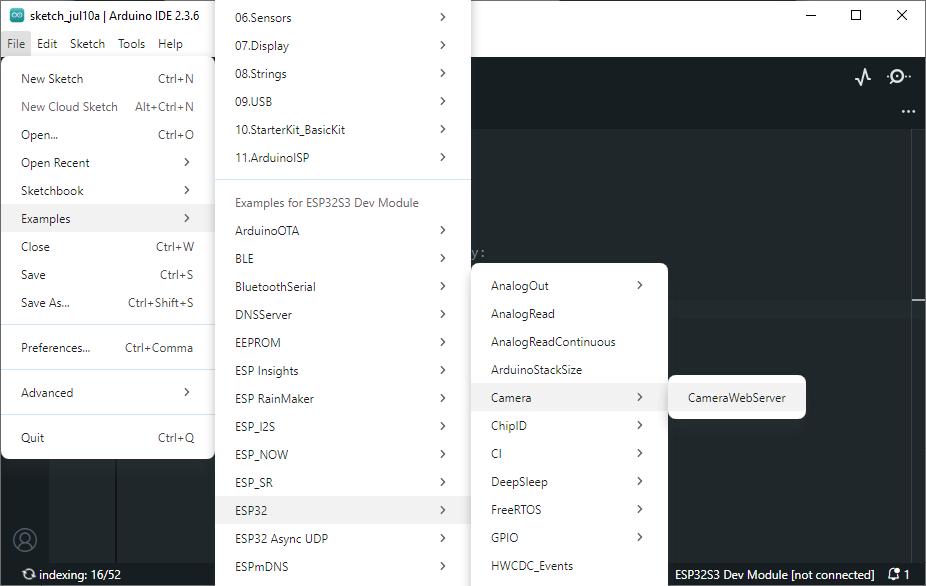
Open: File > Examples > ESP32 > Camera > CameraWebServer
Before running the program, please modify your router’s name and password in the box shown in the illustration above to make sure that your Sketch can compile and work successfully.
const char *ssid = "**********";
const char *password = "**********";
#include "esp_camera.h"
#include <WiFi.h>

// ===================
// Select camera model
// ===================
//#define CAMERA_MODEL_WROVER_KIT // Has PSRAM
//#define CAMERA_MODEL_ESP_EYE // Has PSRAM
#define CAMERA_MODEL_ESP32S3_EYE // Has PSRAM
//#define CAMERA_MODEL_M5STACK_PSRAM // Has PSRAM
//#define CAMERA_MODEL_M5STACK_V2_PSRAM // M5Camera version B Has PSRAM
//#define CAMERA_MODEL_M5STACK_WIDE // Has PSRAM
//#define CAMERA_MODEL_M5STACK_ESP32CAM // No PSRAM
//#define CAMERA_MODEL_M5STACK_UNITCAM // No PSRAM
//#define CAMERA_MODEL_AI_THINKER // Has PSRAM
//#define CAMERA_MODEL_TTGO_T_JOURNAL // No PSRAM
// ** Espressif Internal Boards **
//#define CAMERA_MODEL_ESP32_CAM_BOARD
//#define CAMERA_MODEL_ESP32S2_CAM_BOARD
//#define CAMERA_MODEL_ESP32S3_CAM_LCD

#include "camera_pins.h"

// ===========================
// Enter your WiFi credentials
// ===========================
const char* ssid     = "********";
const char* password = "********";

void startCameraServer();

void setup() {
Serial.begin(115200);
Serial.setDebugOutput(true);
Serial.println();

camera_config_t config;
config.ledc_channel = LEDC_CHANNEL_0;
config.ledc_timer = LEDC_TIMER_0;
config.pin_d0 = Y2_GPIO_NUM;
config.pin_d1 = Y3_GPIO_NUM;
config.pin_d2 = Y4_GPIO_NUM;
config.pin_d3 = Y5_GPIO_NUM;
config.pin_d4 = Y6_GPIO_NUM;
config.pin_d5 = Y7_GPIO_NUM;
config.pin_d6 = Y8_GPIO_NUM;
config.pin_d7 = Y9_GPIO_NUM;
config.pin_xclk = XCLK_GPIO_NUM;
config.pin_pclk = PCLK_GPIO_NUM;
config.pin_vsync = VSYNC_GPIO_NUM;
config.pin_href = HREF_GPIO_NUM;
config.pin_sccb_sda = SIOD_GPIO_NUM;
config.pin_sccb_scl = SIOC_GPIO_NUM;
config.pin_pwdn = PWDN_GPIO_NUM;
config.pin_reset = RESET_GPIO_NUM;
config.xclk_freq_hz = 20000000;
config.frame_size = FRAMESIZE_UXGA;
config.pixel_format = PIXFORMAT_JPEG; // for streaming
config.grab_mode = CAMERA_GRAB_WHEN_EMPTY;
config.fb_location = CAMERA_FB_IN_PSRAM;
config.jpeg_quality = 12;
config.fb_count = 1;

// if PSRAM IC present, init with UXGA resolution and higher JPEG quality
// for larger pre-allocated frame buffer.
if(psramFound()){
    config.jpeg_quality = 10;
    config.fb_count = 2;
    config.grab_mode = CAMERA_GRAB_LATEST;
} else {
    // Limit the frame size when PSRAM is not available
    config.frame_size = FRAMESIZE_SVGA;
    config.fb_location = CAMERA_FB_IN_DRAM;
}

// camera init
esp_err_t err = esp_camera_init(&config);
if (err != ESP_OK) {
    Serial.printf("Camera init failed with error 0x%x", err);
    return;
}

sensor_t * s = esp_camera_sensor_get();
// initial sensors are flipped vertically and colors are a bit saturated
s->set_vflip(s, 1); // flip it back
s->set_brightness(s, 1); // up the brightness just a bit
s->set_saturation(s, 0); // lower the saturation

WiFi.begin(ssid, password);
WiFi.setSleep(false);

while (WiFi.status() != WL_CONNECTED) {
    delay(500);
    Serial.print(".");
}
while (WiFi.STA.hasIP() != true) {
    Serial.print(".");
    delay(500);
}
Serial.println("");
Serial.println("WiFi connected");

startCameraServer();

Serial.print("Camera Ready! Use 'http://");
Serial.print(WiFi.localIP());
Serial.println("' to connect");
}

void loop() {
// Do nothing. Everything is done in another task by the web server
delay(10000);
}
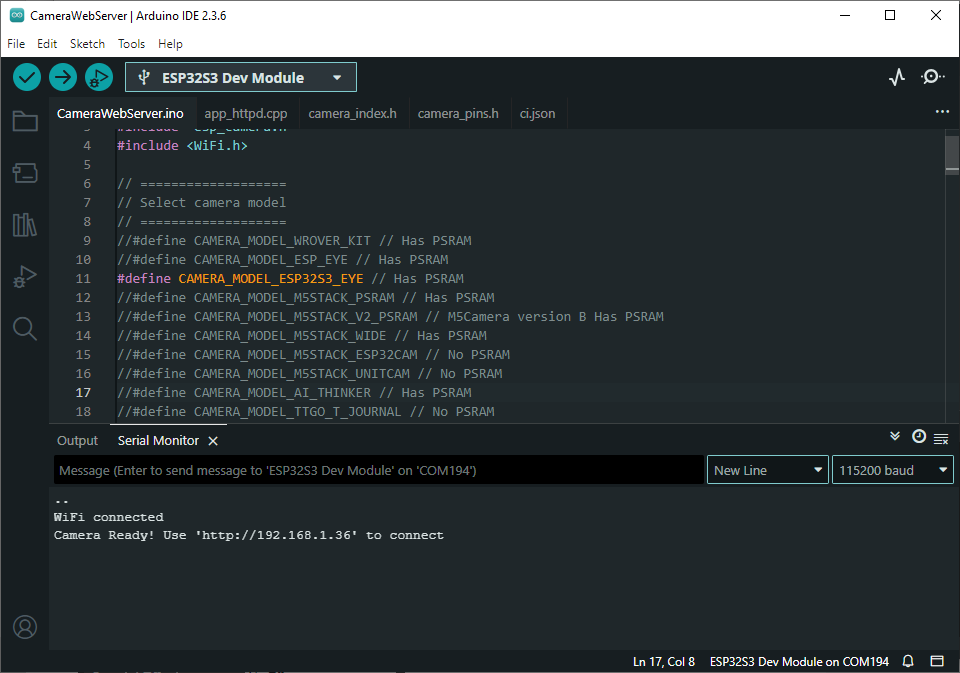
Compile and upload codes to ESP32-S3, open the serial monitor and set the baud rate to 115200, and the serial monitor will print out a network link address. Copy the IP address then open your browser and paste the IP address.
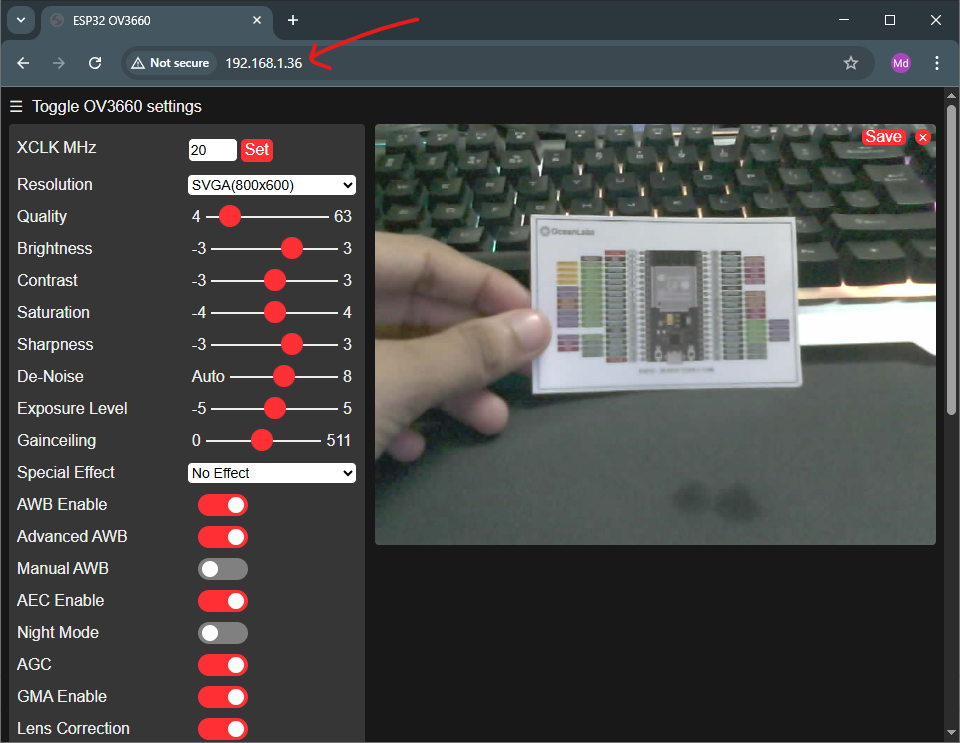
Now you will see the ESP32-S3 camera interface live on your browser. You can start the stream by clicking on the “Start Stream” button. You can also capture images or adjust settings like resolution, brightness, contrast, etc., directly from the web UI.
Click on Start Stream. The effect is shown in the image below.

Comments (7)